
An inflatable boat repair kit is one of those things you hope you’ll never need, but you’ll be incredibly glad you have it when you do. It’s your ticket for quick, on-the-water fixes for punctures and leaks. Usually packed with adhesive, patches, and a few key tools, it can turn a potential trip-ending disaster into a manageable delay. Think of it as your first line of defence against common mishaps, ensuring you get back to shore safely.
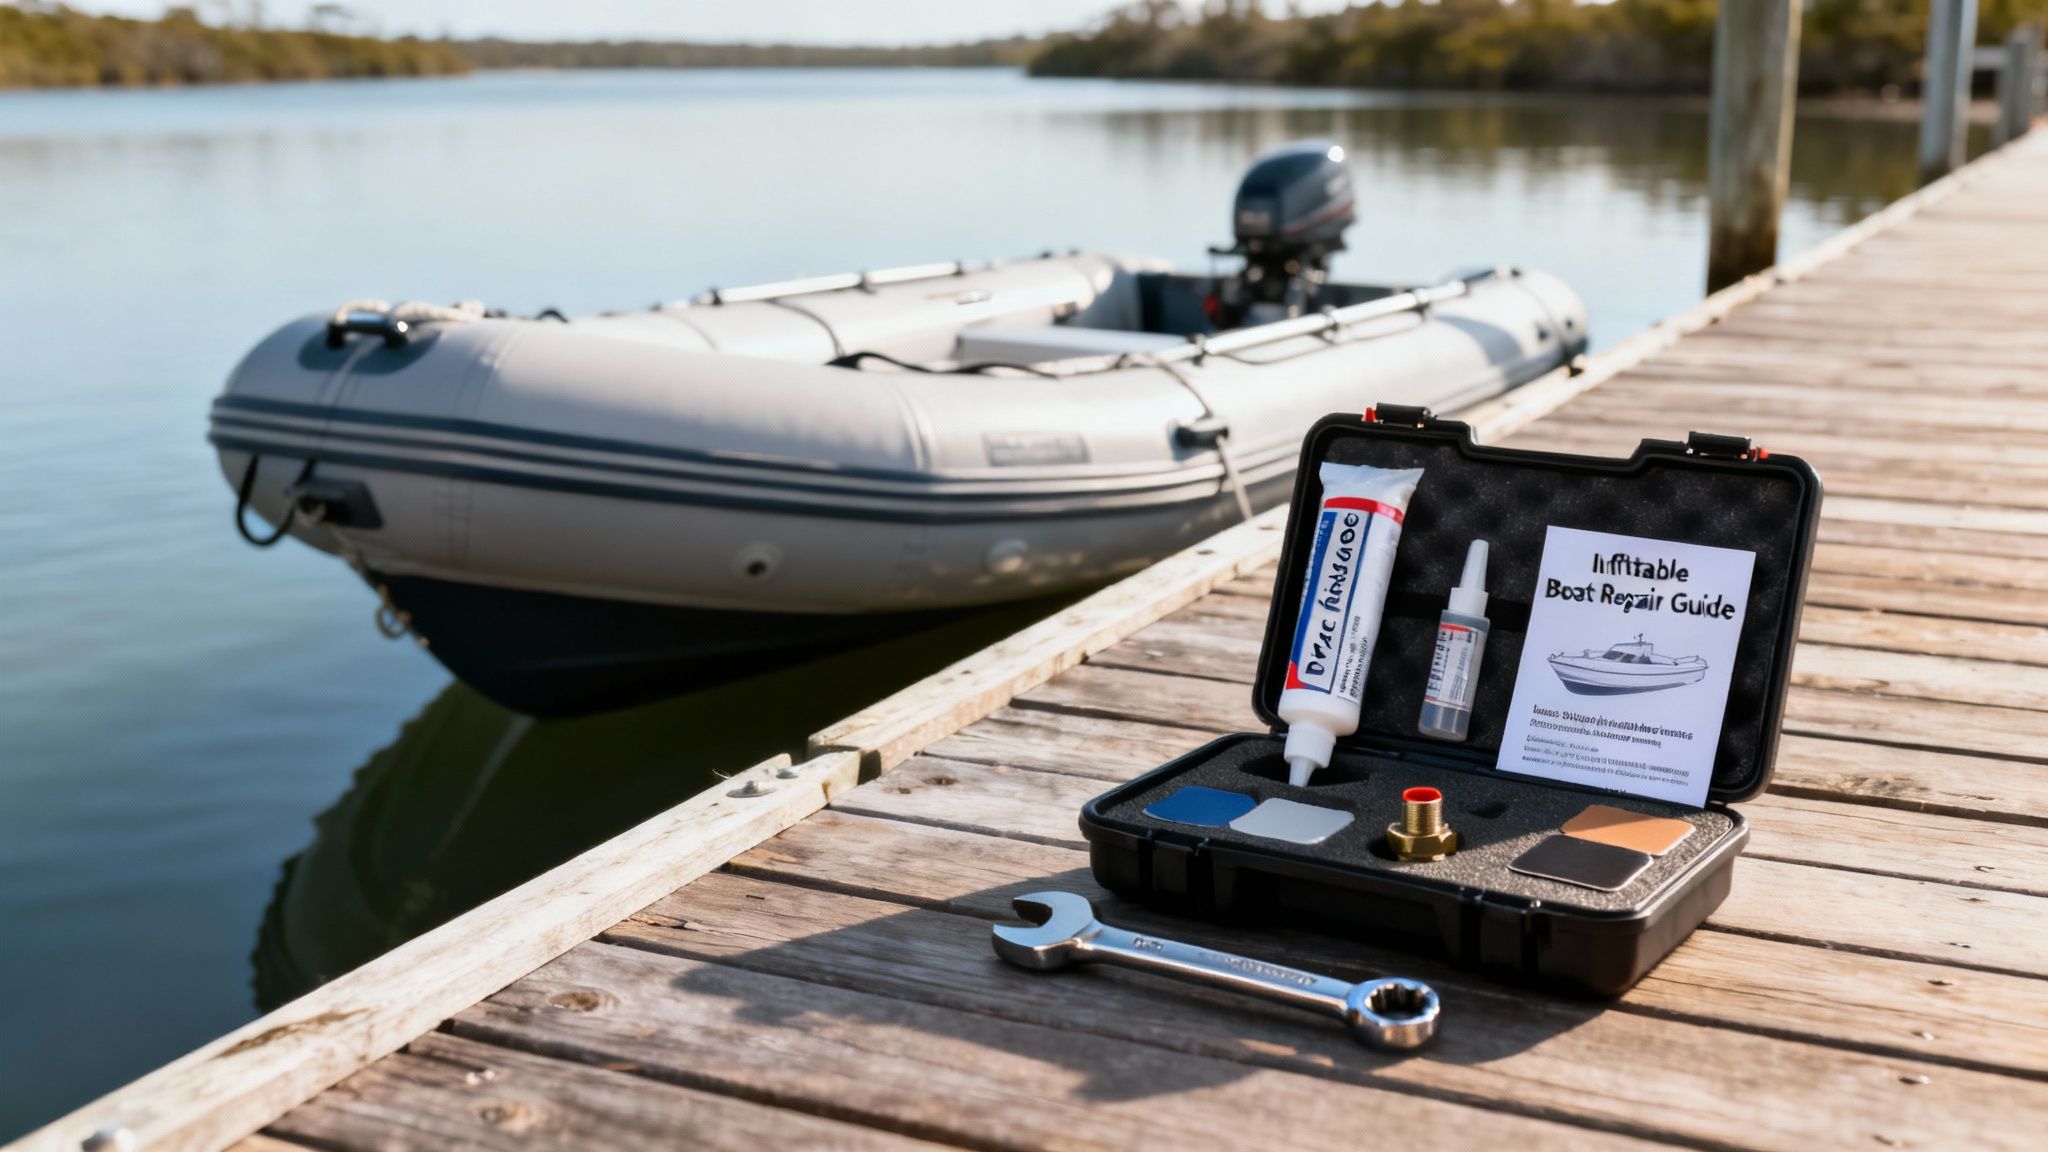
For any Aussie boater, whether you’re exploring coastal estuaries or remote inland rivers, an unexpected puncture can bring your whole day to a screeching halt. It’s not just about losing air; it’s about losing precious time on the water and staring down a long, frustrating trip back to the ramp. This is where a reliable inflatable boat repair kit proves its worth, shifting from a simple accessory to a non-negotiable piece of safety gear.
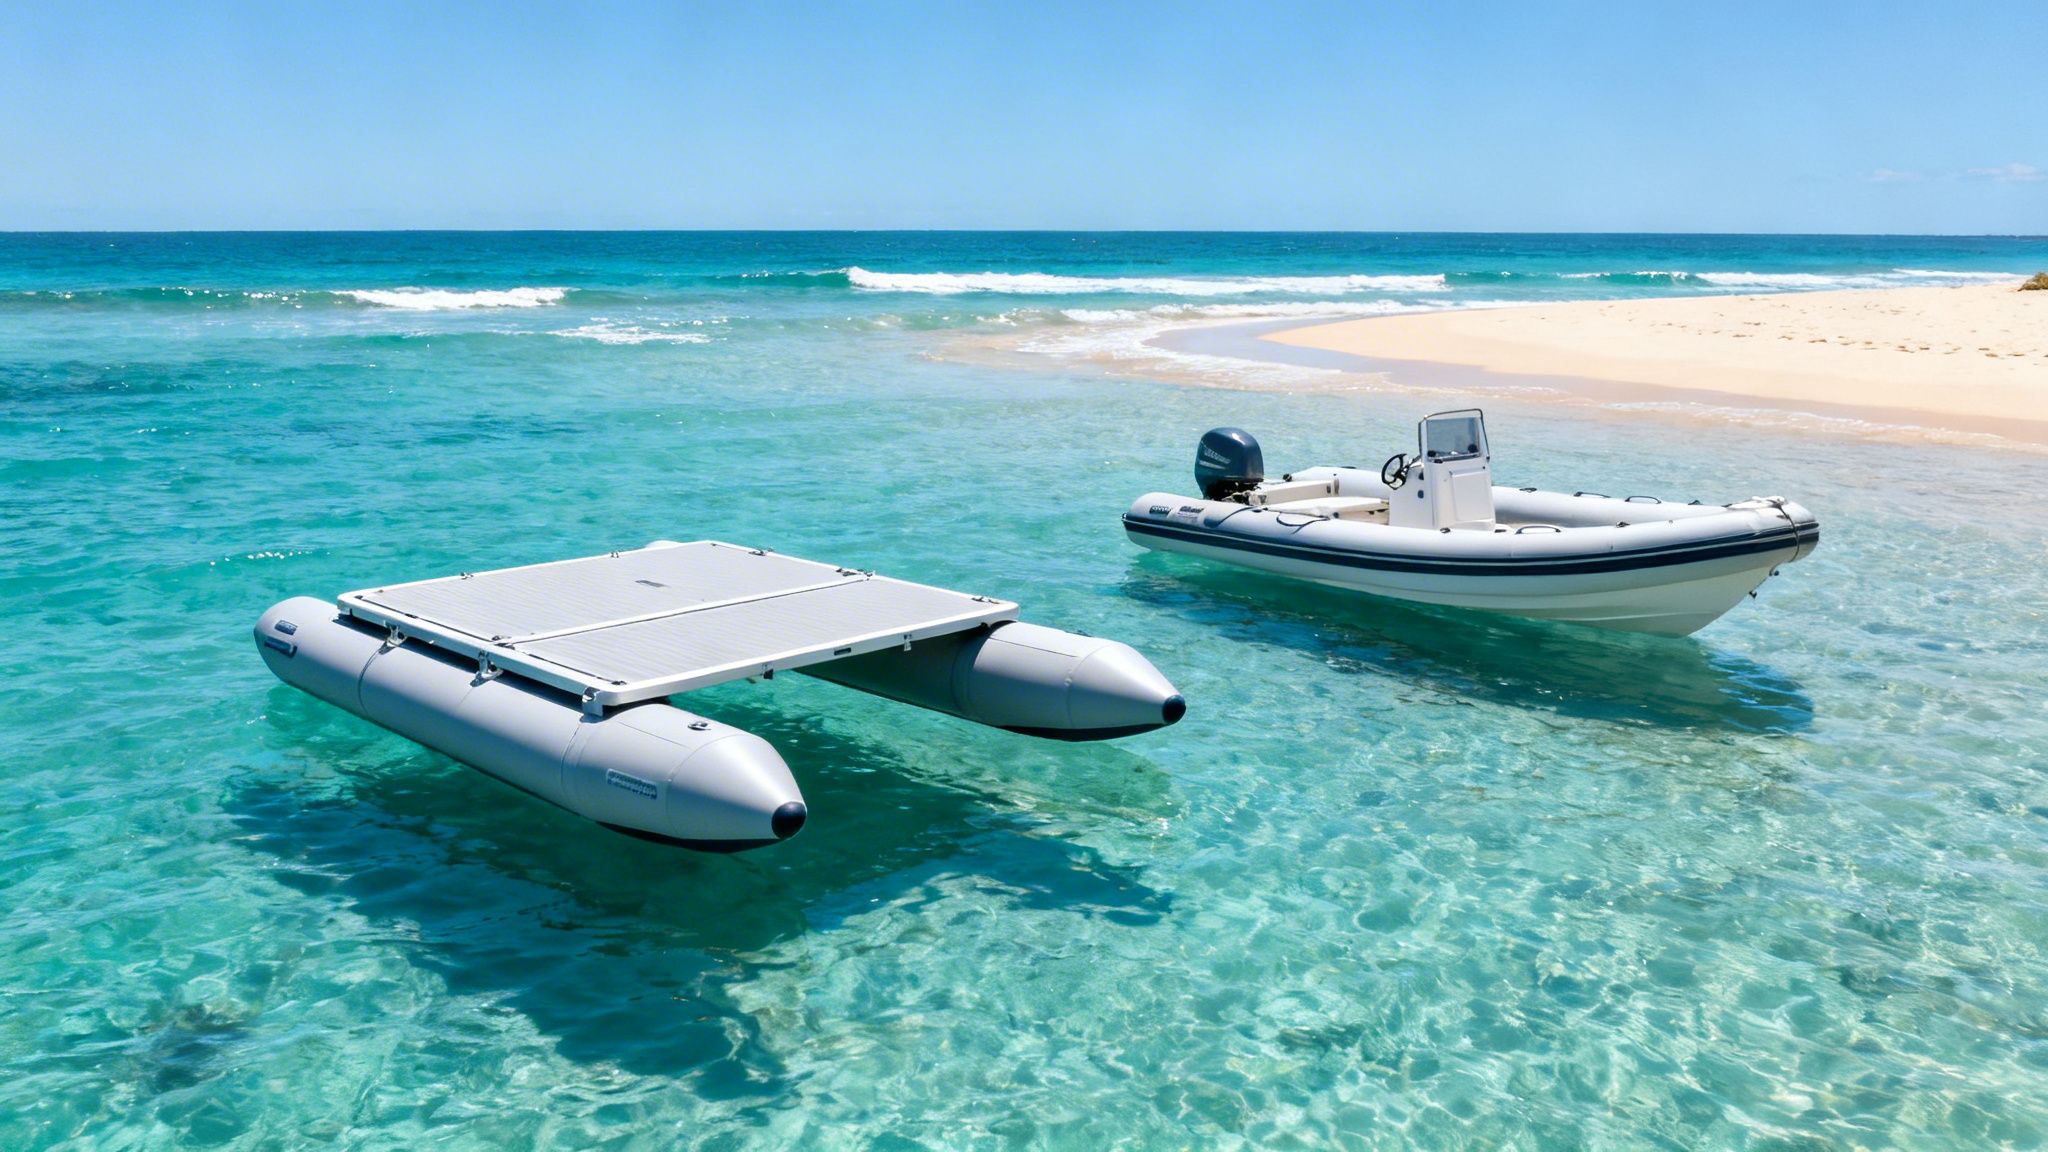
Imagine navigating a tranquil river and snagging a submerged branch, or scraping against sharp oyster beds while nosing into a secluded beach. These aren’t rare hypotheticals; they’re part of the adventure. Having the right tools to perform a quick, durable repair on the spot gives you invaluable self-reliance and peace of mind. When comparing the features and prices of inflatable boats in your area, remember that a quality included repair kit is a major feature.
A quality repair kit is so much more than just glue and patches. It’s an investment in your safety and the longevity of your boat. For families enjoying a day out on an inflatable catamaran or anglers seeking the perfect spot in their tender, knowing you can handle minor damage yourself is crucial. It means you can push on with your adventure confidently, knowing you’re prepared for whatever the water throws at you.
This preparedness is vital in the vast Australian boating scene. Local data shows that over 65% of inflatable boat owners reported needing repairs within the first two years, often due to marine debris or UV exposure. A simple kit allows for fast fixes, frequently in under 30 minutes, saving owners up to $500 per incident compared to professional services.
The real value of a repair kit isn’t just fixing a hole—it’s the confidence it gives you to explore further, knowing you have a reliable backup plan. It transforms a potential disaster into a minor inconvenience.
Ultimately, carrying a well-stocked repair kit reflects a responsible boater’s mindset. It’s as fundamental as having life jackets or an anchor. Understanding how to use it ensures that a small problem doesn’t escalate into a big one, protecting your investment and, most importantly, keeping everyone on board safe. For a complete rundown of what to carry, check out our guide on essential inflatable boat accessories.
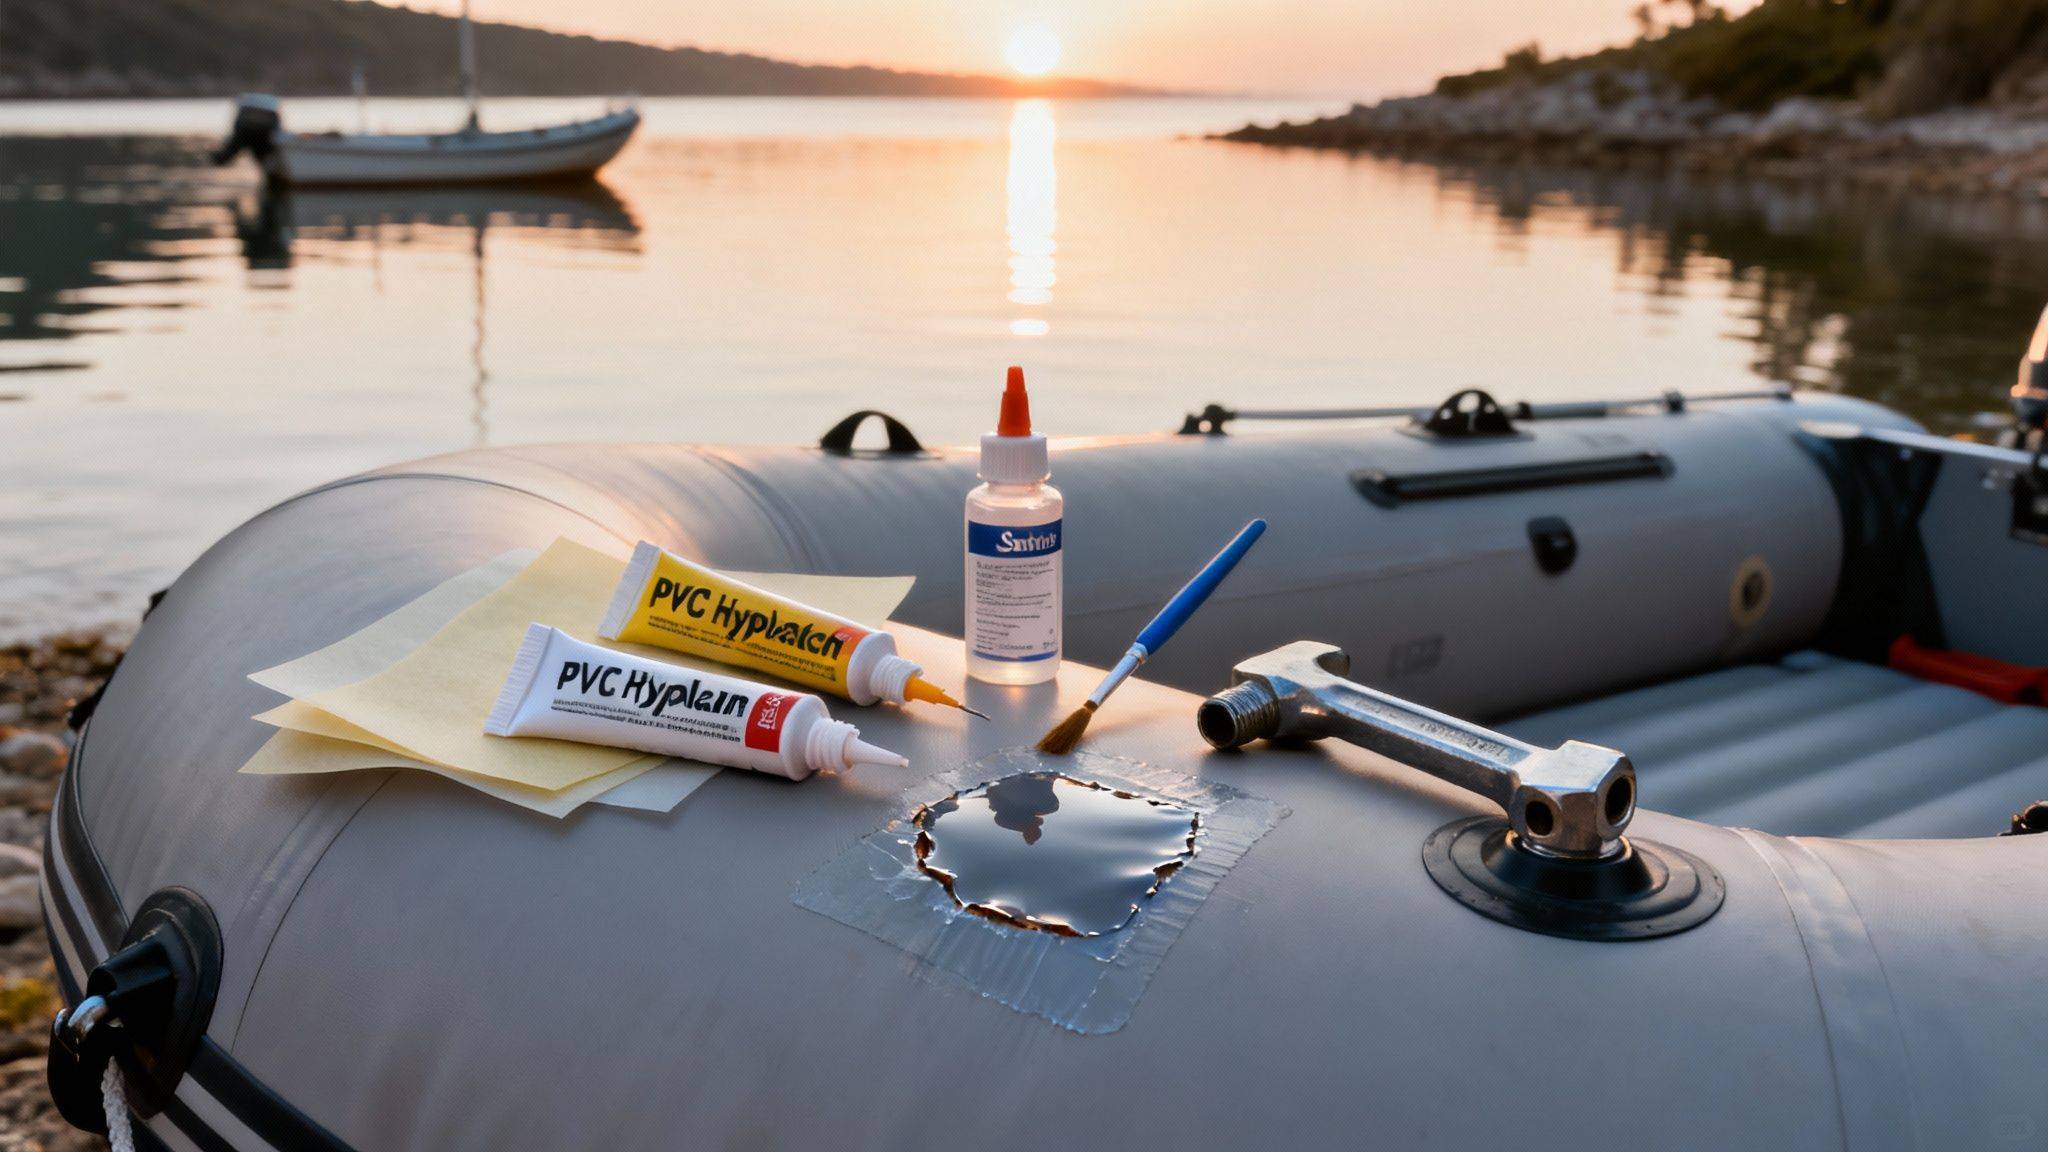
Opening a brand-new repair kit can feel a bit like looking into a surgeon’s tray—a collection of patches, goos, and odd-looking tools. Getting to know what each item does is the first step towards a proper, permanent fix that you can trust out on the water.
At the heart of every good kit is the adhesive. This is the magic stuff that creates that airtight, waterproof bond. But here’s the most important thing to know: not all glues are the same. The right one depends entirely on what your boat is made of, which is almost always either PVC (polyvinyl chloride) or Hypalon. Grab the wrong tube, and your patch is guaranteed to fail.
The difference is huge. A PVC adhesive creates a chemical weld, slightly melting the surfaces of the boat and patch to fuse them together for life. Hypalon glue, on the other hand, is more like a high-tech contact cement. It needs both surfaces to be roughed up (sanded) to create a powerful mechanical grip. You can’t mix and match them—it just won’t stick.
To make things crystal clear, here’s a quick rundown of the key items you’ll find in a well-stocked kit and exactly what they’re for. Think of this as your cheat sheet for professional-grade repairs.
| Component | Primary Function | Pro Tip for Usage |
|---|---|---|
| Patch Material | Pieces of PVC or Hypalon fabric used to cover the puncture or tear. | Always cut your patch into a circle or oval shape—no sharp corners! This prevents the edges from catching and peeling up over time. |
| Two-Part Adhesive | The glue and hardener that create the permanent, airtight bond. | Mix only what you need for the immediate repair. Once the hardener is added, the clock is ticking, and it will start to cure. |
| Surface Solvent | A chemical cleaner (like MEK for PVC) to prepare the repair area. | This is non-negotiable. It strips away grime, oils, and old UV protectant, allowing the adhesive to bond directly to the raw material. |
| Applicator Brush | A small brush for applying a thin, even layer of adhesive. | Apply a thin coat to both the patch and the boat surface. Two thin coats are always better than one thick, goopy one. |
| Valve Wrench | A small, notched tool designed to tighten or replace air valves. | A loose valve is one of the most common causes of a slow leak. A quick tighten with this tool can often fix the problem in seconds. |
Every piece in that kit has a job to do, and they all work together. Skipping a step, like cleaning the surface with the solvent, is like trying to build a house on sand. It’s just destined to fail.
Think of the solvent as laying the foundation—without a perfectly prepped surface, even the best glue in the world won’t hold. The patch provides the new skin, the adhesive creates the seal, and the valve wrench is your go-to for those sneaky, slow leaks that are often the simplest to fix.
Once your repair has cured, you need to check your work. That means getting the boat back up to the right air pressure to ensure the patch is holding strong. Having a reliable pump on hand is crucial for this final check. A good quality portable boat pump is a brilliant investment, as it lets you inflate the boat to the manufacturer’s recommended PSI quickly and easily. It’s that final step that gives you complete confidence in your repair before you hit the water again.
That sudden hissing sound is every boater’s worst nightmare. Whether it’s a tiny pinhole from a stray fishing hook or a nasty gash from a hidden rock, knowing how to patch your inflatable boat is a non-negotiable skill. This guide will walk you through the process, giving you the confidence to handle repairs like a pro and keep your boat—be it a simple tender or a slick inflatable catamaran—seaworthy and reliable.
The secret to a successful repair comes down to three stages: preparation, patching, and bonding. Get one wrong, and the whole thing fails.
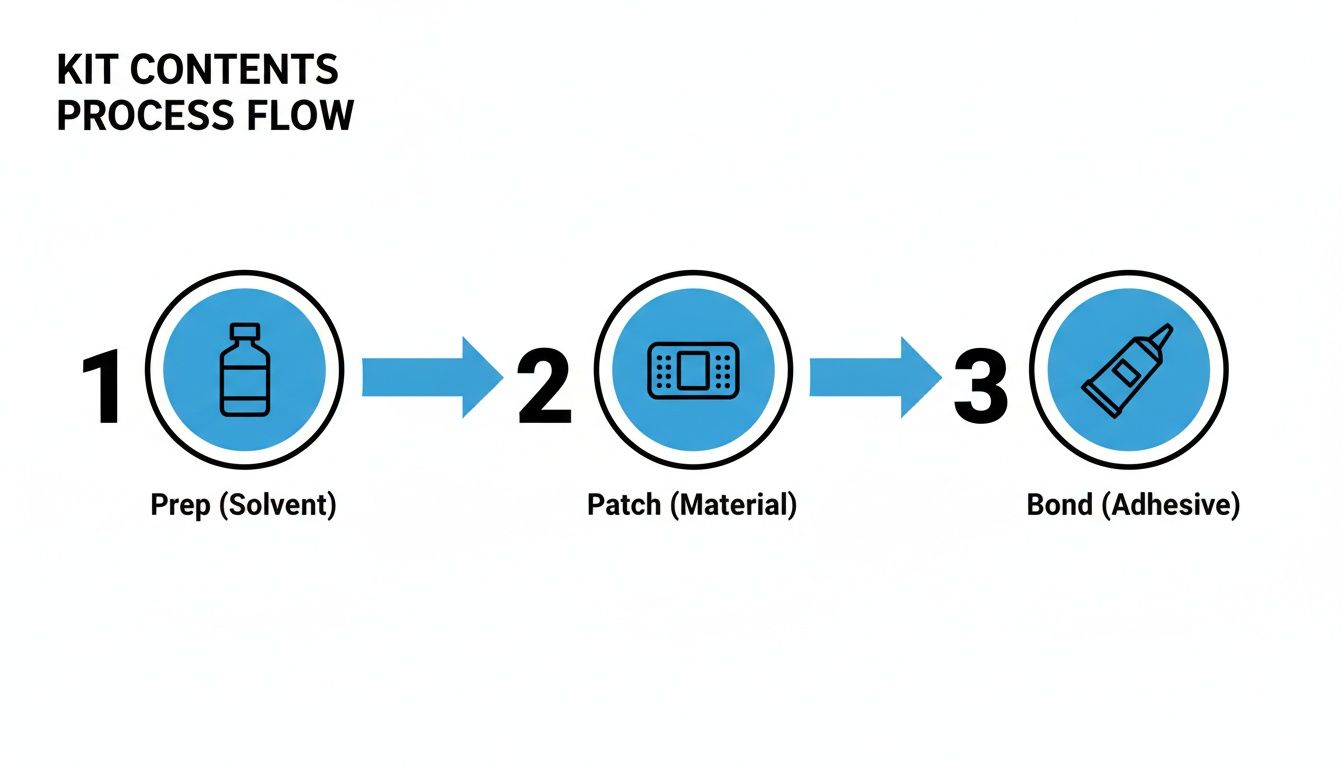
As you can see, each step is critical. Trying to glue a patch onto an unprepared surface is a complete waste of time.
First things first: you have to find the leak. A big tear is obvious, but those slow, sneaky leaks can be infuriatingly hard to pin down. The best method is the classic soapy water test.
Just mix a bit of dish soap with water in a spray bottle. Inflate the boat so it’s firm but not rock-hard, then spray the suspect area. Now watch. You’re looking for tiny bubbles that form and grow—that’s your culprit.
Once you’ve found it, circle the spot with a waterproof marker. Be meticulous. Check all the seams and the area around the valve, as these are common weak points for slow leaks.
This is where most DIY repairs go wrong. Slapping glue onto a dirty, glossy surface guarantees failure. Your goal is to create a perfectly clean, receptive surface so the adhesive can form a permanent chemical bond.
The technique varies slightly based on your boat’s material.
With the surfaces prepped, it’s time to get patching. This stage demands a bit of patience and precision. If you rush it, you’ll end up with peeling edges and another leak in no time.
First, cut your patch. Never use a square patch with sharp 90-degree corners. Instead, cut it into a circle or an oval with smooth, rounded edges. This one simple trick dramatically reduces the chance of a corner catching and lifting later on. The patch should extend at least 5 cm past the tear in every direction.
Pro Tip: Use masking tape to outline exactly where the patch will go on the boat. This keeps you from smearing adhesive everywhere and leaves you with a clean, professional-looking repair.
Using the brush that came with your inflatable boat repair kit, apply a thin, even layer of the two-part adhesive to both the patch and the marked-out area on your boat. Let it dry until it’s tacky to the touch (usually 5-10 minutes, but always follow your kit’s instructions). Now, apply a second thin coat to both surfaces.
Wait another 5-10 minutes for that second coat to get tacky. Carefully line up the patch and press it firmly onto the boat. Start from the centre and work your way out to the edges.
The final step is what makes the bond bulletproof. Use a seam roller or even the smooth back of a spoon to apply firm, consistent pressure across the entire patch. This squeezes out any trapped air bubbles and ensures the two glued surfaces are in 100% contact.
This knack for DIY repairs is a massive part of the Australian boating scene. In fact, data shows a staggering 78% of RIB owners in coastal hotspots like Sydney and the Gold Coast do their own patching. This cuts their boat downtime by an average of 40% and keeps them on the water. A recent industry audit even found that repair kits prevented over 55,000 boats from being scrapped prematurely, saving the sector an estimated AUD 12 million in replacement costs.
Patience is everything in boat repair. The patch might feel stuck after an hour, but the adhesive is still working its magic, undergoing a chemical curing process to reach full strength.
For a truly reliable, airtight seal, you have to wait a minimum of 24 hours before re-inflating the boat to full pressure. If you can leave it for 48-72 hours, that’s even better, especially for a bigger repair or one on a critical seam. This allows the bond to cure completely, ready to handle the pressure, heat, and water you throw at it.
If you have any doubts, particularly if the tear is large or near a vital seam, don’t hesitate to get a professional opinion. You can find more advice on when to call in the experts in our complete guide to inflatable boat repairs.
While a simple puncture is the most common fix you’ll handle, some problems need a bit more finesse. A leaking seam or a dodgy valve can seem intimidating, but with the right approach and your trusty repair kit, they are surprisingly manageable. Getting these advanced repairs sorted yourself not only saves a trip to the repair shop but also gives you real confidence in your ability to keep your boat in prime condition.
Often, the first sign of trouble is a slow leak you just can’t seem to trace back to a clear hole. Before you start thinking the worst, remember that valves are a very common culprit. The constant vibration and temperature shifts out on the water can cause a valve fitting to work itself slightly loose over time, creating a slow but persistent leak.
Before you even start inspecting seams, your first port of call should always be the air valves. A loose valve is the reason behind a surprising number of slow leaks, and thankfully, the fix is usually dead simple. It should always be your go-to diagnostic step for any leak you can’t immediately pinpoint with the soapy water test.
That small, notched tool in your repair kit is the valve wrench, and it’s designed for exactly this job. Just pop it into the valve and give it a firm but gentle clockwise turn to tighten it up. You don’t need to go crazy with force—you could strip the plastic threads. Often, a simple quarter-turn is all it takes to reseat the seal and stop the leak in its tracks.
If tightening the valve doesn’t do the trick, the internal O-ring or the whole valve unit might be worn out. If that’s the case, a full replacement is your next step. You’ll use the same valve wrench to unscrew the old valve, letting you inspect it and swap it out for a new one.
A leaking seam can feel like a much bigger deal, but the repair process follows the same core ideas as a simple patch—it just requires more precision. Seams can fail from age, UV damage, or being constantly over-inflated, which puts stress on the original bond. The trick is to catch the leak early before it develops into a major structural problem.
Grab your soapy water spray and trace it along the seams of your inflatable catamaran or tender to find exactly where the bubbles are forming. Once you’ve found the spot, mark it clearly. The most important part of any seam repair is meticulous preparation.
A seam repair is all about patience and precision. Unlike a simple patch, you are reinforcing the boat’s structural integrity. Rushing the cleaning or curing process will only lead to a temporary fix that fails under pressure.
Knowing your boat’s material is the most critical factor for any advanced repair. The glues and techniques for PVC and Hypalon are completely different, and using the wrong one is a surefire way to make the problem worse. To get a better handle on these fabrics, you can check out our in-depth comparison of Hypalon vs German Mehler PVC material, which breaks down why matching your repair method to your material is so vital.
Learning how to handle these more complex repairs turns you from a boat user into a truly capable owner. It equips you with the skills to maintain the safety and reliability of your vessel for years, making sure every trip out on the water is a good one.

The best way to fix a puncture is to stop it from happening in the first place. While an inflatable boat repair kit is your best mate in an emergency, a solid maintenance routine is your first line of defence. Good habits extend the life of your boat, protect your investment, and seriously cut down the odds you’ll ever need to break out the glue and patches.
Think of your boat’s material like skin—it needs cleaning, sun protection, and the right pressure to stay healthy. Neglect these basics, and you’re asking for trouble. Material starts to degrade, seams weaken, and the risk of a leak goes way up, turning a tiny issue into a trip-ending disaster.
After any trip, especially in saltwater, a proper clean is non-negotiable. Salt crystals left on the surface act like tiny magnifying glasses, cooking the material in the sun and accelerating damage. They also attract moisture, which is an open invitation for mould and mildew.
Here’s a simple but effective post-trip routine:
For a deeper dive into keeping your vessel in top nick, check out our complete guide to inflatable boat maintenance made simple.
The Aussie sun is relentless, and UV radiation is the number one enemy of both PVC and Hypalon. Over time, it breaks down the material’s plasticisers, causing it to fade, become brittle, and eventually crack.
The single most effective thing you can do is regularly apply a quality UV protectant spray. Do it every 4-6 weeks during peak boating season. It’s sunscreen for your boat, creating a barrier that deflects harmful rays and keeps the material supple.
Think of it this way: a $30 bottle of UV protectant can save you hundreds of dollars in professional repairs down the line. It’s one of the smartest and easiest investments you can make for your boat’s longevity.
Getting the air pressure right is vital for your boat’s structural integrity. Constantly over-inflating puts massive stress on the seams, while under-inflation causes the material to flex and wear out. Always use a pressure gauge and stick to the manufacturer’s recommended PSI.
How you store your boat makes a massive difference, too.
Following these simple steps will do more than just keep your boat looking good. It ensures it remains a reliable vessel for all your adventures, meaning less time worrying and more time on the water.
Even with the best instructions, you’re bound to have questions when a repair is underway. Getting the right answers builds confidence and helps you sidestep the common traps. We’ve pulled together the most frequent queries we hear from boat owners across Australia, from families with big inflatable catamarans to solo anglers in their trusty tenders.
Patience is probably the most underrated tool in your inflatable boat repair kit. It’s tempting to get back on the water as soon as the glue feels tacky, but that’s a big mistake. While the adhesive might seem dry to the touch in 30 minutes, it’s still going through a critical chemical curing process.
For a bond you can truly rely on, you need to wait a minimum of 24 hours before inflating the boat back to full pressure. If you’ve tackled a larger patch or a more critical seam repair, giving it 48-72 hours is even better. This extra time allows the bond to reach maximum strength, ensuring it can handle the pressure, flexing, and temperature swings it’ll face out on the water.
Absolutely not—this is one shortcut you can’t afford to take. PVC and Hypalon are completely different materials, and they need entirely different adhesives to create a permanent bond.
Using the wrong glue and patch is a guaranteed failure. The patch will peel off, and it will probably happen at the worst possible time. Always double-check what your boat is made of before you even open the glue.
The success of your entire repair comes down to material compatibility. Using a PVC kit on a Hypalon boat (or vice versa) is like trying to weld wood—the materials just won’t bond, and the patch will peel right off as soon as it’s put under any real pressure.
By far, the most common and critical error we see in DIY repairs is improper surface preparation. It’s easy to get impatient and rush this part, but it’s the foundation of the whole job. Slapping a patch onto a dirty or unprepared surface is just asking for it to peel off.
You have to be meticulous. Clean the area with the correct solvent (like MEK for PVC or Toluene for Hypalon) to get rid of every last trace of dirt, salt, grime, and old UV protectant. For Hypalon, you also must sand the surface until it has a “woolly” texture the adhesive can really bite into. A perfectly prepped surface is the only secret to a professional-grade, permanent bond.
A good quality repair kit can handle most common punctures and small tears up to about 10-15 cm. But there are definitely times when it’s much smarter—and safer—to call in a professional. Whether you need a simple fix or want to compare prices and features of inflatable boats in your area, expert advice is invaluable.
Think about getting an expert involved for:
Professionals have specialised tools and climate-controlled workshops designed for major repairs that are simply beyond the scope of a standard DIY kit. If you have any doubt at all about the safety or durability of your repair, making the call to an expert is always the right move.
Ready to tackle your next adventure with confidence? The team at Easy Inflatables has the gear and expertise you need, from premium repair kits to complete inflatable boat packages perfect for exploring Australia’s incredible waterways. Still wondering, “what are the best inflatable boats for recreational use available near me?” We can help. Find your perfect setup at https://easyinflatables.com.au.