
Strapping a motor onto your inflatable kayak is a total game-changer. It takes your trusty paddlecraft and turns it into a serious vessel, letting you explore further, take on currents without a second thought, and save your energy for what really matters—fishing, swimming, or just kicking back and enjoying the view. Whether you’re comparing prices and features of inflatable boats in your area or looking for the best inflatable boats for recreational use, adding a motor is a simple upgrade that opens up a whole new world of possibilities.
Look, paddling is fantastic. It’s a great workout and connects you with nature in a way nothing else can. But let’s be real—there are days when a bit of extra grunt makes all the difference. Imagine cruising across a huge bay or exploring a winding river system in just one day, without feeling like you’ve run a marathon. That’s exactly why more and more Aussie adventurers are adding kayak motors and mounts to their setup.
This isn’t about turning your kayak into a speedboat. It’s about being smarter on the water. A motor gives you the freedom to reach those remote fishing spots that are just a bit too far for a paddle alone. For families, it means longer, happier days out, without the worry of a long, tiring paddle back to the ramp when everyone’s knackered. Whether you’re looking for the best inflatable boats for recreational use available near me or planning a family outing, a motor enhances the experience.
With a motor, you’re no longer at the mercy of your own stamina or the weather. We’ve all been there—a sudden headwind whips up, or a strong tide turns a leisurely paddle home into an exhausting battle. A motor is your ticket home, getting you back safely and quickly when conditions turn sour.
Just think about the practical perks:
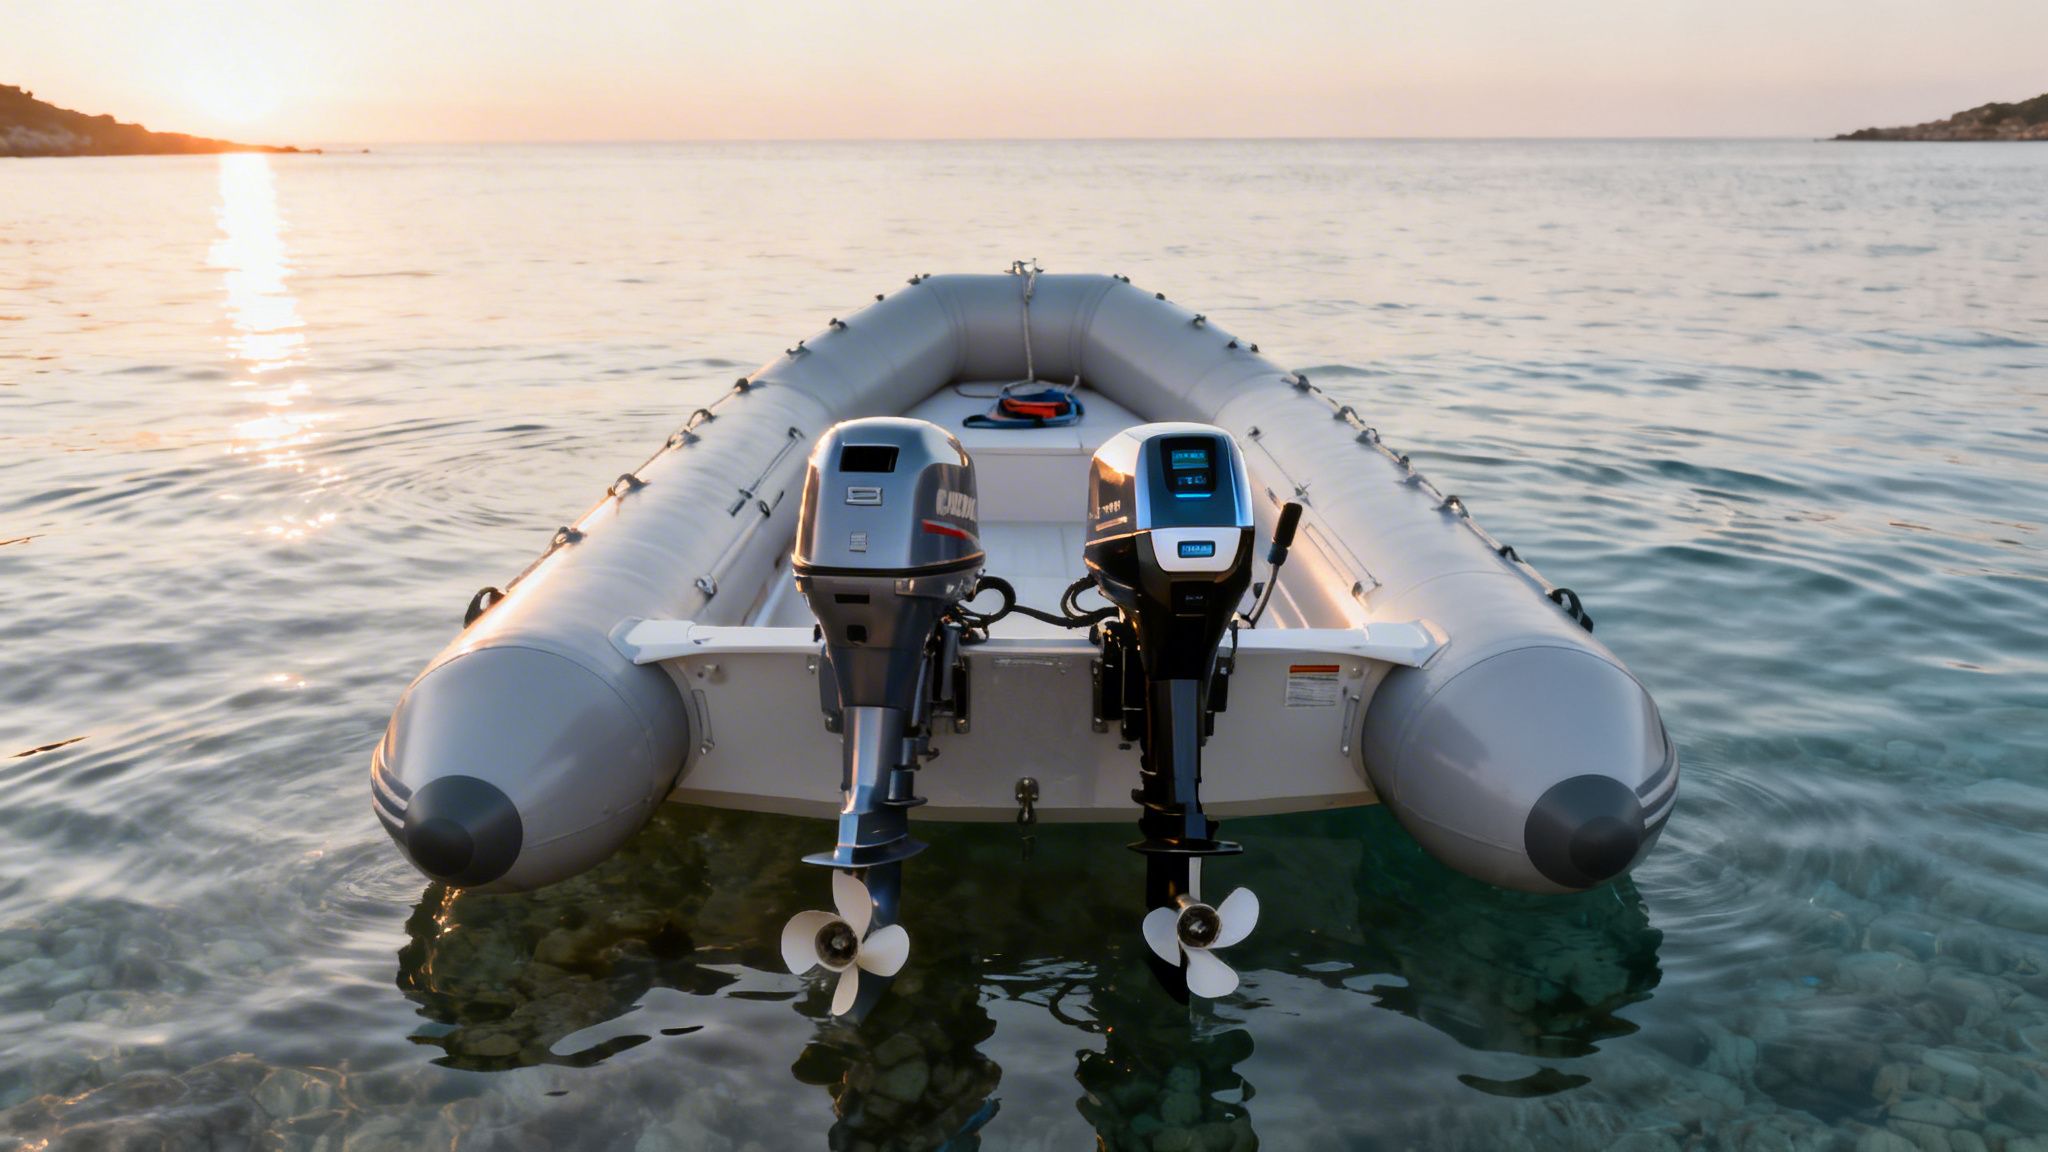
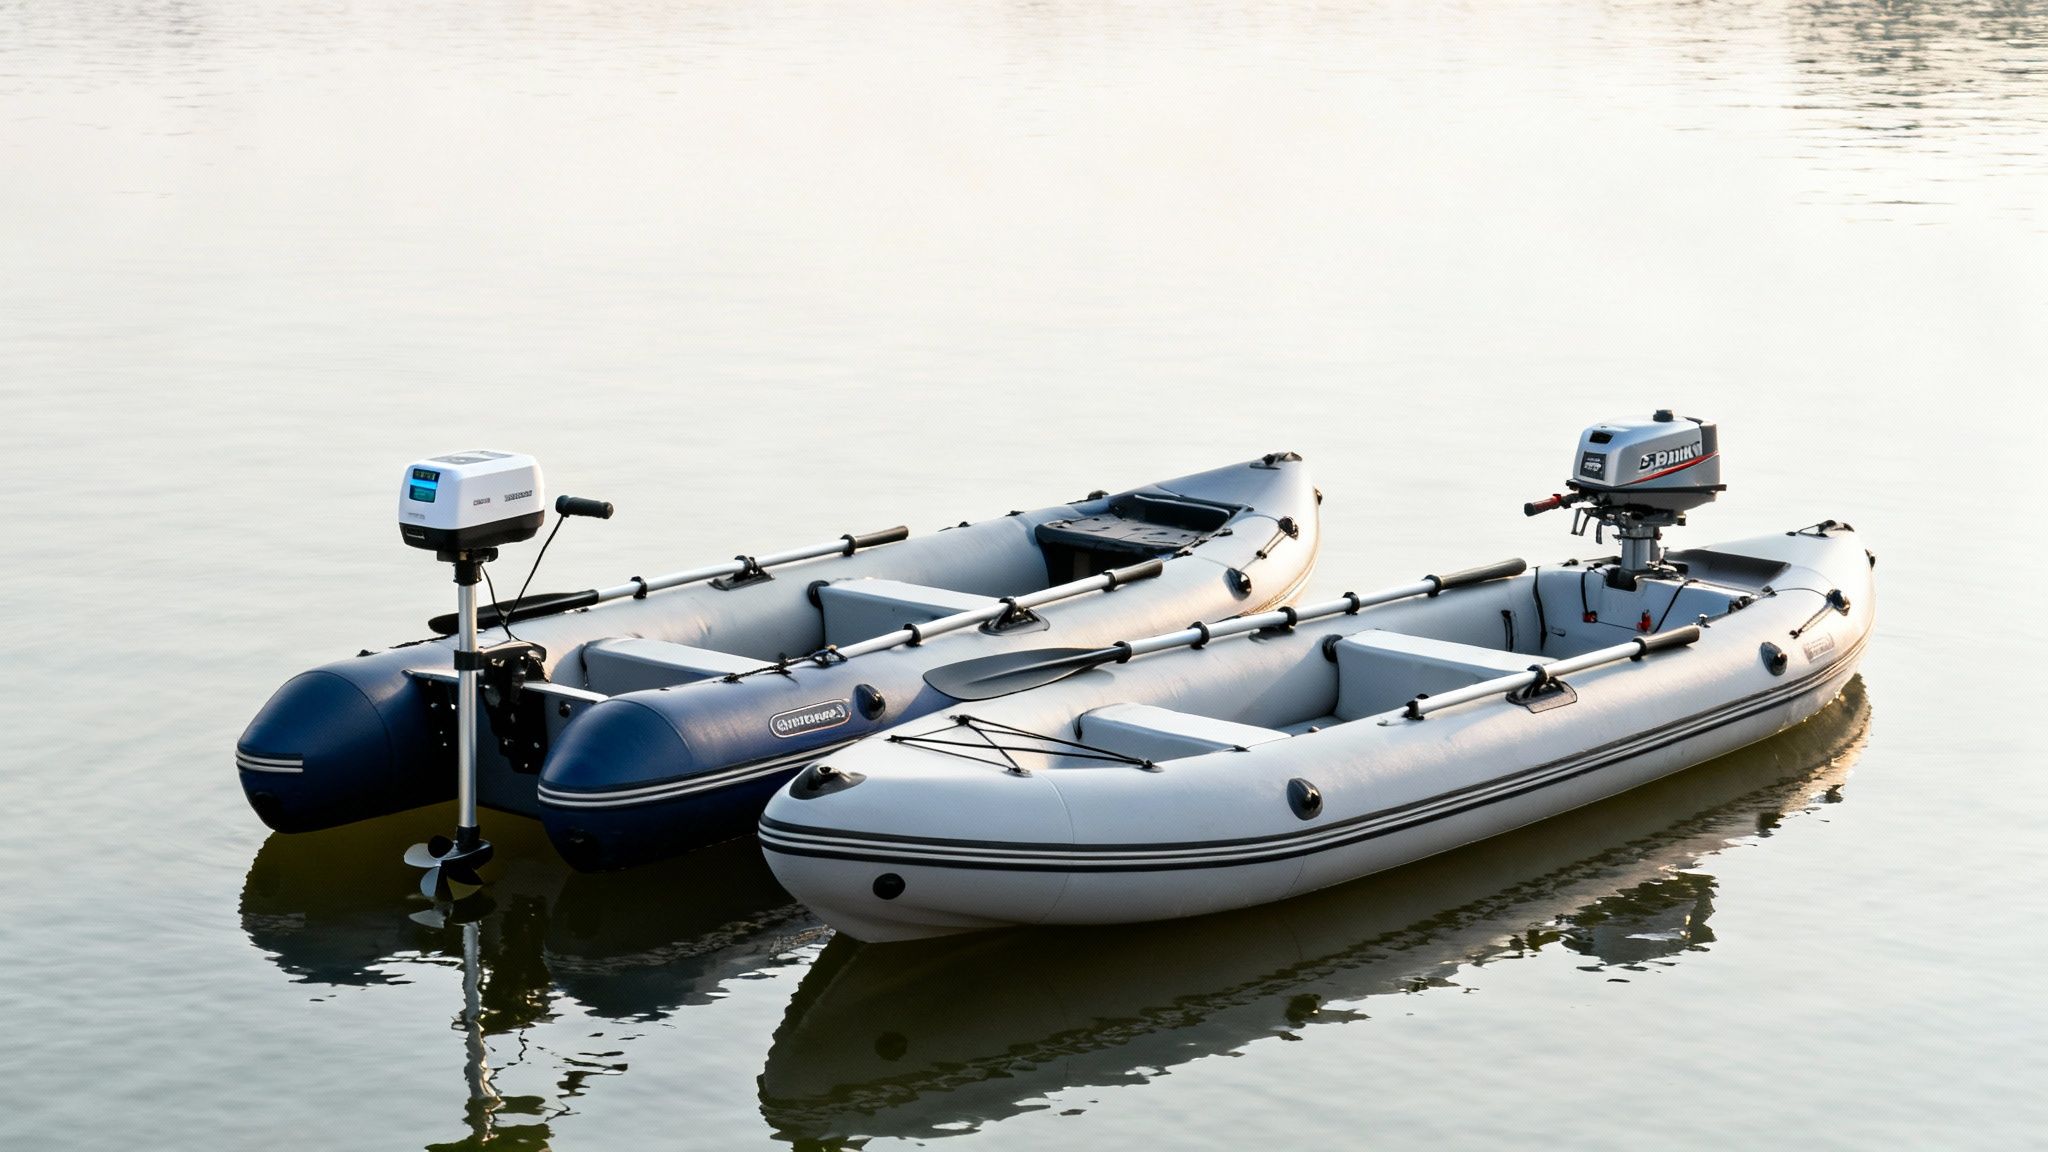
Getting your inflatable kayak motorised comes down to three key bits of gear working in harmony: the motor, the mount, and your power source. And thanks to modern designs, getting this combination right has never been easier or more effective.
There’s a common myth that putting a motor on an inflatable is tricky or unsafe. The reality is, with the right gear—especially a kayak designed with a proper transom and a well-matched motor—it’s dead simple and creates a surprisingly stable and capable craft.
For instance, many of our inflatable kayaks, like the Aerowave range, come with a sturdy aluminium transom built right in. This factory-installed plate gives you a rock-solid foundation to clamp on a small outboard, taking all the guesswork out of the equation. This makes them some of the best inflatable boats for recreational use available in Australia.
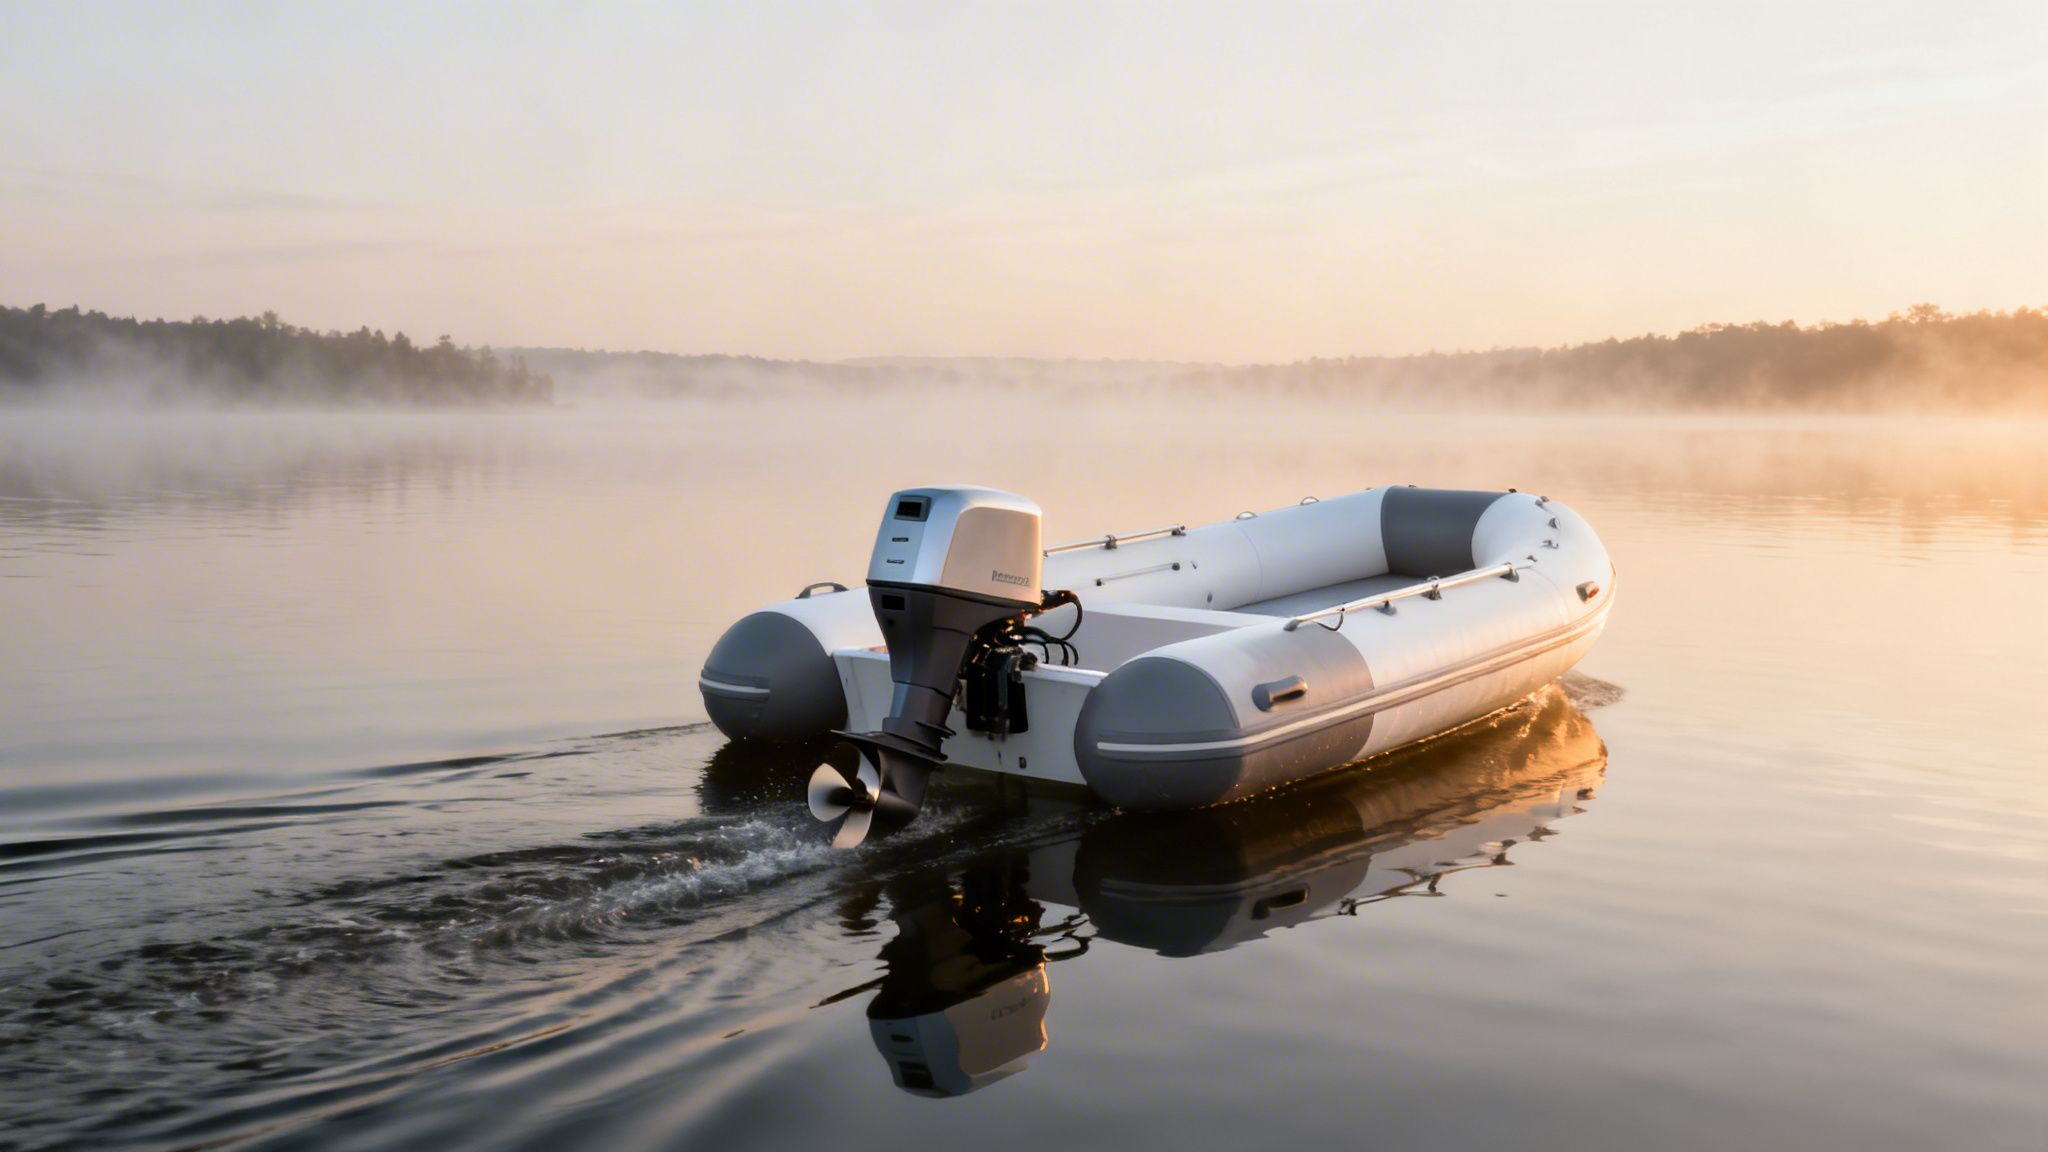
When you pair that with a reliable Hidea outboard, you’ve got a turnkey package ready for anything. The whole idea is to create a balanced system where the kayak motors and mounts work together seamlessly, giving you more freedom on the water.
Picking the perfect motor for your inflatable kayak can feel like a big decision, but it really just boils down to how you plan to use it on Aussie waters. The main choice you’ll face is between a quiet electric trolling motor and a more powerful petrol outboard. Each one has its own clear advantages, depending on what you’re trying to achieve.
Are you an angler who loves sneaking into glassy estuaries without spooking the fish? An electric motor is your best friend. Or do you need the grunt to push through coastal chop and cover long distances quickly? That’s where a petrol outboard really shines.
The Australian market for kayak trolling motors is booming, which shows a real shift in how we enjoy our waterways. The Asia-Pacific region now holds around 20% of the global share, with recreational kayaking here jumping by over 12% between 2020 and 2023.
This growth is being supercharged by Aussie anglers upgrading to electric motors. A big reason for this is that lithium-ion battery costs have dropped 30% over the last five years, making these setups far more affordable and portable, especially for RV travellers. This is why we often bundle reliable Hidea outboards with our Aerowave kayaks, which feature standard aluminium transoms ready for quick motor mounting.
Deciding between electric and petrol power is the first major hurdle. It’s not just about speed; it’s about noise, maintenance, and where you’ll be boating.
For many, the whisper-quiet operation of an electric motor is a massive drawcard. It lets you glide into sensitive marine parks or your favourite fishing spots without causing a disturbance. Petrol motors, on the other hand, offer raw power and the convenience of simply refilling a fuel tank for extended trips, without ever worrying about battery life.
To make the choice clearer, let’s break down the key differences.
Here’s a simple, side-by-side look at how these two motor types stack up, helping you figure out which one aligns with your kayaking style.
| Feature | Electric Motor | Petrol Motor |
|---|---|---|
| Noise Level | Virtually silent, ideal for stealthy fishing and wildlife observation. | Noticeably louder, which can disturb fish and wildlife. |
| Best Use Case | Precision control, trolling, short-to-medium range trips, sensitive areas. | Long-range travel, fighting strong currents, getting to spots quickly. |
| Maintenance | Very low maintenance; requires charging batteries and keeping connections clean. | Regular maintenance needed (oil changes, spark plugs, fuel system checks). |
| Running Cost | Cheaper to run (cost of electricity) but higher initial battery cost. | Ongoing fuel costs, which can fluctuate significantly. |
| Environmental Impact | Zero emissions, making it the eco-friendly choice. | Produces exhaust emissions and has a risk of fuel spills. |
Ultimately, the best motor is the one that fits your adventures. If you value peace and quiet for fishing, electric is the way to go. If you need to cover serious ground, petrol offers unbeatable range and power.
Once you’ve picked your motor type, the next critical step is getting the power right. Too little, and you’ll struggle against wind and current. Too much, and you could overpower your kayak, making it unsafe and difficult to handle.
For electric motors, power is measured in pounds (lbs) of thrust. A good rule of thumb is to have at least 2 lbs of thrust for every 45 kg of total weight—that includes the kayak, your gear, and all passengers.
Petrol outboards are measured in horsepower (HP). A small 2.5HP motor, like a Hidea outboard, is often plenty for an inflatable kayak. It provides reliable power without overwhelming the craft.
A common mistake is thinking more power is always better. For an inflatable kayak, balance is key. A motor that’s too heavy or powerful can put excessive stress on the transom and negatively affect the kayak’s stability and handling on the water.
Let’s imagine an angler with an Aerowave inflatable loaded with fishing gear, with a total weight around 180 kg. Using our formula, they’d want an electric motor with at least 8 lbs of thrust. However, choosing something in the 30-40 lb range would provide a comfortable safety margin for dealing with wind. For a petrol equivalent, a lightweight 2.5HP Hidea motor would be a perfect match, offering ample power for most conditions.
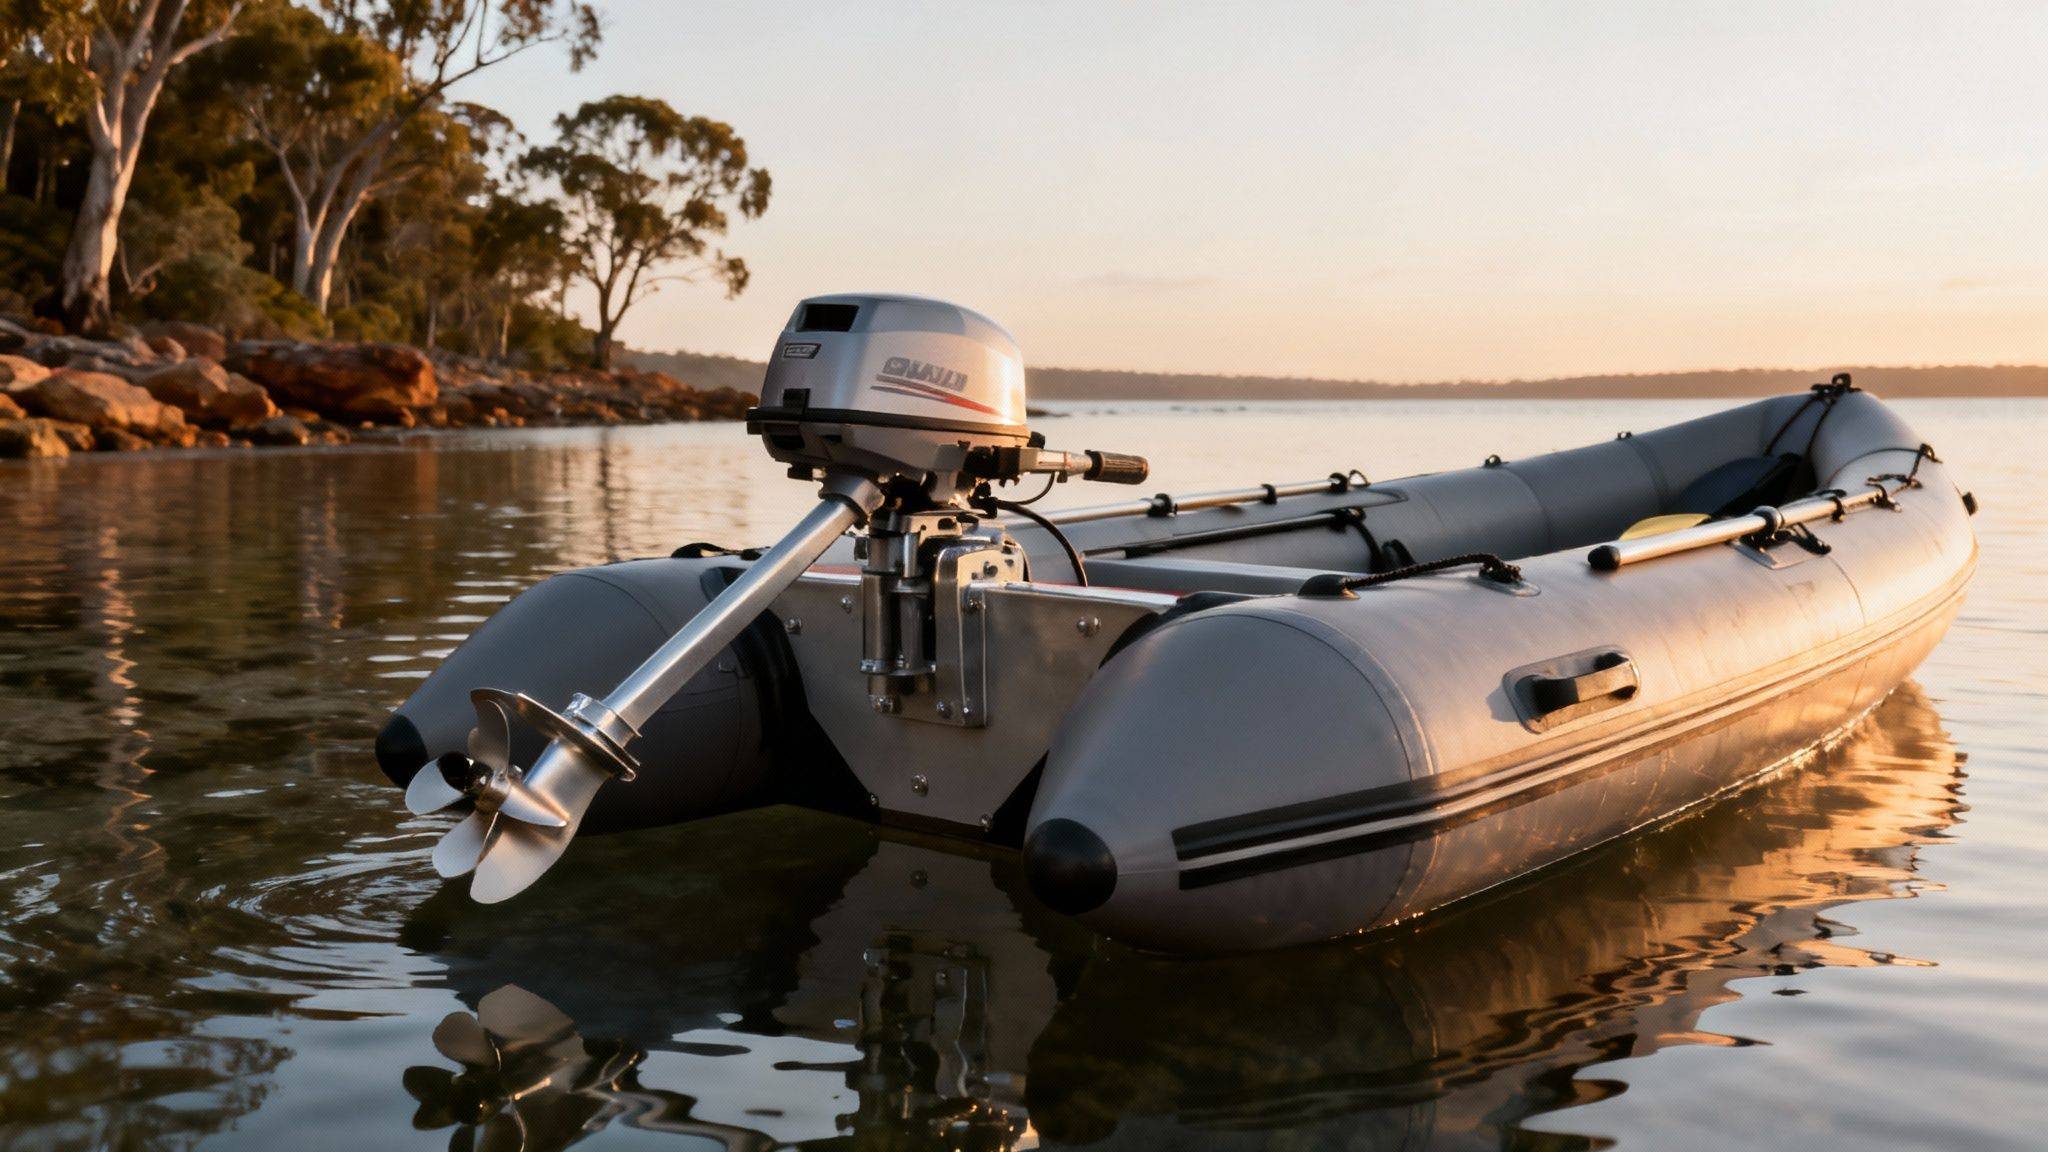
Finally, one of the most overlooked yet crucial details is the motor’s shaft length. The shaft is the part of the motor that extends from the powerhead down to the propeller.
Get this wrong, and you’ll run into problems. If it’s too short, the propeller will be too close to the surface, causing it to suck in air (this is called cavitating) and lose power. If it’s too long, it will drag in the water, create unnecessary resistance, and risk hitting the bottom in shallow areas.
To get it right, you need to measure the distance from the top of your kayak’s transom (where the motor clamps on) down to the waterline. The anti-cavitation plate on the motor—that’s the flat plate just above the propeller—should sit about 2-5 cm below the waterline for optimal performance.
Getting this measurement right ensures your motor works efficiently, giving you the best possible speed and control. You can find more specific advice in our complete guide to electric trolling motors for kayaks.
Your motor is only as good as the mount holding it in place. This piece is the critical link between your kayak and its power source, and getting it right is non-negotiable for safety, performance, and protecting your inflatable.
Think about it: a flimsy or poorly chosen mount is an accident waiting to happen, especially in choppy Australian waters. The last thing you want is to watch your expensive motor sink to the bottom or, worse, damage your kayak’s hull.
For many, the simplest and most secure solution is a kayak with a built-in transom. Models like our Aerowave inflatable boats are designed with a sturdy, integrated aluminium transom plate straight from the factory. This gives you a rock-solid foundation for clamping on an outboard, taking all the guesswork out of the equation.
But what if your kayak doesn’t have one? Don’t worry, you’ve still got fantastic options. Aftermarket brackets are designed to solve this exact problem, letting you securely attach a motor to a kayak that wasn’t originally built for one.
The first big decision is where to position your motor. You’ve got two main choices: a stern (or transom) mount at the back and a bow mount at the front. Each has a very different purpose and is favoured by different types of kayakers.
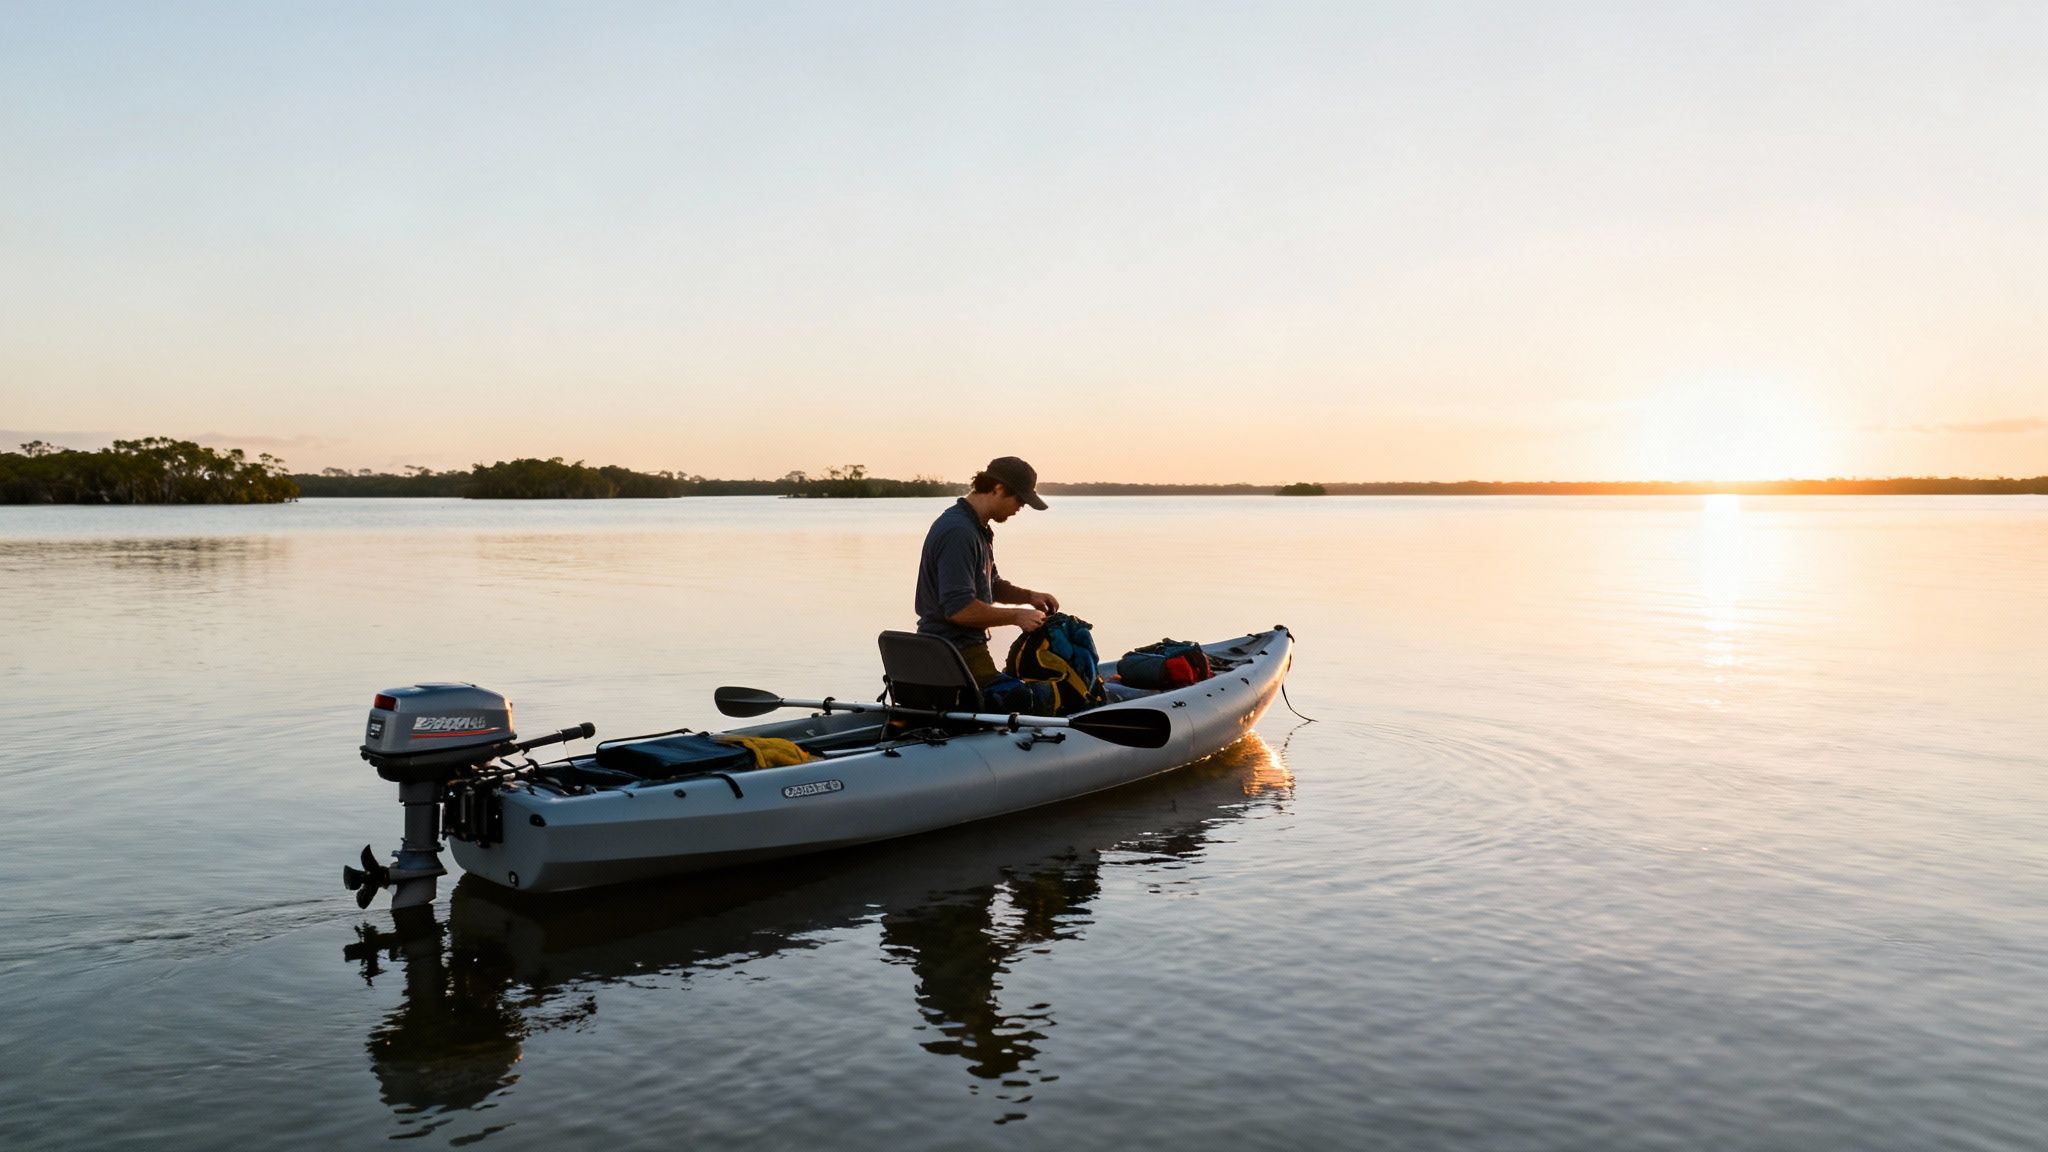
Stern-mounted motors are the go-to setup for general recreational use. They are dead simple to install, especially on kayaks with a transom, and give you excellent forward push. It works just like a traditional boat—the motor pushes from behind, making it perfect for getting from A to B.
Bow-mounted motors, on the other hand, are the weapon of choice for serious anglers. Instead of pushing, a bow mount pulls the kayak through the water. This gives you far superior steering precision and control, letting you navigate tight spots, follow a shoreline with pinpoint accuracy, or hold your position against wind and current.
The trend towards more advanced angling setups is undeniable. Bow-mount kayak motors are set to dominate the Australian market, capturing an estimated 40% share by 2035 because of their incredible steering control in tricky waterways. Here in Australia, where kayak fishing is a national obsession, these front-mounted setups pull the craft with a precision that stern mounts just can’t match.
The global kayak trolling motor sector is forecast to hit USD 684M in 2025, with Australia’s thriving tourism industry driving a 4.7% compound annual growth rate. In fact, data shows 70% of Aussie kayak anglers prefer electric bow mounts for their long battery life—a must-have for those marathon fishing trips.
If your inflatable kayak doesn’t have a built-in transom, you’ll need an add-on bracket. These usually come in two main styles:
When you’re picking a bracket, the material is just as important as the design. You need something that can handle the harsh saltwater environment and constant vibration from a motor. Look for mounts made from marine-grade aluminium or heavy-duty, UV-resistant plastics. A cheap, flimsy mount will fail, and it’ll take your expensive motor with it.
A strong mount does more than just hold the motor; it absorbs vibration and transfers the motor’s thrust efficiently to the kayak’s hull. Investing in a quality mount from a reputable brand ensures it can handle the torque without flexing or stressing your kayak’s material.
To make sure you nail this decision, you can explore our complete guide to choosing and installing an inflatable kayak trolling motor mount.
Installation is everything. A poorly installed mount is just asking for trouble. The goal is to create a connection that is completely rigid and secure, making sure the motor’s power is transferred smoothly without any wobbling or shifting.
When attaching a mount to an inflatable, always follow the manufacturer’s instructions to the letter, especially when it comes to adhesives. The glue needs to create a permanent, waterproof bond with your kayak’s PVC or Hypalon fabric.
Proper weight distribution is also vital. The extra weight of the motor and mount will change your kayak’s centre of balance. Always test your new setup in calm, shallow water first to get a feel for how it handles before you head out into more challenging conditions.
A well-chosen and properly installed mount will feel like a natural extension of your kayak, giving you the power and control to truly expand your horizons on the water.
Alright, this is where the fun really begins—the hands-on part. You’ve picked out your motor and mount, and now it’s time to bring it all together. The installation might look a bit intimidating at first, but it’s actually pretty straightforward when you tackle it one piece at a time. The end goal is a secure, balanced, and safe setup that feels like it was always part of your inflatable kayak.
A proper installation is crucial. It ensures all that motor power transfers efficiently to the boat, giving you smooth control without putting any weird stress on the kayak’s hull. We’ll walk through everything you need to know, from attaching the mount and setting up the battery to getting the weight distribution spot-on before you even get near the water.
This diagram breaks down the three main ways you can fit a motor, from built-in transoms to aftermarket brackets for the bow or stern.
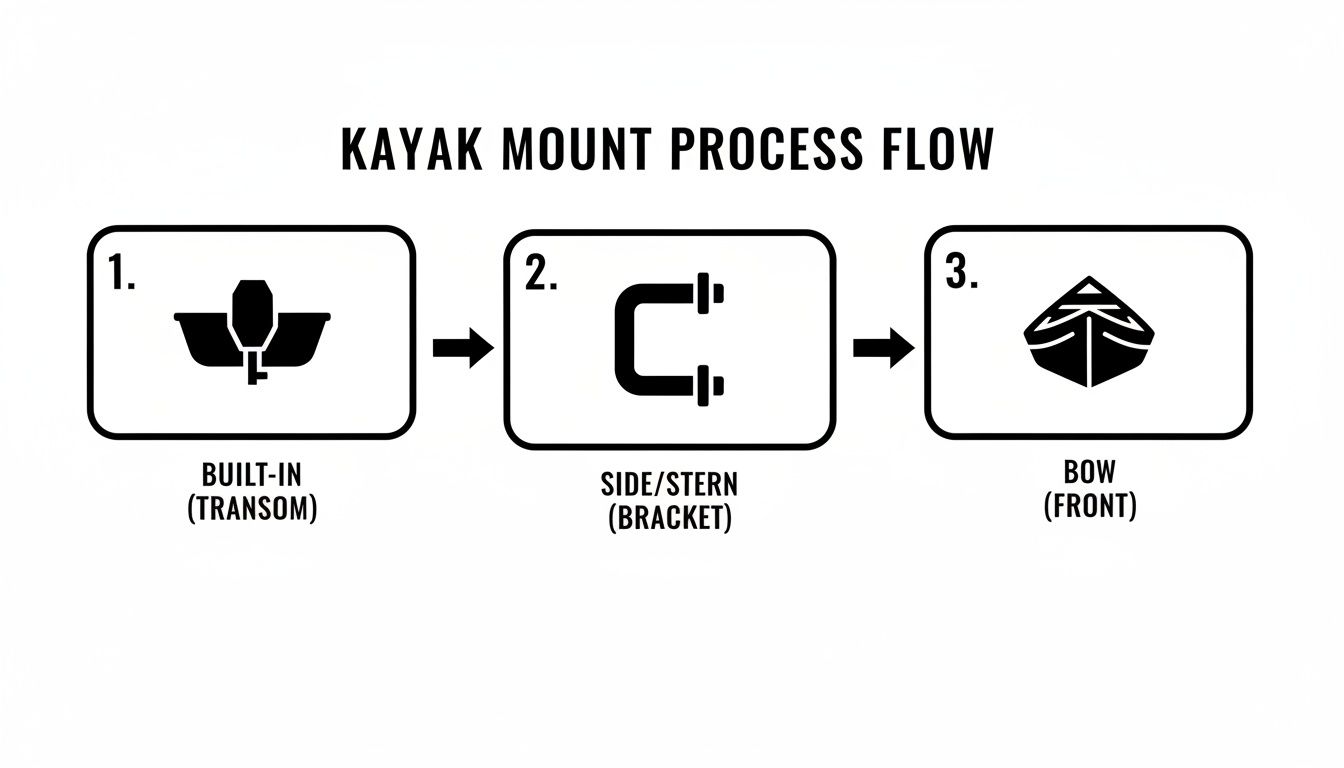
As you can see, it ranges from the dead-simple clamp-on style for a built-in transom to more specialised installations for side, stern, or even bow mounts, depending on what you need for your type of kayaking.
If your kayak already has a built-in aluminium transom, like an Aerowave, you’re in luck. This step is incredibly easy. You just clamp the motor directly onto the transom plate, tighten the thumb screws until they’re hand-tight, and that’s pretty much it. It’s easily the most secure and hassle-free method out there for kayak motors and mounts.
For kayaks without that built-in transom, you’ll be installing an aftermarket bracket. This almost always involves gluing reinforced pads onto the inflatable tubes.
For a bond that won’t let you down, follow these key steps:
Rushing the curing process is the number one mistake I see people make, and it almost always leads to the mount failing on the water. Give that adhesive its full time to set. The integrity of your entire rig depends on a solid, waterproof bond.
With an electric motor, getting your battery and wiring right is non-negotiable for both safety and performance. The big decision here is where to put the battery and what type to use. While heavier AGM batteries are a decent budget option, the lighter lithium (LiFePO4) batteries are a far better choice for inflatable kayaks. They save a huge amount of weight and deliver consistent power.
Where you place your battery has a massive impact on the kayak’s balance, or trim. A heavy battery stuck too far back will make the bow lift, while putting it too far forward will make it nose-dive. You want to aim for a central position to keep the kayak sitting nice and level in the water.
A waterproof battery box is an absolute must-have. It protects the terminals from spray and splashes, which prevents short circuits and corrosion. You can learn more about how to pick the right one and why they’re so important here: selecting the right marine battery boxes. Once the battery is boxed up, run the wiring neatly along the inside edge of the kayak and use clips or ties to keep it out of the way so it doesn’t become a trip hazard.
If you’ve gone with a petrol motor, the same logic applies to securing the external fuel tank. Find a central, stable spot where it won’t slide around, and make sure the fuel line is routed safely away from anything it could snag on.
Before you even think about heading to the boat ramp for your first motorised trip, do one final check at home. It’s much easier to make adjustments in your driveway than on a slippery ramp.
Load your kayak with all the gear you’d normally carry—eskies, fishing tackle, safety equipment—and put the motor and battery in their final positions. Now, stand back and take a good look at how the kayak is sitting.
Making small tweaks now is simple. You might need to shift the battery box a few inches forward or move a gear bag to the opposite side. This quick dry run ensures that once you’re on the water, your kayak will be stable, predictable, and ready for adventure. It’s the final, and most important, step in getting your kayak motor and mount installed right.
Alright, your motor is mounted, and everything’s tightened up. Now for the fun part: hitting the water. But hold on a second. Adding a motor completely changes how your kayak behaves. Your first trip out shouldn’t be about fishing or exploring; it should be a dedicated test run to get acquainted with its new personality.
For that first voyage, pick a spot you know well—somewhere calm and shallow. Forget busy boat ramps or anywhere with a ripping current. The goal here is to learn how your motorised kayak responds without any added pressure or distractions.
The biggest difference you’ll notice is in turning and stopping. A motor provides constant forward thrust, meaning your kayak will carry its momentum much further than when you were just paddling. You’ll want to practise making gentle, wide turns at low speed and get a real feel for how long it takes to coast to a stop.
Adding a motor officially turns your kayak into a powered vessel, which means you’ve got some legal responsibilities to think about. These rules are in place for everyone’s safety and they do vary between Australian states and territories, so it’s vital to check your local maritime regulations.
The main things you need to be across are boat registration and mandatory safety gear.
In most Australian states, whether you need to register your kayak comes down to the motor’s power output. For example, in NSW, any vessel with a motor of 4.0 kilowatts (approx. 5HP) or more must be registered. Over in Queensland, the threshold is lower, at just over 3kW (4HP). Always, always check with your state maritime authority before you hit the water.
Registration aside, you will absolutely be required to carry specific safety equipment. We’ve put together a detailed breakdown of what you’ll need in our comprehensive boat safety equipment checklist. At a minimum, this nearly always includes a properly fitting life jacket (PFD) for every single person on board.
Once you’re confident with the basic handling, you can start tweaking your setup to squeeze out better performance. Small adjustments can make a surprising difference to your speed, battery life, and overall handling, especially when you’re up against wind and currents that would have been a real battle with just a paddle.
First things first, look after your hull. Keeping it clean means less drag. For extra protection and glide, a good marine ceramic coating can provide an excellent shield against the elements and keep you moving efficiently.
Out on the water, one of the most effective adjustments you can make is to the motor trim angle. This is simply the angle of the motor shaft in relation to your transom.
When navigating, use that motor to your advantage. Point the bow directly into wind or waves at a steady, controlled speed rather than letting them hit you from the side, which can make things feel tippy. If you’re fighting a strong current, use just enough power to maintain control and make headway without needlessly draining your battery. Mastering these little tricks will make every trip safer and a whole lot more fun.
So, you’re ready to motorise your inflatable kayak, but a few last-minute questions are probably floating around. Getting these sorted is the final step to feeling confident before you hit the water. Let’s tackle the most common queries we hear from fellow paddlers.
This is a big one, and the answer really depends on which state you’re in. Registration rules are handled by state and territory maritime authorities, and they almost always hinge on your motor’s power output.
For instance, if you’re boating in New South Wales, any vessel with a motor of 4.0 kilowatts (about 5HP) or more needs to be registered. Head north to Queensland, however, and that threshold drops—registration is mandatory for any boat with a motor over 3kW (around 4HP).
It’s absolutely critical to check the rules with your local authority, like Transport for NSW or Maritime Safety Queensland, to get the most current regulations before you launch. Don’t get caught out.
For the serious angler, a bow-mounted electric motor is the gold standard for precision control. It pulls the kayak through the water, giving you incredible manoeuvrability for sneaking along shorelines or holding your position over a hot fishing spot, especially with GPS spot-lock features.
However, for most people, a transom mount is the way to go. It’s far simpler to install, much more affordable, and perfect for general trolling or just getting from A to B without paddling. For an all-rounder inflatable kayak, a transom mount is a fantastic starting point that dramatically extends your range and capability. Many anglers find it’s more than enough for their needs.
While a standard AGM battery will get the job done, a lithium (LiFePO4) battery is easily the best choice if your budget allows. The advantages are massive, especially for a portable craft like an inflatable kayak.
Lithium batteries are significantly lighter than their deep-cycle counterparts, which makes a huge difference to your kayak’s overall weight and balance. They also deliver consistent power right up until they’re empty and can be recharged far more times, making them a smarter long-term investment.
The weight savings and superior performance you get from a lithium battery are a game-changer on the water. We highly recommend them.
Definitely not, and this is a crucial safety point. You should only ever mount a motor on an inflatable kayak that has been specifically designed to handle the weight, thrust, and vibration. Trying to rig one onto a standard recreational kayak that isn’t built for it can cause serious damage to the boat and is just plain unsafe.
Always look for models with a rigid, reinforced transom or dedicated motor mount attachment points. This is exactly what you’ll find on the Aerowave range of inflatable boats—they’re engineered from the ground up to provide a stable and secure platform for your motor. For a deeper dive on what to look for, check out our electric outboard motors Australia buying guide.
Ready to find the perfect motor and mount for your adventures? At Easy Inflatables, we specialise in creating complete, reliable packages. Whether you’re after an inflatable catamaran or want to compare prices and features of inflatable boats in your area, we can help. Explore our range of Hidea outboards and Aerowave inflatable boats to build your ultimate motorised kayak today. Visit us at https://easyinflatables.com.au.