
A proper rubber boat repair starts long before you even think about opening a tube of glue. It all begins with finding the exact source of the problem. A thorough diagnosis is what separates a quick fix that fails in a week from a permanent, reliable seal that gives you total confidence on the water.
Before you can patch anything, you need a crystal-clear picture of what you're dealing with. A tiny, almost invisible pinhole from a fish hook requires a completely different approach than a seam that's starting to let go.
Rushing this first step is a classic mistake. It almost always leads to wasted time, wasted materials, and patches that peel off after a single outing.
The best way to find those sneaky, elusive leaks is the good old-fashioned soapy water test. It’s cheap, simple, and incredibly effective at pinpointing even the smallest punctures that you'd never spot with a visual check alone.
First up, inflate your boat to its recommended pressure. You want it firm. Next, mix a generous amount of dish soap with water in a spray bottle or a bucket—you're aiming for a really sudsy solution.
Start spraying the mixture liberally over a section of the boat. Pay extra attention to common trouble spots like seams, valves, and any areas with visible scuffs or wear marks.
Now, watch closely. A leak will give itself away by creating a cluster of tiny, growing bubbles. Sometimes, you'll even see a small "foam volcano" erupting from the puncture site. That's your target.
Once you find a leak, circle the spot with a waterproof marker so you don’t lose it. Be methodical and continue this process across the entire boat, testing one chamber at a time.
Don’t just check the main tubes. Make sure you spray around the inflation valves, overpressure valves, and along every single inch of the glued or welded seams. These are the most common failure points on any inflatable.
Knowing where the leak is is only half the battle. You also need to identify the type of damage, as this will dictate how you tackle the repair and whether it’s a job you can handle yourself.
Here are the usual suspects:
Understanding the problem is everything. For complex issues like failing seams or widespread material damage, sometimes it's best to consult an expert. Please note: Easy Inflatables outsource all warranty repair work to local Inflatable Repair Specialists, we do not do internal repair work. We specialise in sales, spare parts and accessories. You can explore our extensive guide to professional inflatable boat repairs to help decide when it's time to call in the pros.
Getting your rubber boat repair right comes down to one thing: using the correct materials. Picking the right glue and patch isn’t just a good idea—it’s the only way to get a durable, airtight seal you can trust out on the water.
The biggest mistake I see boaters make is grabbing any old glue off the shelf, assuming it’ll do the job. Inflatable boats are almost always made from one of two fabrics: PVC (Polyvinyl Chloride) or Hypalon (a brand name for CSM). The glues for each are chemically worlds apart.
Let me be clear: PVC glue will absolutely not bond to Hypalon, and vice versa.
Using the wrong combo means your patch will fail, and usually at the worst possible time. This is why figuring out what your boat is made of is the most critical first step.
Before you even think about buying a repair kit, you need to know what you're working with. Most manufacturers will list the material in the owner's manual or on their website. But if you’ve got a second-hand boat or just can’t find the info, there are a couple of simple tests you can do.
Just find an inconspicuous spot—under the transom mount or inside a pontoon is perfect.
Once you know your material, you can confidently buy the right two-part adhesive designed specifically for it. This little bit of detective work is the key to a permanent, reliable repair.
To help you out, here’s a quick rundown of the key differences.
This table breaks down the main characteristics to help you quickly identify your boat's material and understand why the right repair approach is so important.
| Characteristic | PVC (Polyvinyl Chloride) | Hypalon (CSM) |
|---|---|---|
| Surface Finish | Typically has a shinier, more 'plastic' look. | Often has a duller, more 'rubbery' or matte finish. |
| Sanding Test | Scratches but retains its colour and sheen. | Goes dull and may change colour slightly. |
| Acetone Test | Becomes tacky and colour may transfer to a cloth. | No reaction; does not get sticky or lose colour. |
| Seams | Welded seams, which look like a very clean, melted bond. | Glued seams, which have a visible overlap and glue line. |
| Cost | Generally more affordable. | More expensive due to a more complex manufacturing process. |
| Durability | Good, but can be susceptible to UV degradation over time. | Excellent resistance to UV, chemicals, and extreme temperatures. |
Knowing these differences makes it much easier to diagnose issues and choose the right supplies.
A strong rubber boat repair is like a chemical weld between the patch and the hull. The right adhesive creates a molecular bond that fuses the materials, making the patched area as strong, if not stronger, than the original fabric.
It's worth noting that around 70% of inflatable boat repairs in Australia are for seam failures or valve leaks. These issues are often tied to how each material handles our local conditions, like intense UV exposure and stress. Choosing the right repair method is vital for long-term reliability on the water. You can explore detailed reports on the inflatable boat market for more insights into these trends.
Understanding the difference is crucial. If you want to dive deeper, check out our guide on the benefits of Hypalon vs German Mehler PVC material. It’ll give you a full appreciation for why matching your repair kit to your boat’s fabric is so important for a fix that lasts.
Alright, you've got the right materials ready to go. Now comes the part where a little patience and careful prep work make all the difference in a proper rubber boat repair. Nailing a professional-grade patch is all about creating a flawless, permanent bond, and that means getting every step—from cleaning to applying the final pressure—just right.
The secret to a repair that lasts isn't just the glue itself. It's the meticulous work you do beforehand that allows the adhesive to create a true chemical weld with the boat's fabric. Trust me, skipping any of these steps is the fastest way to find yourself doing the same repair all over again.
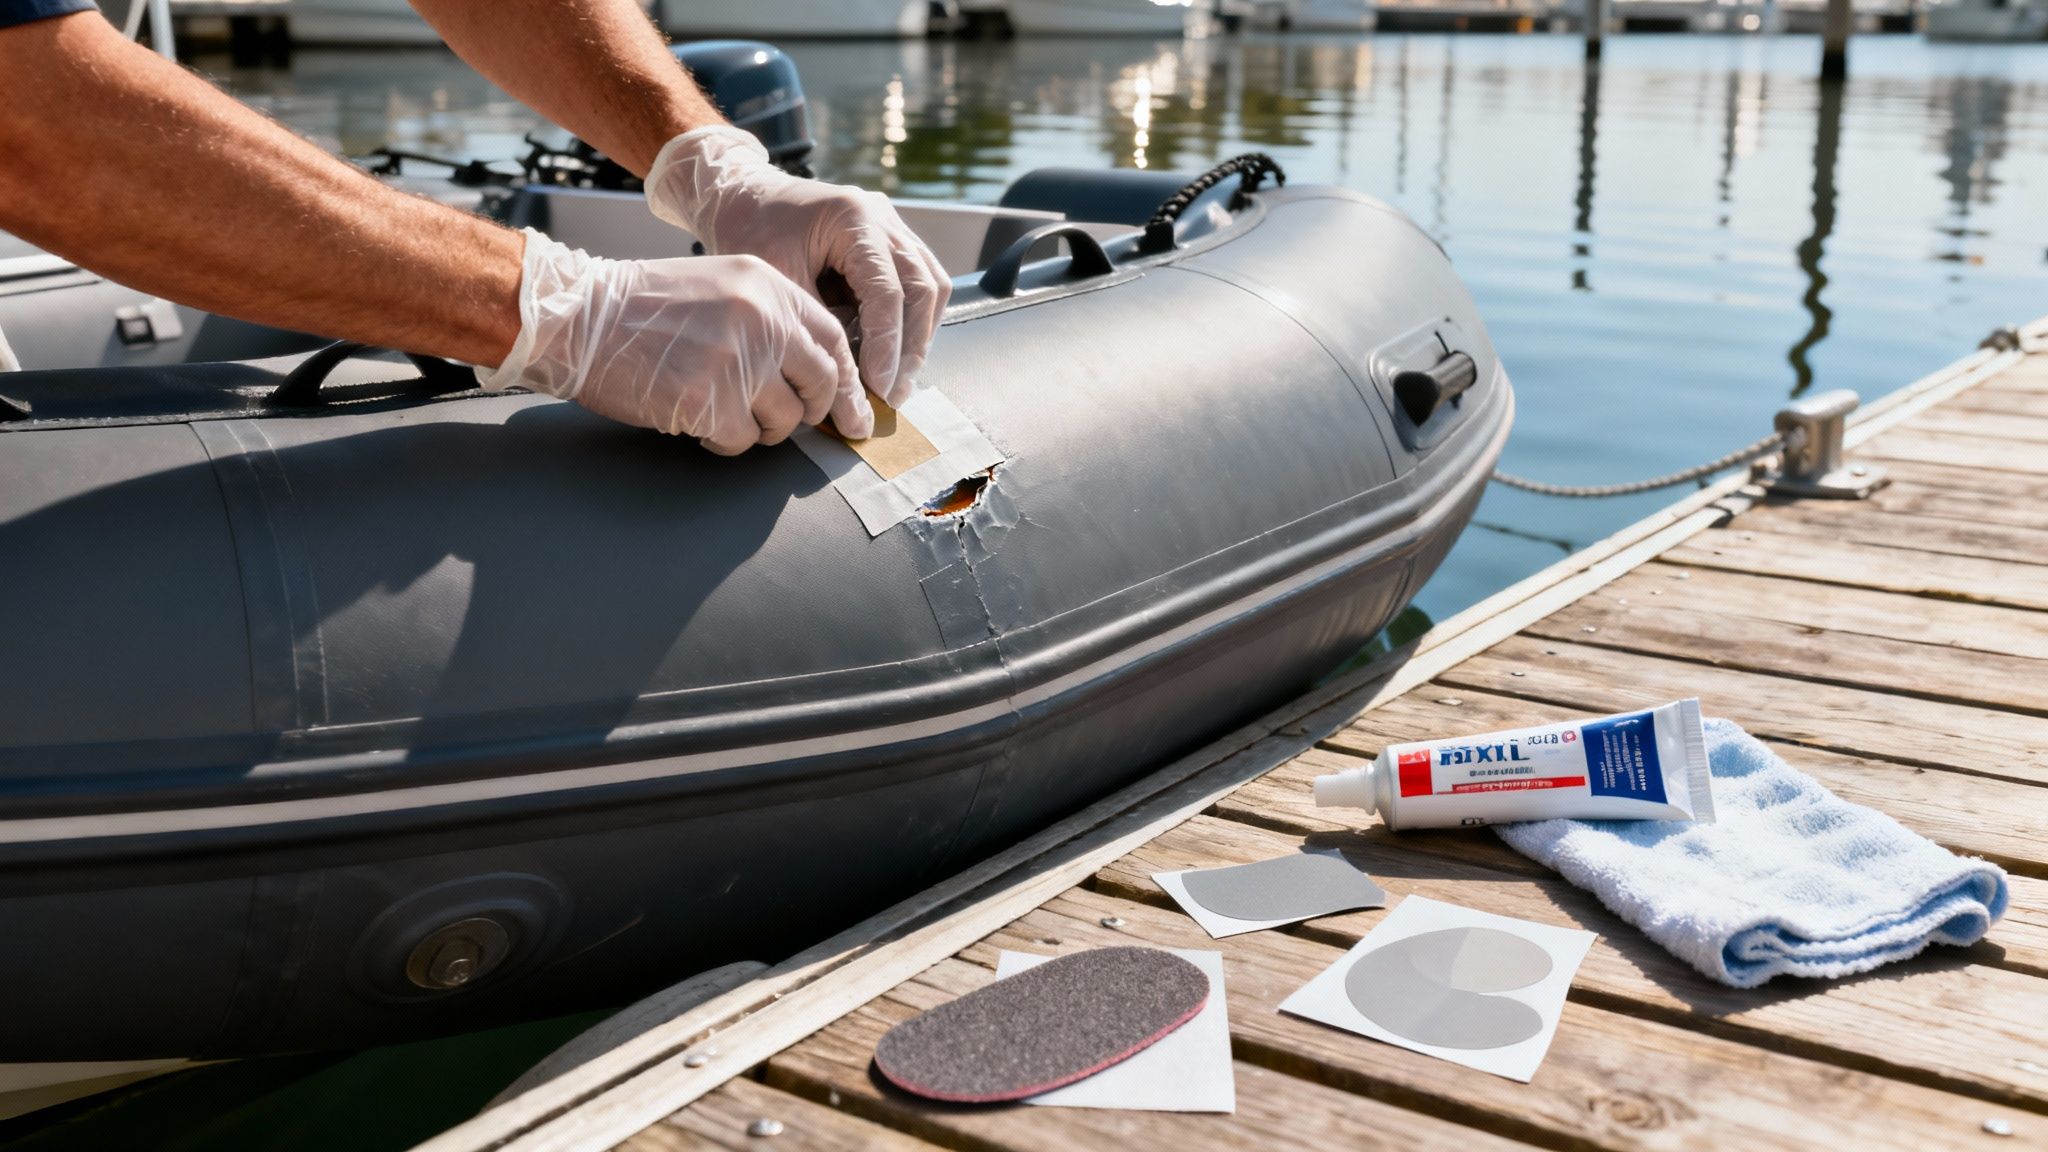
First things first, you need to create the perfect canvas for your patch. This means cleaning and lightly scuffing both the boat's surface and the underside of the patch itself. This prep work is crucial because it ensures the glue can properly bite into the material and form an unbreakable bond.
Start by cutting your patch. I always recommend shaping it into a circle or at least rounding the corners really well. Sharp corners are notorious for catching on things and peeling up over time. Make sure the patch extends at least 5cm beyond the edges of the tear or hole in every direction.
Next, lay the patch over the damaged area exactly where you want it to go. Grab a pencil or a non-permanent marker and carefully trace its outline onto the boat. This line is your roadmap for the next few steps, so take your time.
With your guide marked out, it’s time to get cleaning. You need to thoroughly clean the area inside the traced outline on the boat, plus the side of the patch that will make contact. The right solvent is key here: Methyl Ethyl Ketone (MEK) is the go-to for PVC, while Toluene works best for Hypalon.
Put a bit of solvent on a clean, lint-free cloth and give both surfaces a firm wipe. You're trying to remove every trace of dirt, grime, oils, and old plasticisers that could interfere with the bond.
Let the solvent flash off completely, then it’s time to scuff. Grab some low-grit sandpaper—something around 120-grit is perfect. You're not trying to sand the material away, just lightly abrade the surface to take off that shiny glaze and give the glue something to grip onto. After sanding, give it one final wipe with your solvent cloth to remove any dust.
A quick tip from experience: be precise with that solvent. Only apply it within your marked area. Getting it on the surrounding fabric can cause ugly smudges or discolouration, especially on PVC boats.
To help you get started on any repair, this simple flowchart breaks down how to identify your boat's material first.
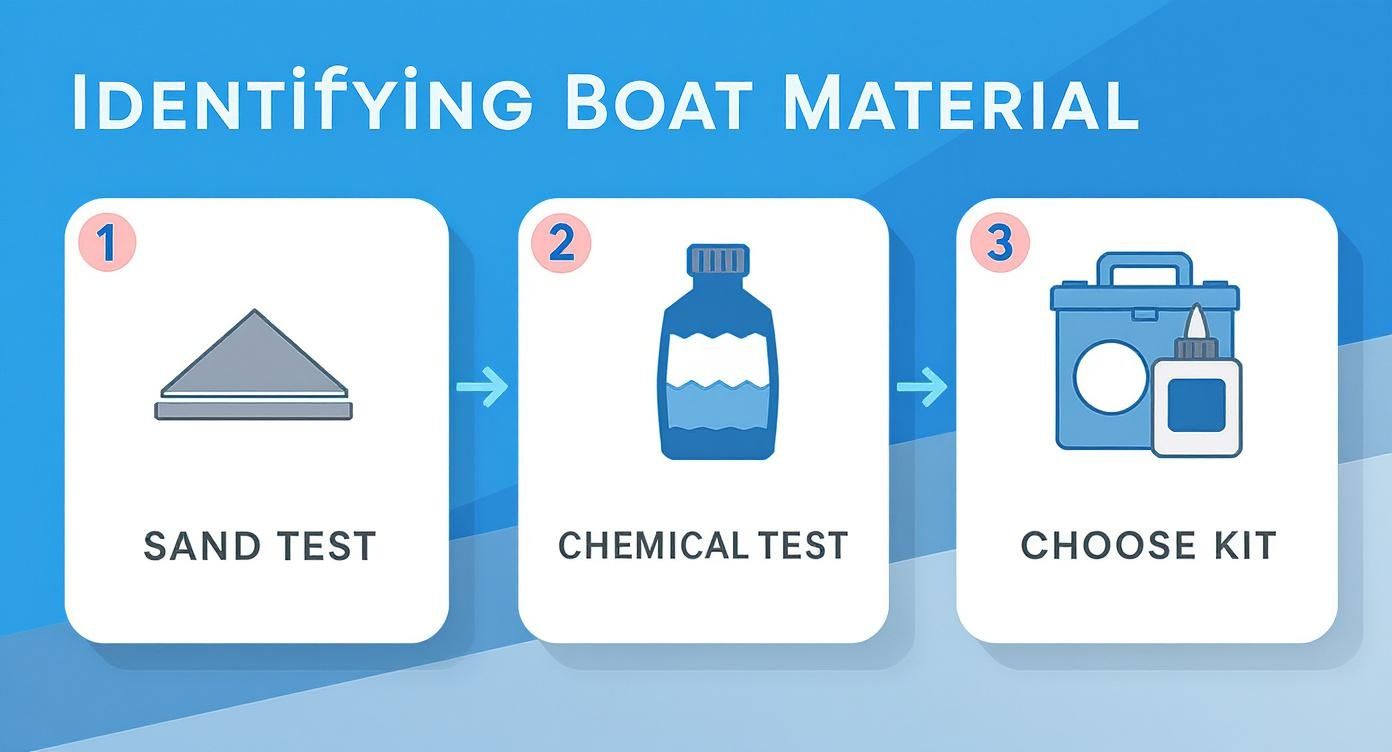
Following this process ensures you have the correct tools for the job, like the proper two-part adhesive from a purpose-built rubber boat repair kit.
Now for the main event: the adhesive. Most professional-grade kits use a two-part glue, which means you'll need to mix a catalyst or hardener with the main adhesive. Follow the manufacturer's instructions to the letter on this—the mixing ratio and time are critical for a strong bond.
Using a small, stiff brush, apply a thin, even layer of the mixed glue to both the scuffed area on the boat and the patch. Let this first coat dry until it's just tacky to a light touch. This usually takes around 10-15 minutes, but it can vary with the temperature and humidity.
Once it’s tacky, apply a second thin coat of adhesive to both surfaces. Wait again, maybe another 5-10 minutes. The sweet spot is when the surfaces feel tacky but don't transfer any glue to your knuckle when you touch them. This is the "open window" you have to get that patch on.
Carefully line up one edge of the patch with your traced guideline and slowly lay it down, working from one side to the other. This technique helps push out any air bubbles that might get trapped underneath. Once the patch is on, grab a seam roller or even the back of a spoon and apply firm, steady pressure. Start from the centre and work your way out to the edges to force out any remaining air and ensure total contact between the two glued surfaces.
For a truly bulletproof repair, you have to let it cure properly. Leave the boat deflated for at least 24 hours before you even think about inflating it. Some heavy-duty adhesives can take up to 48-72 hours to reach maximum strength, so always double-check the instructions. You can find high-quality, material-specific options in our range of inflatable boat repair kits, which have everything you need for a lasting fix.
While a clean puncture is usually a straightforward fix, some leaks are a bit more stubborn. Often, the real culprits are the seams or the inflation valves themselves—issues that require a more careful approach to your rubber boat repair.
A failing seam is more than just a leak; it's a sign of a potential structural weakness that needs addressing. A faulty valve is just as frustrating, causing a slow, constant loss of air that no patch will ever fix.
These repairs might seem a little daunting at first, but with the right technique, you'll restore your boat’s integrity and get back on the water with full confidence.
If your soapy water test shows a tell-tale line of bubbles running right where two pieces of fabric meet, you've got a seam leak. This usually happens when the original adhesive bond weakens over time, often from stress, UV exposure, or just years of good use.
The trick here isn't to just slap a patch over the top. You need to get new adhesive deep into the separated area to create a solid, internal bond.
Start by giving the leaky seam a thorough clean with the right solvent—MEK for PVC or Toluene for Hypalon—to get rid of any grime or old glue residue.
Grab a small tool, like a fine-tipped artist's brush or even the stiff edge of an old credit card, and gently work a thin layer of your two-part adhesive right into the opening. The goal is to force that glue as deep as you can to rebuild the bond from the inside out. Let this first layer sit for about 20 minutes, or until it becomes tacky to the touch.
Now, apply a second layer, again working it right into the seam. As soon as you're done, apply firm, consistent pressure along the entire length of the seam for several minutes. Use a roller or even just your thumbs to press the two sides together as tightly as possible. This ensures the best possible contact for the adhesive to cure properly.
For the final step, put a generous third layer of glue over the exterior of the seam. This creates a tough, external seal that adds an extra layer of protection. Let the whole repair cure for at least 24-48 hours before you even think about inflating the boat. It takes patience, but this multi-layer method creates a permanent fix that makes the seam strong again.
What if the bubbles are coming directly from the centre or the base of an inflation valve? Well, the valve itself is your problem. Before you rush out to buy a new one, try these simple checks first.
If none of that works, it's time for a replacement. This job involves unscrewing the old valve from inside the tube and fitting a new one. It's a pretty straightforward process, but getting the correct replacement part is critical.
You can find high-quality options like these Aerowave inflatable boat valves to ensure you get a perfect fit for a lasting, airtight seal. When installing the new valve, just remember to apply firm, even pressure to create that solid connection you need.
Once you've got the hang of a solid rubber boat repair, you’ll quickly realise the best strategy is to avoid needing those skills in the first place. Think of it this way: proactive care is your best defence. It protects your investment and means you spend more time on the water and less time wrestling with a repair kit.
A simple, consistent maintenance routine is all it takes to head off the most common problems that plague inflatable boats, especially under the harsh Australian sun. It’s about shifting your focus from fixing damage to preventing it altogether.
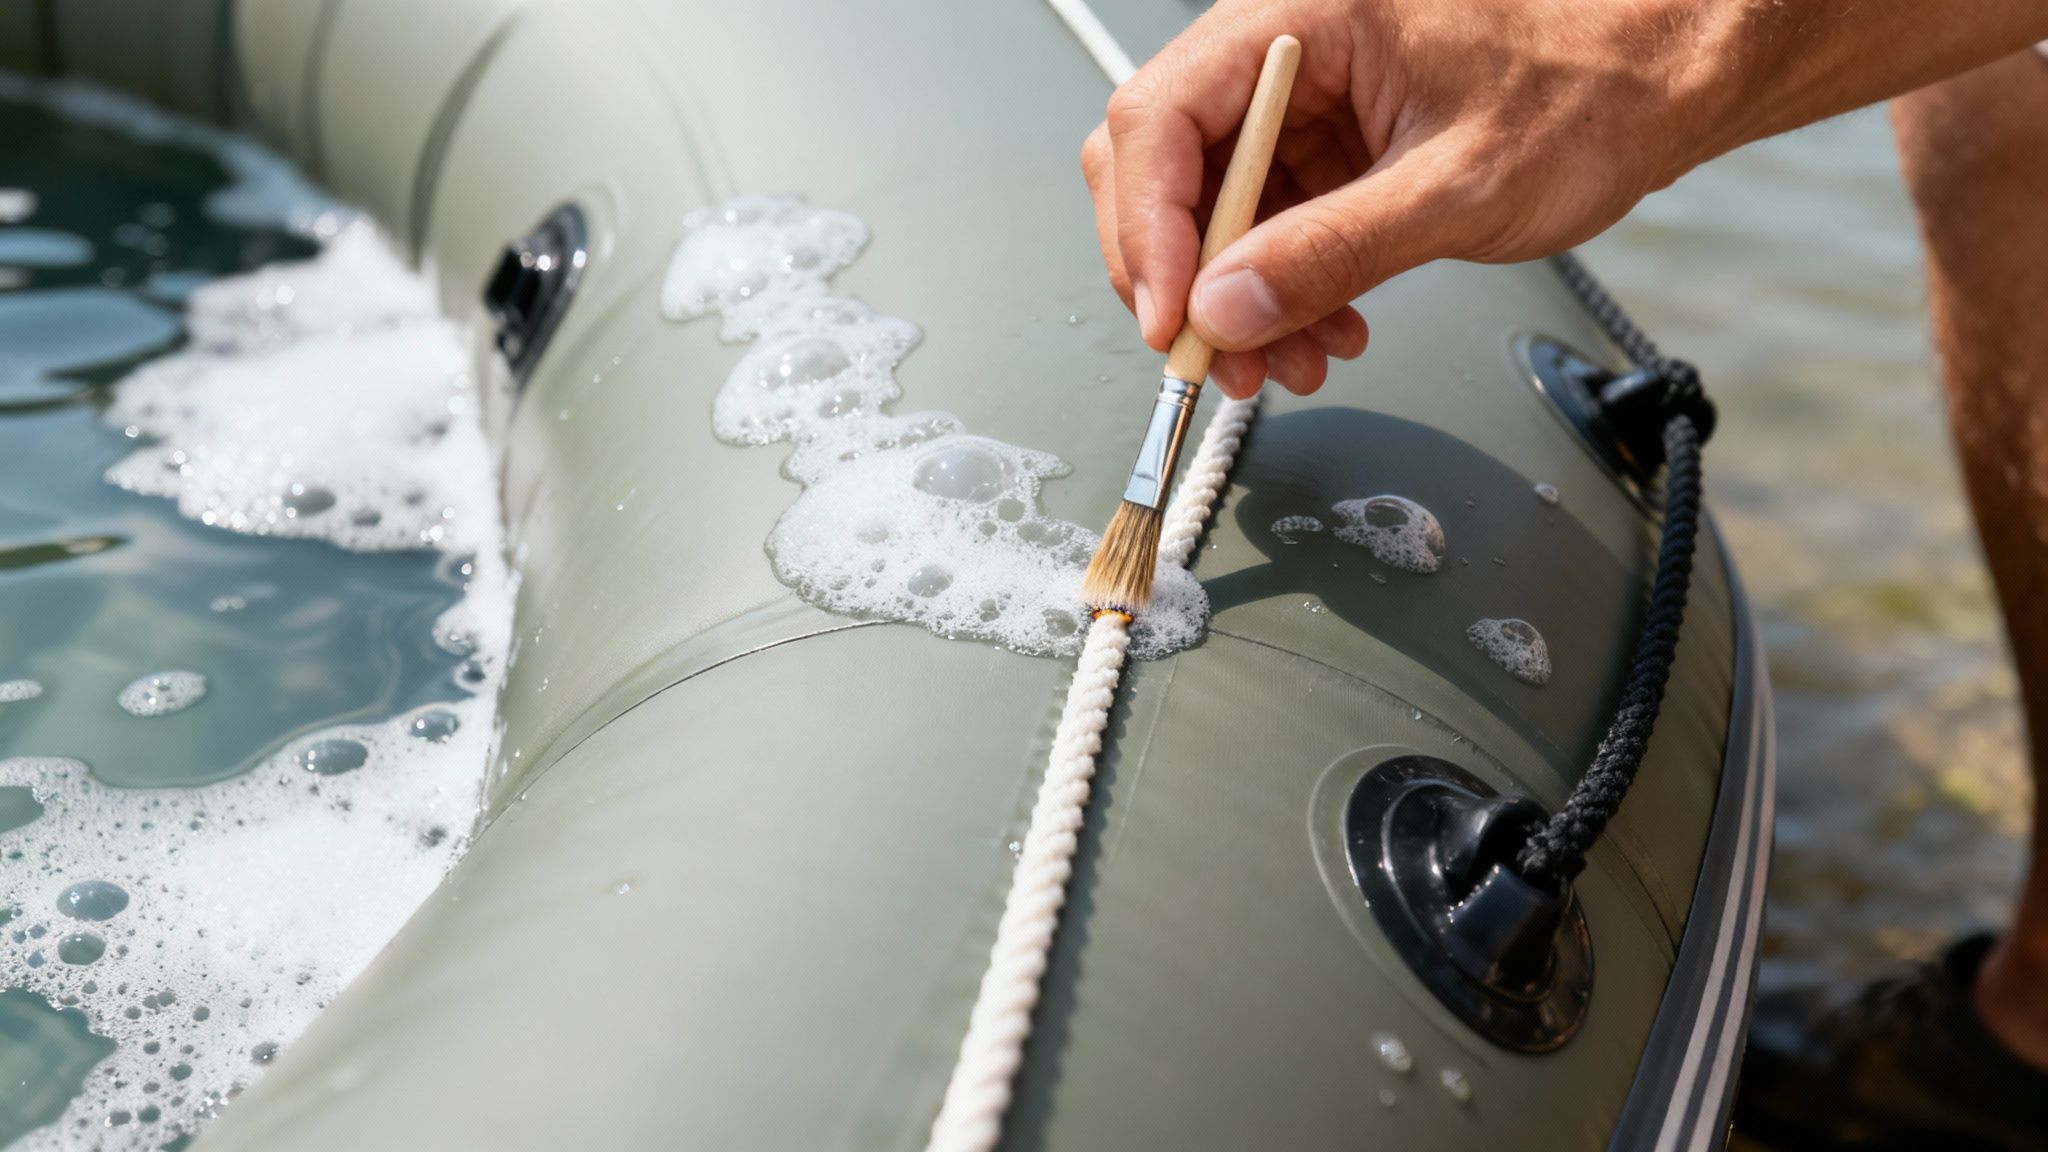
Make it a habit to give your boat a thorough rinse with fresh water after every single trip out, especially after being in saltwater. Salt crystals left behind act like sandpaper, slowly grinding away at the fabric and seams over time.
For a deeper clean, a bit of mild soap and a soft-bristle brush will work wonders on any grime, bird droppings, or scuff marks. Just be sure to steer clear of harsh chemicals like bleach or ammonia—they can weaken the fabric and attack the adhesives holding your seams together.
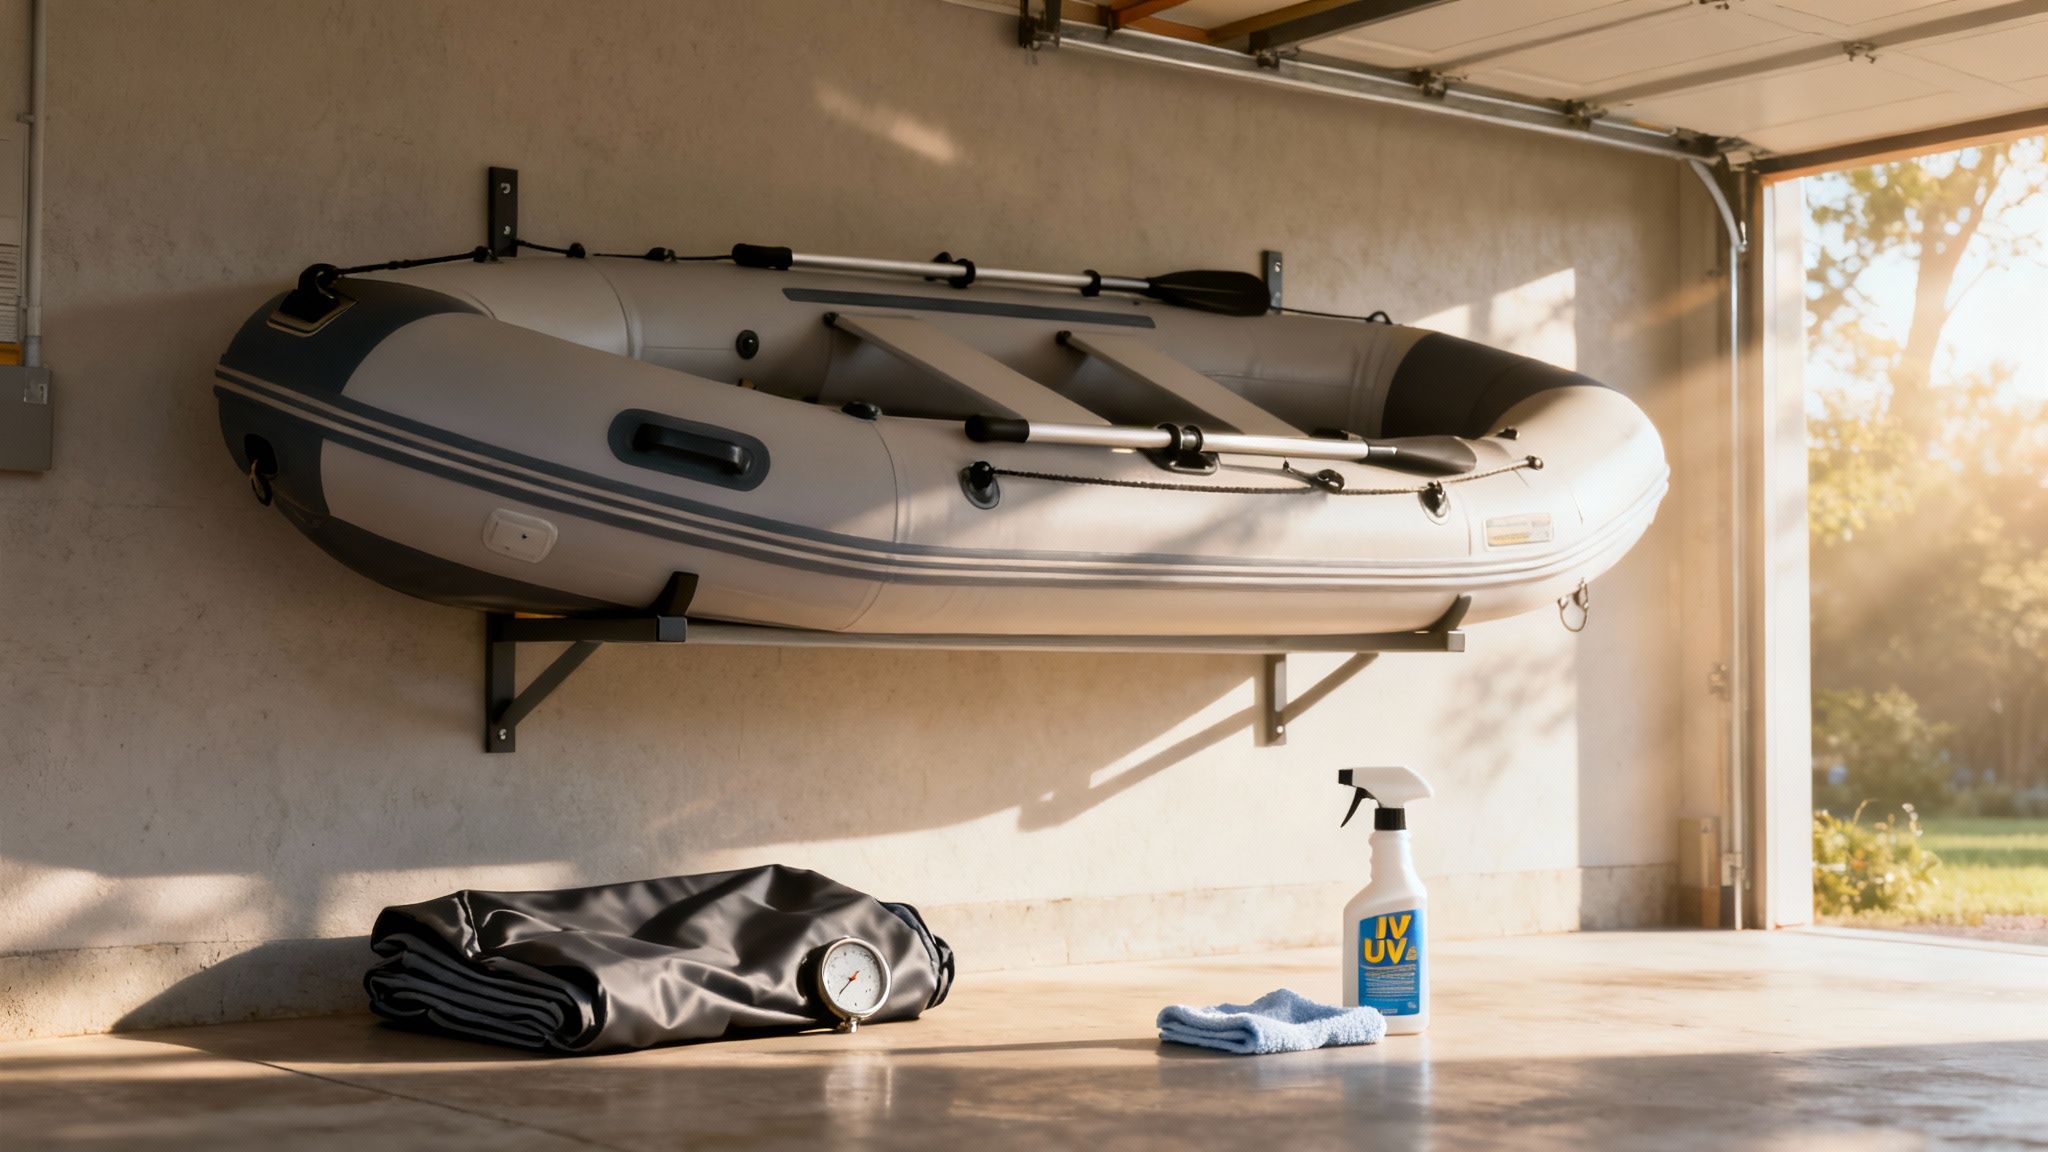
The sun is your inflatable boat's biggest enemy, no question about it. Australia's intense UV radiation can cause both PVC and Hypalon to become brittle, discoloured, and weak after years of exposure. Applying a quality UV protectant spray is one of the single most effective things you can do.
Think of it as sunscreen for your boat. These sprays create a protective barrier that reflects harmful rays, drastically slowing down material degradation. Get into the rhythm of applying it every few months, or more often if your boat is frequently stored in direct sunlight.
A well-maintained boat not only performs better but also holds its value. Regular care is a small price to pay to avoid costly repairs and extend the life of your vessel for many more seasons of fun.
How you store your boat makes a massive difference. If you can, keep it in a cool, dry place out of direct sunlight, like a garage or under a proper boat cover. If you store it partially inflated, it's a good idea to let a little air out to avoid stressing the seams as the air inside expands and contracts with temperature changes.
Correct inflation is also key. Over-inflating your boat, especially on a hot day, puts immense strain on the seams. On the flip side, an under-inflated boat will flex too much in the water, which also stresses the seams and the transom. Always use a pressure gauge and stick to the manufacturer's recommended PSI.
This commitment to maintenance is a core part of the broader marine industry in Australia. In fact, the national boatbuilding and repair services sector is a significant economic contributor, expected to stabilise around $1.4 billion AUD by 2025. This just goes to show how crucial proper repair and maintenance are for keeping vessels safe and operational across the country.
By adopting these simple habits, you’ll catch minor issues long before they become major headaches. To build a complete care routine, check out our comprehensive guide on inflatable boat maintenance made simple. A little effort on land ensures maximum reliability when you’re out on the water.
Even with a solid guide, it’s natural to have a few lingering questions when you’re staring down a puncture or a peeling seam. Getting the right answers is what gives you the confidence to do the job properly and, more importantly, trust that repair when you're miles from shore.
It’s a common scenario. Australia’s marine leisure scene is huge—just look at events like the 2023 Sydney International Boat Show, which pumped a massive $345 million AUD into the economy. That tells you a lot of people are out on the water, and sooner or later, many of them will face their first repair. You can learn more about the growth of the Australian marine industry here.
To help you tackle your fix with complete confidence, we’ve answered some of the most common queries we get from fellow boaties.
A patch done right isn't a temporary fix; it's a permanent one. When you use the correct two-part adhesive, prepare the surface properly, and give the glue its full curing time, you’re creating a chemical bond that’s often even stronger than the original boat fabric.
Don't think of it like a band-aid or a sticker. It’s more like a weld. That patched area should last the entire remaining life of your boat, holding up to sun, salt, and choppy water just like any other part of the hull.
Hands down, the most common stuff-up is grabbing the wrong adhesive for the boat’s material. If you slap PVC glue onto a Hypalon boat (or the other way around), you’re guaranteeing that patch will fail. It will peel off, probably on its first trip out, because the glues are completely chemically incompatible.
The runner-up for the biggest mistake? Rushing the prep work. If you skip the cleaning and scuffing, the adhesive can't get a proper grip. You'll end up with a weak bond and a patch that’s guaranteed to leak.
Plenty of repairs are perfect for a DIY job, but some things are best left to an expert with the right tools and a dedicated workshop. It’s time to call a pro for:
For these kinds of complex, structural repairs, a specialist will ensure the job is done safely and reliably, so you can get back on the water without a worry.
At Easy Inflatables, we’re all about providing top-quality inflatable boats, spare parts, and accessories that get you out on the water with confidence. Please note: Easy Inflatables outsource all warranty repair work to local Inflatable Repair Specialists, we do not do internal repair work. We specialise in sales, spare parts and accessories. While we are the go-to source for everything else you need for your boating adventures, we trust our partners for expert repair services.
Explore our full range of boats and gear at https://easyinflatables.com.au.