
A failing wheel bearing isn’t just an annoying noise; it’s a critical safety issue waiting to become a disaster. If you ignore the warning signs of a worn bearing, you’re risking a catastrophic failure. We’re talking about the wheel potentially detaching from your vehicle at speed, leading to a complete loss of control. This makes a wheel bearing replacement one of the most important maintenance jobs you can tackle.
Think of a wheel bearing as the unsung hero of your vehicle. Tucked away inside the wheel hub, this simple set of steel balls in a metal ring lets your wheels spin freely with almost zero friction. Without them, the massive weight and rotational forces would grind everything to a screeching halt.
But these parts live a tough life. They support the entire weight of your vehicle—plus any cargo—while dealing with constant heat, vibration, and whatever the road throws at them. This is especially true here in Australia, where our driving conditions can be brutal.
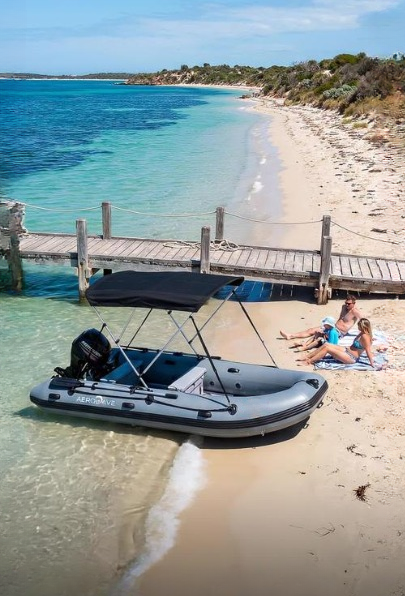
Picture this: you’re towing your inflatable boat for a weekend getaway. Every time you launch at a saltwater ramp, your trailer’s bearings get a dunking. Saltwater is incredibly corrosive, and it doesn’t take long for it to wash out the protective grease, inviting rust and rapid failure. If you’re keen to learn more on this, our detailed guide on small boat trailers in Australia is a fantastic resource.
Or maybe you’re heading on an outback adventure. That fine red dust from unsealed roads is notorious for working its way past the bearing seals. Once inside, it contaminates the grease and acts like liquid sandpaper, destroying the internal components and turning a reliable bearing into a serious liability.
A compromised wheel bearing doesn’t just fail quietly. It can set off a chain reaction of expensive problems, with the excessive heat and vibration damaging the hub, CV joint, and even putting stress on the transmission.
Catching a problem early is the secret to avoiding a roadside breakdown or a shocking repair bill. Your vehicle will almost always give you a heads-up that a wheel bearing replacement is on the horizon. Learning to spot these clues can save you from a genuinely dangerous situation.
Keep an ear out and a feel for these key warning signs:
Ignoring these symptoms is a gamble you don’t want to take. A complete bearing failure can cause the wheel to seize up entirely or, in the worst-case scenario, break away from the axle. This risk is massively amplified when you’re towing, as the stability of your entire rig depends on every single component doing its job properly.
So, you’ve heard that suspicious humming noise or felt a weird vibration, and your gut is telling you it’s a wheel bearing. Before you start ordering parts or booking a mechanic, it’s a smart move to confirm the diagnosis yourself. A few simple, safe tests can give you the confidence to know exactly what’s wrong.
Guesswork can be an expensive game. Misdiagnosing a bad wheel bearing could mean you needlessly replace a perfectly good tyre or chase a phantom suspension issue. These quick checks will help you pinpoint the problem with much greater certainty.
Sometimes it’s hard to describe the exact noise or feeling you’re experiencing. This quick-reference table should help you match what you’re hearing and feeling with the most likely cause.
| Symptom | What It Feels or Sounds Like | Common Cause |
|---|---|---|
| Humming or Growling Noise | A low-pitched drone that gets louder with speed, often changing pitch when you turn. | Worn-out bearing raceways or rollers creating friction. This is the classic, tell-tale sign. |
| Clicking or Snapping | A sharp, rhythmic clicking sound, especially noticeable during slow turns or acceleration. | A damaged outer constant velocity (CV) joint, but can also indicate a cracked bearing cage. |
| Steering Pull or Wander | The vehicle pulls to one side, or the steering feels vague and unresponsive. | Excessive play in the bearing allows the wheel to shift, affecting alignment and control. |
| Vibration or Shudder | A noticeable vibration felt through the steering wheel or floor, often worsening at certain speeds. | The bearing is so worn that the wheel hub is no longer spinning smoothly. |
| Uneven Tyre Wear | The inside or outside edge of one tyre is wearing down much faster than the rest. | The looseness from a bad bearing has thrown off the wheel alignment. |
These symptoms are the most common red flags. If you’re noticing one or more, it’s definitely time to investigate further with the hands-on tests below.
One of the trickiest parts of diagnosis is telling the difference between a failing wheel bearing and simple tyre noise. The swerve test is an old-school mechanic’s trick that works remarkably well. In a safe, open area like an empty car park, get your car up to about 30–40 km/h.
Carefully swerve the vehicle from left to right. When you turn, the vehicle’s weight shifts onto the outer wheels. If the humming noise gets louder when you swerve to the left, the problem is likely in the right-side wheel bearing. If it gets louder when you swerve right, the left-side bearing is the probable culprit. This is because the failing bearing is making more noise under the increased load.
Another critical diagnostic step is the wheel shake test. For this, you absolutely must secure the vehicle safely. Jack up the corner of the car with the suspect bearing and place a sturdy jack stand under the frame for support. Never rely on a jack alone.
With the wheel off the ground, grab the tyre at the 12 and 6 o’clock positions. Try to rock it back and forth. Next, grab it at the 3 and 9 o’clock positions and do the same. Any noticeable clicking, clunking, or excessive play is a direct sign that the wheel bearing is worn and requires a wheel bearing replacement.
If the vehicle experiences significant wheel shakes when braking, this could also be a symptom of a failing bearing or related components like warped rotors.
When performing the wheel shake test, a tiny amount of movement can be normal, but anything more than a few millimetres of play indicates a problem that needs immediate attention.
Finally, use your eyes. A visual inspection can reveal clues that confirm your suspicions. Look around the hub assembly and the inside of the wheel for signs of leaking grease. A failed bearing seal will often sling grease outward as the wheel spins, collecting dirt and grime.
Also, take a good look at your tyre wear. A bad bearing can throw off your alignment, causing accelerated wear on the inner or outer edge of the tyre. These visual signs, combined with the other tests, create a clear picture of the problem.
For boat owners, this is particularly important, as proper trailer maintenance is key to a smooth launch. Check out our ultimate boat trailer loading and launching guide for more tips on keeping your whole setup in top shape.
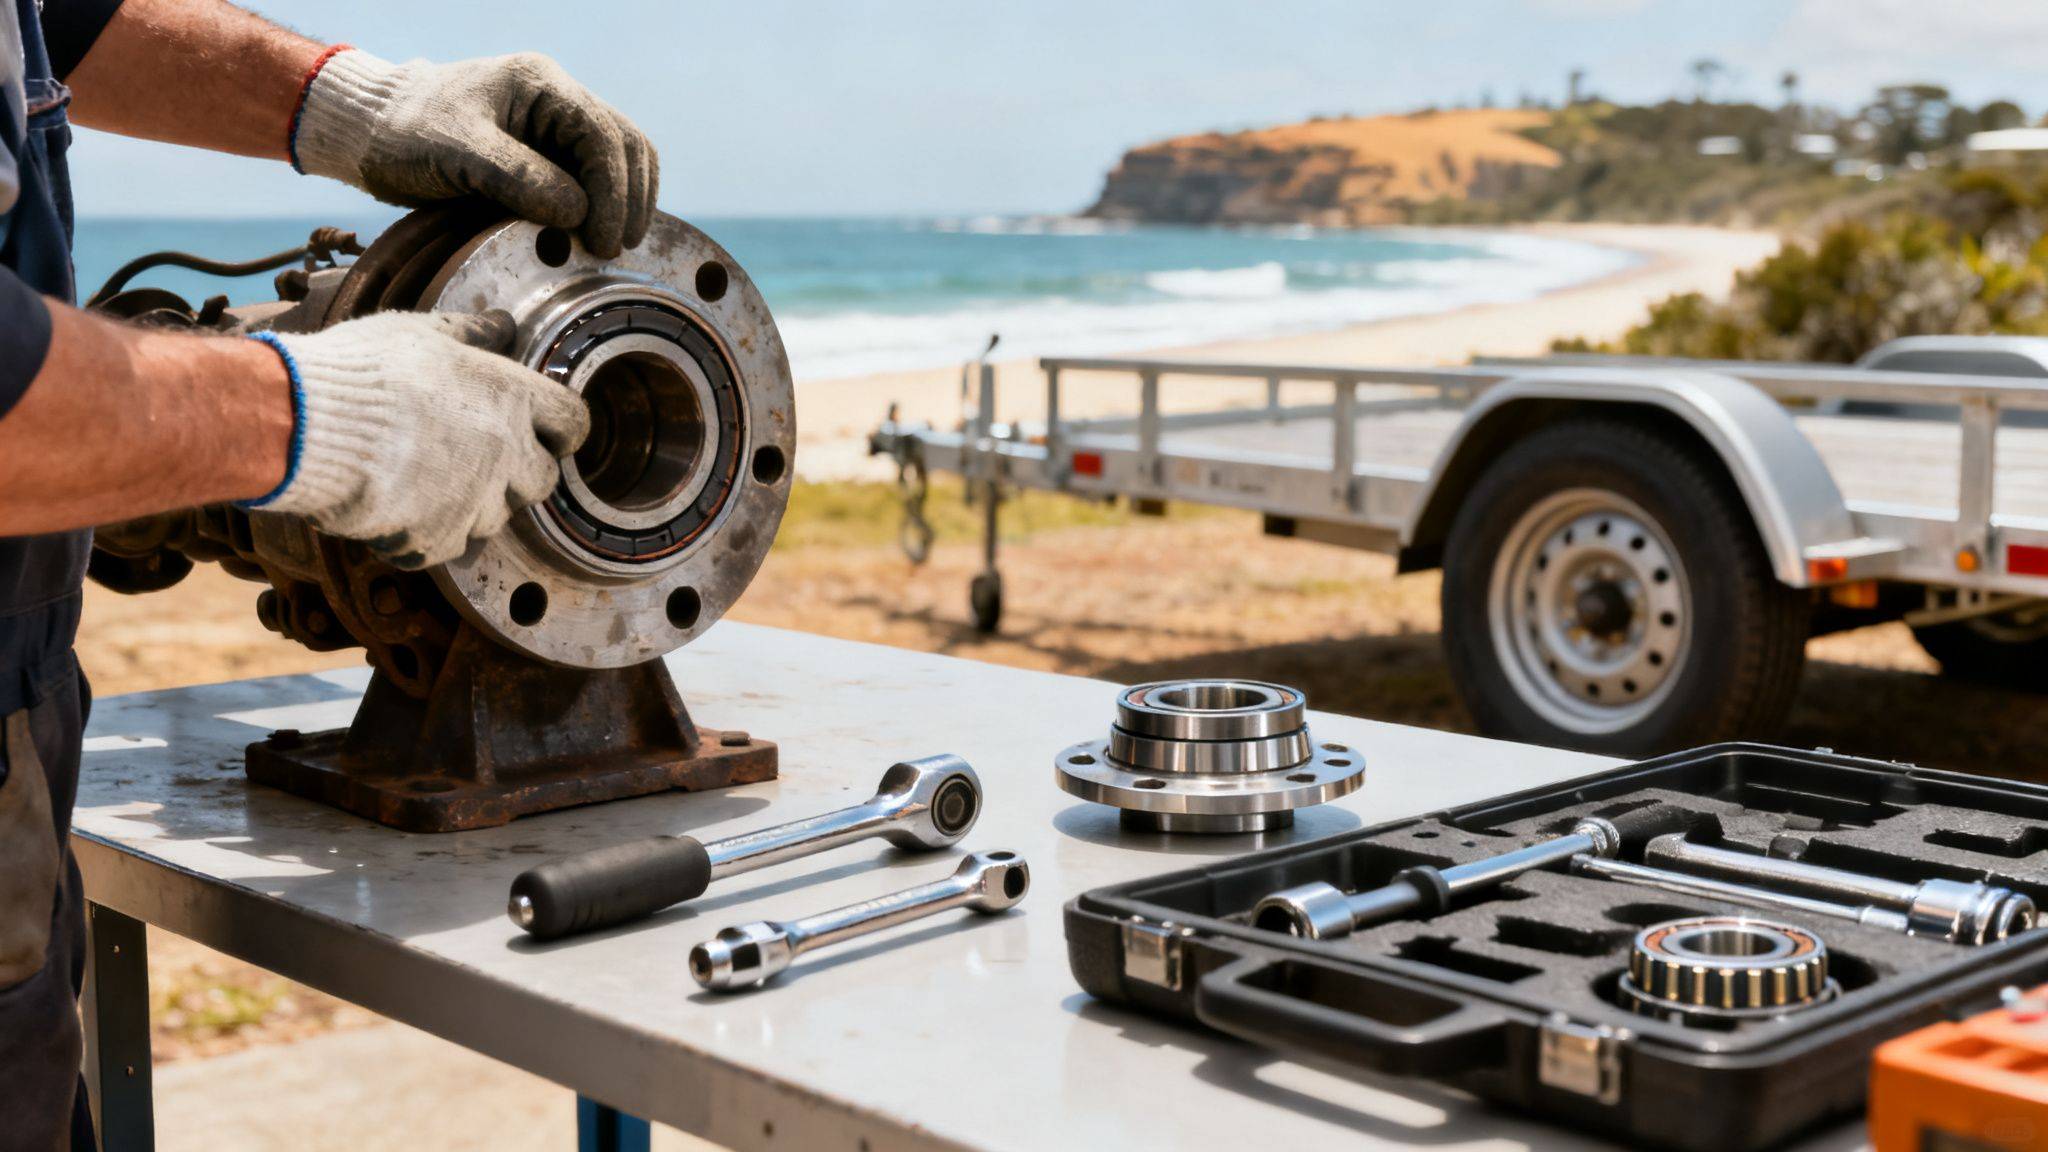
Trying to tackle a wheel bearing replacement without the right gear is a surefire way to turn a weekend project into a week-long headache. Having everything you need laid out before you even lift the car transforms a tough job into a manageable one. It’s the difference between a smooth repair and a nightmare of stripped bolts, damaged parts, and that dreaded mid-job run to the auto parts store.
Proper preparation isn’t just about convenience—it’s a critical safety step. This isn’t a repair where you can afford to cut corners. Before you start, make sure you have all the right components ready to go, like a complete Tie Down Engineering 4 Stud Wheel Hub Kit With 1 In Bearing if you’re working on a trailer with that setup.
This job calls for more than your standard home toolkit. A few specialised tools are absolutely essential to get it done right and, more importantly, safely. Skimping on these can lead to an improper installation, which is every bit as dangerous as the failing bearing you’re trying to replace.
Here’s your non-negotiable list:
While the list above will get you through, a few other tools can make the process a whole lot smoother and drastically reduce the risk of damaging your new parts. If you see yourself doing this kind of work again, they’re a fantastic investment.
A bearing press kit is an absolute game-changer. Sure, you can use a hammer and a socket to tap a new bearing into place, but it’s risky. One misplaced hit can damage the bearing race, leading to premature failure. A press applies even, consistent pressure for a perfect fit every single time.
Having the right tools is only half the battle; you also need the right parts. Your main decision here is between original equipment manufacturer (OEM) parts and high-quality aftermarket alternatives. OEM parts guarantee a perfect fit but you’ll usually pay a premium for them. Good aftermarket bearings from reputable brands can offer the same level of performance for a much friendlier price.
Here in Australia, you can typically expect wheel bearings to last somewhere between 100,000 and 150,000 km. Pushing it much further than that, especially on highways or remote tracks, is asking for trouble.
For those of us who tow, keeping an eye on the trailer’s wheel bearings is just as crucial as the car’s. Whether it’s an Inflatable Catamaran, a camper, or a work trailer, a failed bearing can leave you stranded. If you’re towing an inflatable, ensuring all your gear is in top shape, right down to the trailer wheels, is paramount. You might also find our guide to inflatable boat wheels for effortless launching useful for perfecting your setup.
Alright, this is where the theory ends and the real work begins. Tackling a wheel bearing replacement is a decent-sized DIY job, but with the right approach and a bit of patience, it’s definitely doable in your own garage. We’ll walk through the process, covering the different types of bearings you’ll run into and highlighting the critical safety checks you just can’t afford to skip.
The job changes a little depending on your vehicle’s setup. Most modern cars use a sealed hub assembly, which is a complete bolt-in unit. Older cars and many trailers, on the other hand, use press-in bearings, which need a bit more muscle to get in and out. Figuring out which type you’re dealing with is the very first step.
This flow diagram breaks down the tools you’ll need for the job, separating the absolute must-haves from the gear that just makes life a whole lot easier.
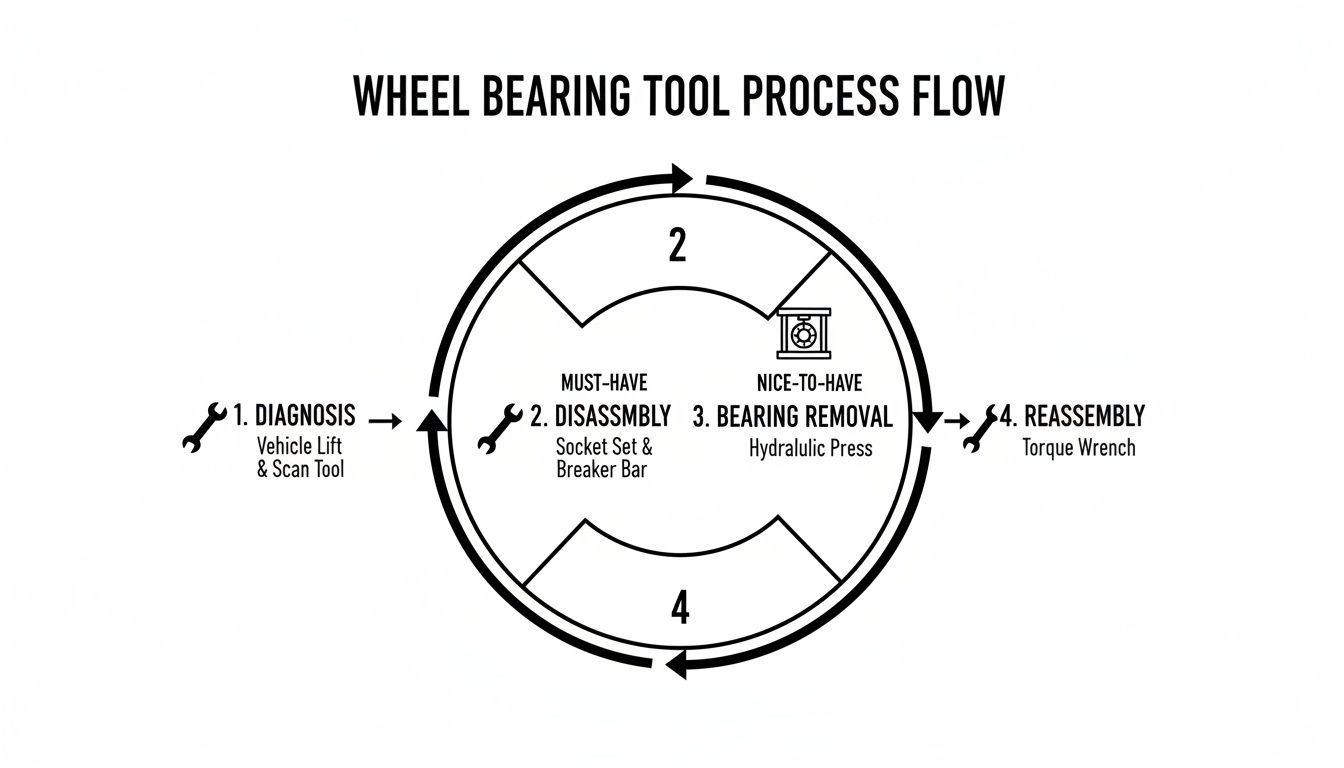
As you can see, a small investment in some specialised pullers or a press can really streamline the whole process, turning a frustrating task into a smooth one.
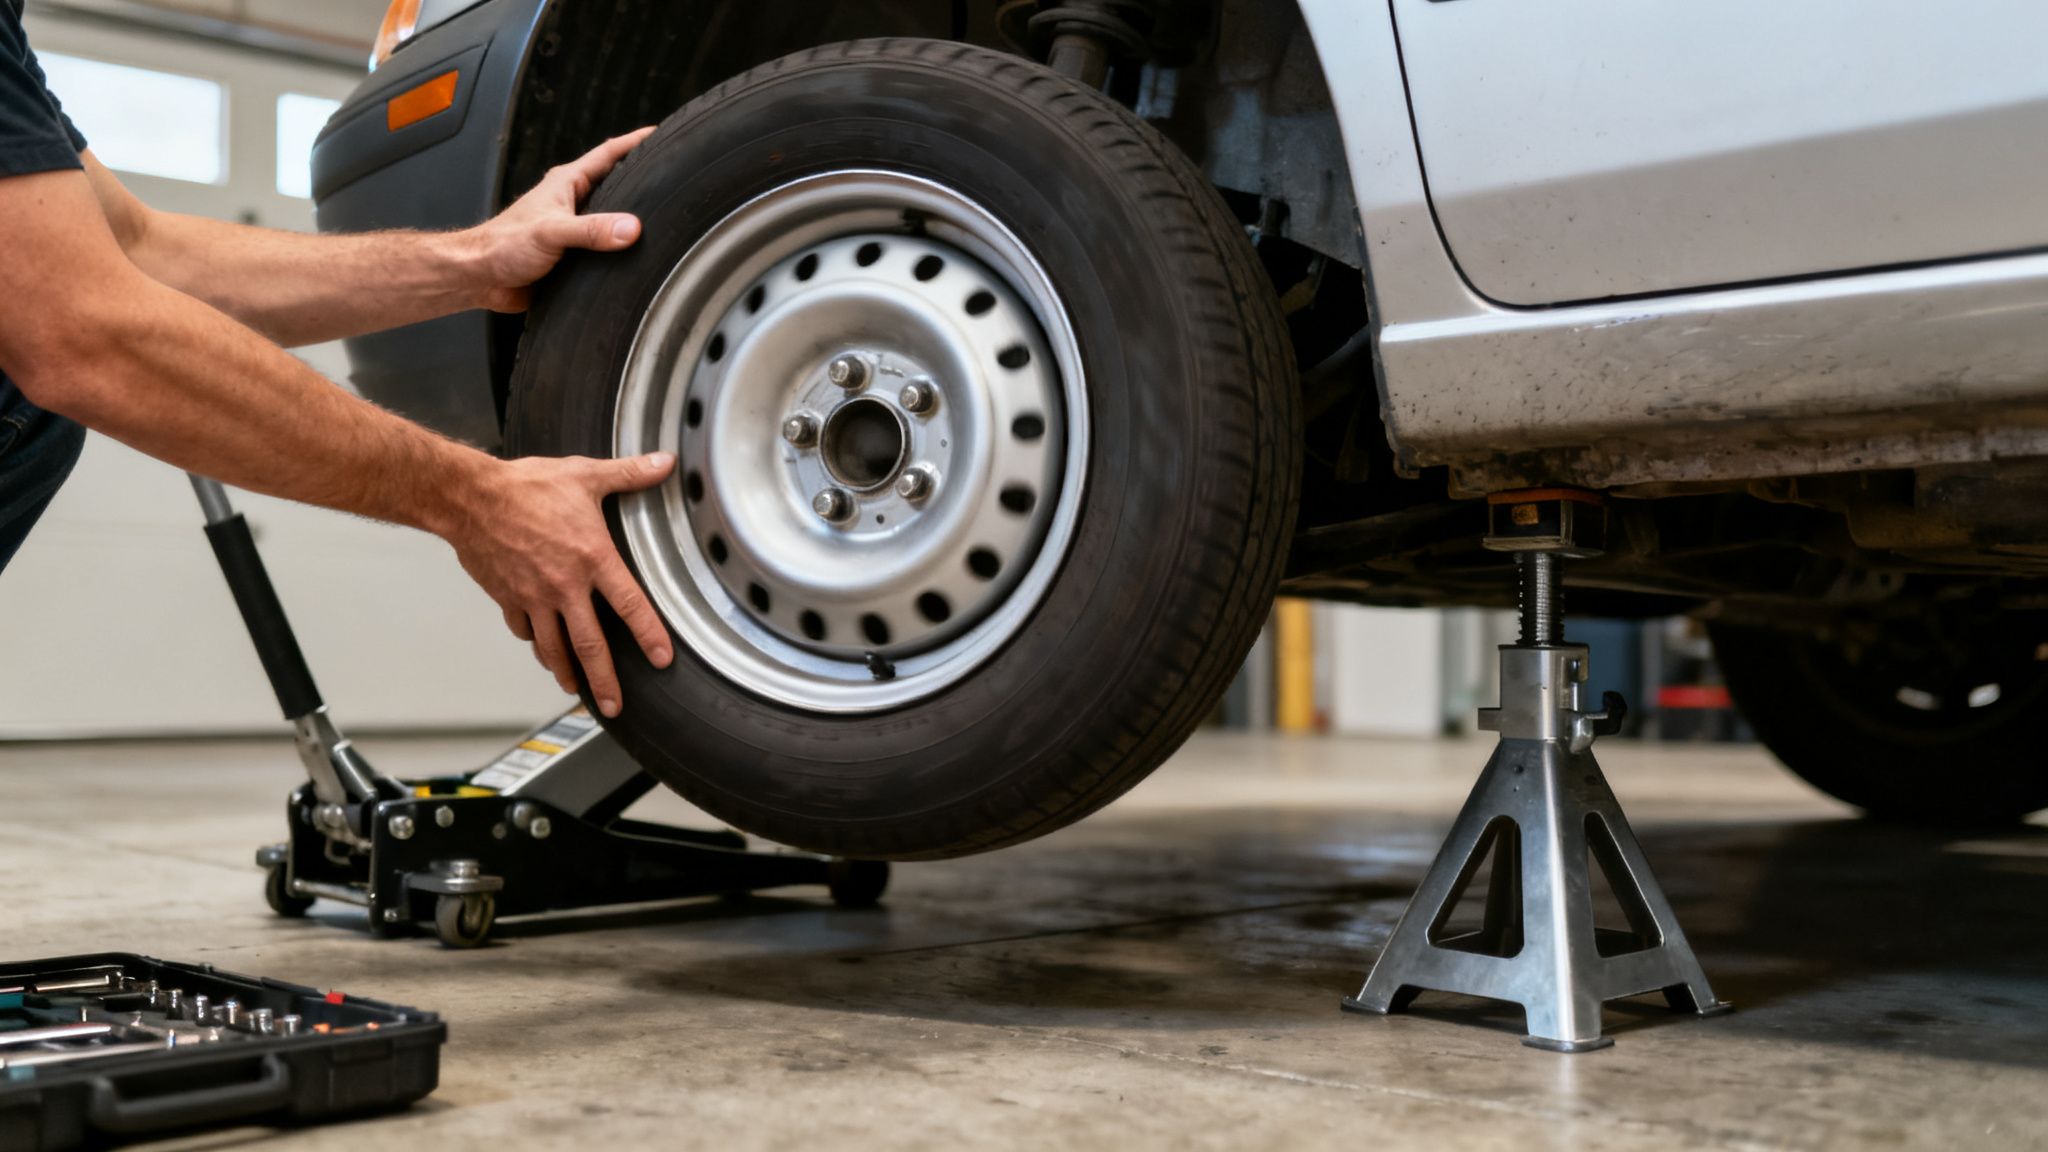
Safety first, always. Before you even think about picking up a wrench, park the vehicle on a flat, level surface, pop on the handbrake, and chock the wheels at the opposite end of the car. Use your breaker bar to crack the lug nuts on the wheel you’re working on before you lift it. Trust me, it’s a lot easier this way.
Once they’re loose, jack up that corner of the vehicle and immediately secure it with a jack stand placed on a solid frame point. Never work under a car supported only by a jack. Now you can spin off the lug nuts and pull the wheel off, which will expose the brake assembly.
Next up are the brake caliper and rotor. The caliper is usually held on by two big bolts at the back. Undo those and carefully slide the caliper off the rotor. Whatever you do, don’t let it hang by its hydraulic hose—that’s a recipe for disaster. Use a hook or a zip tie to hang it securely from the suspension spring. The rotor should then slide right off the hub.
This is where the path splits, depending on what type of bearing you have.
For Bolt-In Hub Assemblies: This is the more straightforward job of the two. The entire assembly is held onto the steering knuckle by three or four large bolts from the back. You’ll also need to remove the big central axle nut. Once those are off, the hub assembly should come out, though it might need a bit of persuasion from a hammer.
For Press-In Bearings: This one requires more effort. After getting the axle nut off, you’ll need to detach the whole steering knuckle from the vehicle. This usually means separating the ball joint and the tie rod end. With the knuckle free and on a workbench, you’ll need a bearing press or a specialised puller kit to force the old bearing out.
Pro Tip: If you’re tackling a press-in bearing without a hydraulic press, stick the new bearing in the freezer for a few hours before you install it. The cold shrinks the metal just enough to make pressing it into the knuckle significantly easier. It’s an old-school trick that really works.
With the old bearing out, give the inside of the steering knuckle a thorough clean. Any leftover grit or rust can cause your new bearing to fail prematurely, and you don’t want to do this job twice.
For a press-in style, use your press or puller kit to carefully and evenly press the new bearing into the knuckle. Make sure it goes in perfectly straight, applying pressure only to the outer race to avoid wrecking the delicate internal components.
For a bolt-in hub, the process is much simpler. Just slide the new hub into place and tighten the mounting bolts to the manufacturer’s specified torque. Reinstall the axle nut, and this is where your torque wrench becomes your best friend. Over or under-tightening the axle nut is one of the biggest causes of early bearing failure.
From here, reassembly is just the reverse of how you took it apart:
Trailer bearings, especially on boat trailers, live a seriously tough life. They’re constantly being dunked in water, which is a death sentence for grease. When you’re servicing them, like on a collapsible boat trailer, it’s vital to be meticulous. To learn more about keeping them in top shape, check out our ultimate guide to collapsible boat trailers for more maintenance tips.
Fortunately, sourcing quality parts is easier than ever. The Australian bearings market, covering everything from cars to trailers, reached USD 1.31 billion and is projected to hit USD 3.56 billion by 2033. This growth ensures parts stay affordable and accessible for all your adventures.
Deciding whether to tackle a wheel bearing replacement yourself or hand the keys to a pro is a classic dilemma for any car owner. The promise of saving a hefty chunk on labour is always tempting, but it’s crucial to look beyond the initial quote. You need to consider the real, total cost in time, tools, and potential headaches.
What seems like a straightforward DIY job can quickly spiral if a bolt seizes or you don’t have exactly the right tool for the job.
The biggest factor on the professional side is, of course, labour. In Australia, workshop labour rates can vary wildly, typically falling somewhere between $100 to over $200 per hour, depending on your location and whether you’re at a dealership or a local independent mechanic. A single wheel bearing replacement often takes a pro one to two hours, so you’re looking at a labour bill of anywhere from $150 to $400 for one corner, plus the cost of the part itself.
On the surface, going the DIY route seems like a clear winner for your wallet. You only pay for the part, which can range from $50 for a simple trailer bearing to over $300 for a high-end hub assembly for a modern car. But those savings start to shrink once you factor in the tools.
If you don’t already have a decent set of tools, you’ll need to gear up. A heavy-duty jack, proper jack stands, a torque wrench, and a long breaker bar are non-negotiable. A specialised bearing press or puller kit, which is pretty much essential for press-in style bearings, can add another $100-$200 to your shopping list. All of a sudden, that “cheap” weekend job isn’t looking quite so cheap, especially if it’s a one-off repair.
Cost isn’t just about dollars and cents. Your time is valuable, too. A job a professional can knock over in two hours might take you an entire weekend, especially if you hit a snag like a stubborn rusted bolt or accidentally damage a delicate ABS sensor. This is where experience really pays off.
The biggest advantage of paying a professional? The warranty. If a new part fails prematurely or the installation wasn’t quite right, the workshop is responsible for making it right. When you do it yourself, any mistakes—like cracking a steering knuckle or damaging the hub during installation—are entirely on you. That can end up costing you far more than you ever hoped to save.
A professional repair simply offers peace of mind. Regular checks are key; addressing wear and tear every 100,000-150,000 km can prevent serious collateral damage to hubs, drive shafts, and brakes, slashing potential repair bills from hundreds into thousands. Given the safety risks on our highways, it’s no surprise that professional installs, with their specialised tools and alignment checks, are the dominant choice. You can learn more about these market trends in Australia to see the bigger picture.
Ultimately, the choice comes down to your confidence, your toolkit, and how much you value your time and sanity. For an experienced home mechanic with a well-stocked garage, a DIY wheel bearing replacement can be a rewarding challenge. For everyone else, the assurance and efficiency of a professional job are well worth the extra cost—much like knowing when to tackle certain inflatable boat repairs yourself versus calling in an expert.
Even the best step-by-step guide can leave you with a few nagging questions. When you’re elbows-deep in a job like replacing a wheel bearing, getting the little details right is what separates a smooth, successful repair from a frustrating weekend do-over. Let’s tackle some of the most common questions that pop up.
Absolutely. It’s one of those non-negotiable rules of thumb in the workshop. Wheel bearings on the same axle are subjected to the exact same forces, mileage, and road conditions. If one has worn out to the point of failure, you can bet its partner on the other side is not far behind.
Swapping them out in pairs is smart preventative maintenance. It guarantees balanced handling, predictable performance, and saves you from tearing everything apart again in a few months.
Think of it like your shoes; you wouldn’t just replace the one with a hole in it. A paired replacement guarantees even wear and stability, which is critical for vehicle safety.
This is a critical step, especially for serviceable bearings like the ones on most trailers. Just smearing a bit of grease on the outside won’t cut it. You need to get that high-temperature wheel bearing grease packed deep down into the rollers.
The old-school method works great: put a generous dollop of grease in the palm of your hand. Then, take the bearing and press the wider edge into the grease, pushing and rotating it. You’ll see the grease work its way through the rollers and start oozing out the other side. That’s when you know it’s properly packed. If you do this often, a bearing packer tool makes the job much cleaner and faster.
This one is incredibly frustrating, but there are usually a few culprits. First, are you certain you diagnosed the correct wheel? Sound can travel in funny ways through a car’s chassis, and it’s easy to get misled. It’s worth double-checking.
Second, the noise might not have been the bearing in the first place. Other suspects include a worn CV joint or even unevenly worn, “cupped” tyres, which can create a rhythmic drone that sounds a lot like a bad bearing.
Finally, take a look at your own work. An axle nut that’s either too loose or too tight can make a brand-new bearing noisy and cause it to fail prematurely. Always, always use a torque wrench and tighten it to the exact manufacturer specifications. No guesswork here.
If you’re looking to compare prices and features of inflatable boats in your area, or want to hire inflatable boats for a family outing in Australia, Easy Inflatables has the options you need. Explore the premium range of durable and lightweight inflatable boats at Easy Inflatables. Find your perfect setup for fishing, family adventures, or tender duties. Visit https://easyinflatables.com.au to see our full collection.