

There’s nothing quite like owning an inflatable boat. It’s your ticket to exploring Australia’s stunning coastlines, hidden rivers, and secluded fishing spots. But with the harsh Aussie sun, saltwater, and regular use, a bit of wear and tear is inevitable. Learning how to handle common inflatable boat repairs yourself is a game-changer—it saves you time, money, and gets you back on the water where you belong.
The real freedom of a boat is having it ready to go for a spontaneous fishing trip or a family day out. Whether you’re weighing up options for a new recreational boat or just hiring one for a weekend away, the appeal is clear. But this convenience comes with the responsibility of keeping your vessel in top shape. From a small puncture from a stray fishing hook to the slow, frustrating hiss of a leaky valve, things happen.
The good news? You don’t need to be a marine mechanic to get a durable, professional-quality fix. This guide is all about giving you the practical know-how to tackle these common repairs with confidence. It all starts with understanding the basics.
We'll walk you through the essential skills every inflatable boat owner should have in their back pocket. We’re talking about:
Proper upkeep isn’t just about safety; it’s about protecting your investment. By learning these skills, you can seriously extend the life of your boat and gear up for countless more adventures. For a deeper dive into proactive care, check out our guide on how inflatable boat maintenance made simple can stop major issues before they start.
Please note: Easy Inflatables outsource all warranty repair work to local Inflatable Repair Specialists, we do not do Internal repair work. We specialise in sales, spare parts and accessories.
Before you can even think about a lasting inflatable boat repair, you need to play detective. A good patch starts with a precise diagnosis, and finding the source of that slow, frustrating air loss is your first and most critical mission. If you rush this part, you’re almost guaranteed a failed repair and a return to that same soft, sagging boat.
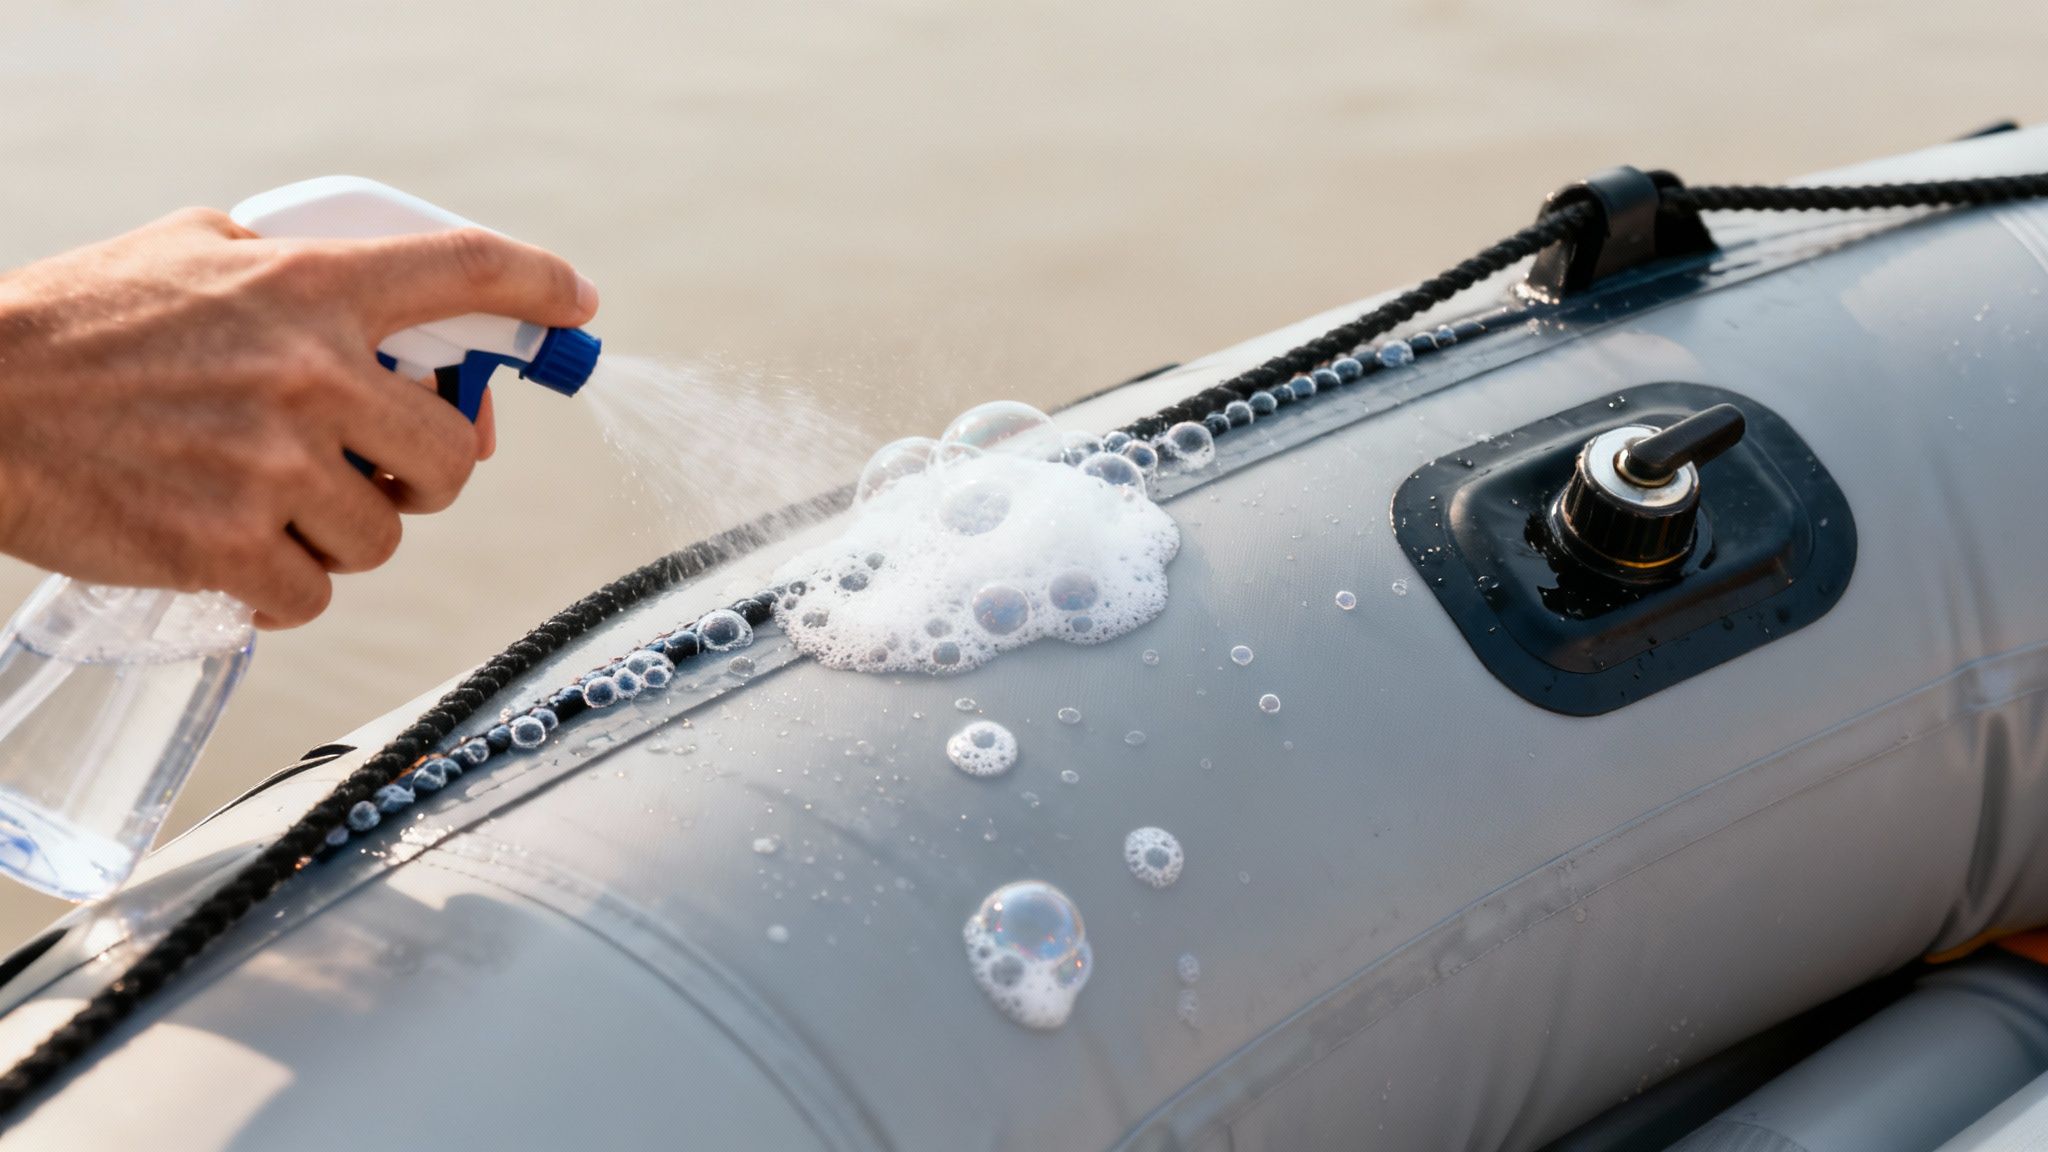
The most common culprit is a slow leak, the kind that leaves your boat noticeably softer after a day or two on the water. This "mystery deflation" can be maddening, but a systematic approach will always uncover the source. Your best tool for the job is surprisingly simple: a spray bottle filled with soapy water.
First things first, fully inflate your boat to its recommended pressure. It's best to work in a shaded spot, out of the wind, as the faint hiss of a tiny leak is nearly impossible to hear outdoors. Once you’re ready, generously spray the soapy water mixture over one section of the boat at a time.
Be methodical and focus your attention on the usual suspects:
Keep a close eye out for small, persistent bubbles forming on the surface. A fast leak will create obvious bubbling, but a pinhole might only produce a tiny stream of foam that grows very slowly. This old-school method is incredibly effective and will pinpoint the exact location of the escaping air.
A common mistake is to only check the main tubes. Don't forget to test the inflatable floor (if you have an air deck) and the keel. A leak in these areas can affect your boat's performance and stability just as much as one in a main chamber.
Once you’ve sprayed and inspected every inch of the boat, mark any leaks you find with a waterproof marker or a small piece of tape. This is crucial—it ensures you won’t lose track of the repair sites when you deflate the boat for patching. This methodical check is a core part of keeping your vessel safe for every trip; for more on this, check out our guide on inflatable boat setup tips for safety.
Finding the leak is only half the battle; you also need to understand what kind of damage you're dealing with. The nature of the damage dictates how complex the repair will be. Are you looking at a straightforward puncture, or is it something more serious like a failing seam?
A puncture is usually a small, clean hole located on a flat area of the boat’s fabric. It could be from a stray fishing hook, a sharp rock on the shore, or from dragging the boat over an abrasive surface. These are generally the easiest types of inflatable boat repairs and can be fixed reliably with a standard patch kit.
A seam leak, on the other hand, is a more complex problem. This happens when the adhesive bonding two pieces of fabric together starts to fail, allowing air to escape along the join. During the soapy water test, it often shows up as a long, narrow line of bubbles rather than a single point. Seam separation can be a sign of age, UV damage, or even a manufacturing defect. While a tiny pinhole on a seam might be patchable, a larger separation often means re-gluing the entire section—a job that demands much more care and precision. Knowing the difference is key to a safe, durable fix.
Once you’ve found the leak, you’ve hit the most critical step for any successful inflatable boat repair: figuring out exactly what your boat is made of. This isn’t just a technical detail—it’s the absolute foundation of a lasting fix.
Using the wrong glue or patch material is a recipe for disaster. It’s like trying to put petrol in a diesel engine; it just won't work, and you'll be dealing with a failed patch every single time. Trust me on this.
Inflatable boats are almost always made from one of two fabrics: PVC (Polyvinyl Chloride) or Hypalon (which is a brand name for a synthetic rubber called CSM). They can look pretty similar at a glance, but chemically, they're worlds apart. The adhesives for PVC create a chemical weld by literally melting the material's surface, while Hypalon adhesives form an incredibly strong surface bond. They are not interchangeable.
You don’t need a science lab to get to the bottom of this. A couple of quick, practical tests are all it takes to know for sure what you're working with.
First, just use your eyes and hands. PVC often has a shinier, more plastic-like look and can feel a bit slick or even sticky, especially in the heat. Hypalon, on the other hand, usually has a more matte, fabric-like finish that feels more like quality rubber. It tends to be a bit more flexible and supple to the touch.
For a definitive answer, it's time for the acetone test. Find a spot on your boat that's out of sight, like under a D-ring or on the inside of the transom. Dab a small amount of acetone or MEK (Methyl Ethyl Ketone) onto a clean rag and give the area a gentle rub.
Pro Tip: Always do any chemical test in a well-ventilated spot and wear your safety gear. And I can't stress this enough—test a very small, hidden area first so you don't accidentally cause any visible damage.
Knowing your boat’s material is about more than just buying the right glue. It tells you a lot about its long-term durability, what it needs to stay in good shape, and how it’ll handle the tough Australian sun and sea. This choice is a huge factor in a boat's price and performance, which is why a proper breakdown of the benefits of Hypalon vs German Mehler PVC material is so valuable for any boat owner.
Here in Australia, getting this right is non-negotiable. Every professional inflatable boat repair depends on this first step, as each fabric has its own specific repair protocol. A mismatch won't just fail—it can compromise the boat's safety down the track.
To make it even clearer, let’s break down the two materials head-to-head.
This quick table cuts through the noise and gives you a simple comparison to help you identify your boat's material and know what to expect from it.
| Feature | PVC (Polymer) | Hypalon (CSM/Neoprene) |
|---|---|---|
| Durability | Good against scrapes, but can get brittle over time with UV exposure. | Excellent resistance to abrasion, chemicals, and extreme temperatures. Incredibly tough. |
| UV Resistance | More likely to get damaged by long-term sun exposure; can degrade and fade. | Highly resistant to UV radiation, making it perfect for tropical climates like ours in Australia. |
| Repair Process | Repairs are done by solvent-welding a patch on. It’s a simpler process but needs the right solvent. | Repairs involve a contact cement process. It's more hands-on, requiring sanding and multiple glue coats. |
| Seams | Usually thermo-welded by a machine, creating very strong and reliable seams. | Seams are hand-glued, which can be a point of failure after many years if not done perfectly. |
| Cost | Generally more affordable, making it a popular choice for recreational boats. | A more expensive material, often found on high-end RIBs, commercial boats, and tenders. |
By taking just a few minutes to get this right, you guarantee you're walking out with the correct repair kit. This simple step is the difference between a quick fix that fails next weekend and a permanent, reliable inflatable boat repair that gives you total peace of mind out on the water.
Alright, you’ve found the leak and you know what your boat is made of. Now for the hands-on part. This is where a bit of patience and the right technique will give you a professional-quality inflatable boat repair that lets you get back on the water with total confidence. A solid patch isn’t just about slapping on some glue; it’s a careful process that creates a permanent, airtight bond.
The single most important step for a good patch is preparation. Rushing this stage is the number one reason I see repairs fail, so take your time and do it right. The aim is to create a perfectly clean, slightly roughed-up surface that the adhesive can really grab onto.
First things first, completely deflate the chamber you're working on. Lay the damaged area flat on a clean, stable surface. Now, grab the right solvent for your boat’s material—that’s MEK for PVC or Toluene for Hypalon—and give the area around the puncture a thorough clean. This step is crucial for removing any dirt, oils, or factory coatings that will stop the adhesive from working properly.
After the solvent has flashed off, give the area a light scuff with fine-grit sandpaper. You're not trying to sand it down, just creating a slightly abrasive texture for the glue to bite into. Once you’re done, wipe it down one last time with your solvent to get rid of any dust.
Next up is the patch itself. Here's a pro tip that makes a huge difference: always cut your patch with rounded corners. A square patch has sharp corners that can easily catch on something and start to peel up over time. An oval or circular shape spreads the stress out evenly and is far less likely to lift.
Make sure the patch is big enough to extend at least 5cm beyond the edges of the tear in every direction. This gives you plenty of surface area for the adhesive to form a strong, reliable seal.
Applying the adhesive is a two-part process that requires a little patience.
Once that second coat is ready, it's go time. Carefully line up the patch over the damaged area, starting from one edge and smoothly pressing it down to avoid trapping any air bubbles underneath.
Use a seam roller or even the back of a spoon to apply firm, even pressure across the entire patch. Always work from the centre outwards to push out any trapped air. This is absolutely critical for getting a perfect, permanent bond.
With the patch in place, the final step is letting it cure. Pop a flat, heavy object (like a sandbag or a stack of books with a towel underneath) over the repair for at least 24 hours. This ensures constant pressure while the adhesive works its magic and creates a full chemical bond.
For a simple puncture, a well-applied external patch is all you need. But for a long tear or gash—anything longer than a few centimetres—you'll need a much stronger solution to restore the boat's structural integrity. This is where an internal and external patch comes in.
This technique involves feeding a larger patch through the tear itself, gluing it to the inside of the tube, and then applying an external patch over the top as usual. It's a more advanced repair that effectively sandwiches the tear between two layers of fabric, creating an incredibly strong fix. It's more involved, but it's the only safe way to handle significant damage.
Having DIY repair materials on hand gives boat owners in Australia the freedom to manage these fixes themselves, which is a big part of our boating culture. Knowing you can get the right fabrics and adhesives is crucial for anyone enjoying our incredible waterways.
Before you can start any repair, though, you need to know your boat's material. This infographic breaks down the simple steps to figure out if you're working with PVC or Hypalon.
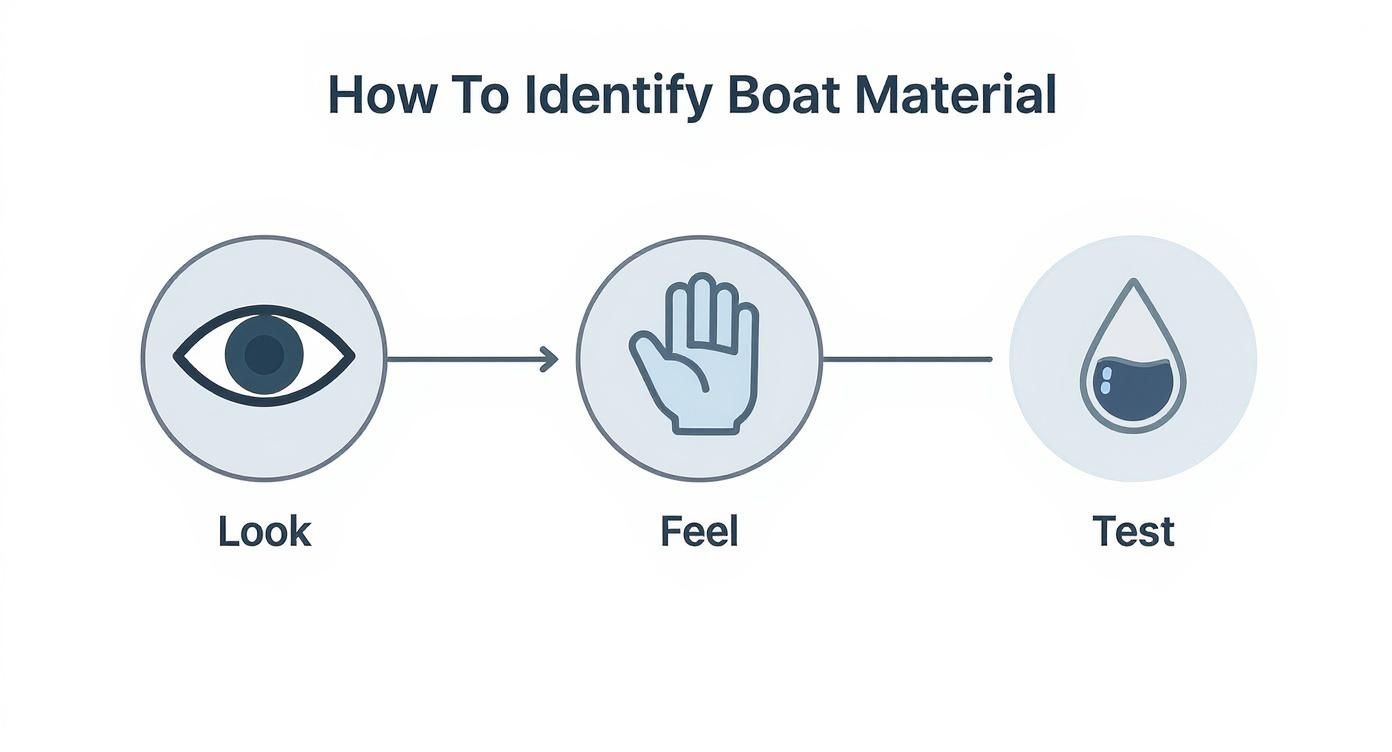
As you can see, a combination of looking, feeling, and a quick solvent test will give you a definite answer. This ensures you buy the correct adhesive and patch material for the job. Making sure you have the right tools from the start is half the battle; you can find the appropriate inflatable boat repair kit for either PVC or Hypalon to make sure you're ready for anything.
While knowing how to do a solid inflatable boat repair is a great skill to have, the real goal is to avoid needing one in the first place. Proactive maintenance is the secret to a long-lasting, reliable boat that's always ready for your next trip.
A few simple habits after each outing can make a massive difference, stopping the slow wear and tear that leads to leaks and bigger problems down the track. Think of it as protecting your investment in future adventures. This is especially true here in Australia, where the intense sun and saltwater can be incredibly harsh on marine fabrics.
Your first line of defence is a consistent routine. Make a habit of running through these simple but crucial steps after every single trip.
First up, a thorough freshwater rinse. Salt is corrosive and, if left to dry on your boat, will slowly weaken the fabric and attack the adhesives in the seams. A complete rinse with fresh water, both inside and out, is non-negotiable. I always pay extra attention to the valves and transom where salt loves to hide.
Next, you have to dry it properly. Putting a boat away while it's still damp is just asking for mould and mildew. Not only does it look and smell terrible, but it can permanently stain and damage the fabric. After rinsing, wipe the boat down with a soft towel and let it air dry completely in a shaded spot before deflating and packing it away.
Getting the air pressure right isn't just about how the boat performs on the water; it's a core part of preventive care. Both under-inflation and over-inflation create unnecessary stress on the boat's structure, leading directly to the most common types of inflatable boat repairs.
An under-inflated boat flexes way too much during use. This constant movement puts a huge strain on the seams, causing them to stretch and weaken over time. Eventually, this leads to seam separation and those frustrating slow leaks that are a nightmare to find.
On the other hand, over-inflation is just as dangerous, especially in the Aussie heat. As the air inside the tubes heats up under the sun, it expands, dramatically increasing the pressure. This can strain the fabric to its breaking point and put immense pressure on seams and valves.
A great rule of thumb I always follow is to inflate the boat to about 90% of its recommended pressure in the cool of the morning. As the day heats up, the air will expand and bring it to the perfect operational pressure without risking damage.
In fact, industry data shows that around 70% of reported inflatable boat repairs involve seam failures or valve leaks—many of which are completely preventable with proper inflation management and regular care.
How you store your boat between adventures plays a massive part in its lifespan. Long-term exposure to the elements, pests, and improper folding can cause damage that you just can't fix.
UV Protection is Key: The sun's UV rays are the number one enemy of inflatable boat fabrics, causing them to become brittle and faded. If you have to store your boat outdoors, using high-quality, UV-resistant inflatable boat covers is an absolute must to shield it from sun damage.
Avoid Pests and Creases: When storing for longer periods, find a cool, dry place like a garage or shed, well away from rodents that might fancy a chew. If you deflate it, make sure it’s bone dry and fold it loosely to prevent sharp creases from weakening the fabric over time.
Even with the best prep work, you’re bound to run into questions or unique situations during a repair. We get it. Here are some of the most common queries we hear from boat owners, with quick, clear answers to help you navigate those tricky spots and get your DIY inflatable boat repairs done with confidence.
This is where patience really pays off. A lasting bond depends entirely on giving the adhesive enough time to cure. Most two-part marine glues need a minimum of 24 to 48 hours in a dry, stable environment to set properly. Rushing this step is probably the biggest mistake you can make.
For maximum strength, especially if you've patched a critical seam or a large hole, we strongly recommend waiting up to 7 days. This gives the adhesive time to achieve its full chemical bond before you inflate the boat to full pressure and get back on the water.
Think of it like this: the glue might feel dry to the touch in a few hours, but the chemical reaction creating its incredible strength is still happening at a microscopic level. Hitting it with air pressure too early will almost certainly cause the patch to fail.
A leaking seam is a different beast altogether compared to a simple puncture. If it's just a tiny pinhole leak right on the seam, a carefully applied external patch might do the trick for a while.
However, seam separation often points to a wider adhesive failure happening underneath the surface. A proper fix might mean re-gluing a significant section of the seam, which demands precision and a good grasp of the process. If you're not completely confident in your ability to clean, prep, and re-bond a large area, this is one of those times it’s wise to call in a professional. A failed seam repair can quickly become a major safety risk out on the water.
As we specialise in sales and accessories, this is an area where we recommend consulting a local specialist for internal repair work, as Easy Inflatables outsources all warranty repairs.
Absolutely not. You should never apply a new patch over an old, failing one. The old patch and every last bit of its adhesive residue must be completely removed for your new repair to have any chance of holding.
A heat gun on a low setting can help soften the old glue, letting you carefully peel the patch off with a blunt scraper. Once the patch is off, the real work begins. You'll need to thoroughly clean the area with the right solvent (MEK for PVC, Toluene for Hypalon) and sand it lightly to create a fresh, properly prepped surface for the new adhesive. A clean base is the only way to guarantee your new inflatable boat repair will be permanent.
Proper storage is the best preventive maintenance you can do. The goal is simple: protect your boat from its two biggest enemies—UV rays and moisture.
Following these simple rules will dramatically extend the life of your vessel. That means less time spent on repairs and more time enjoying Australia's incredible waterways.
At Easy Inflatables, we specialise in providing high-quality boats, spare parts, and the accessories you need to get the most out of your time on the water. While we outsource warranty repairs to local specialists, we're here to empower you with the knowledge and gear for your own maintenance. Explore our full range of boats and accessories today at https://easyinflatables.com.au.