
An outboard fuel line is the lifeline between your fuel tank and your outboard motor. Think of it as the engine’s artery, delivering the petrol it needs to get you moving. A high-quality, properly installed line is your ticket to a steady flow of fuel and reliable performance every time you hit the water in Australia.
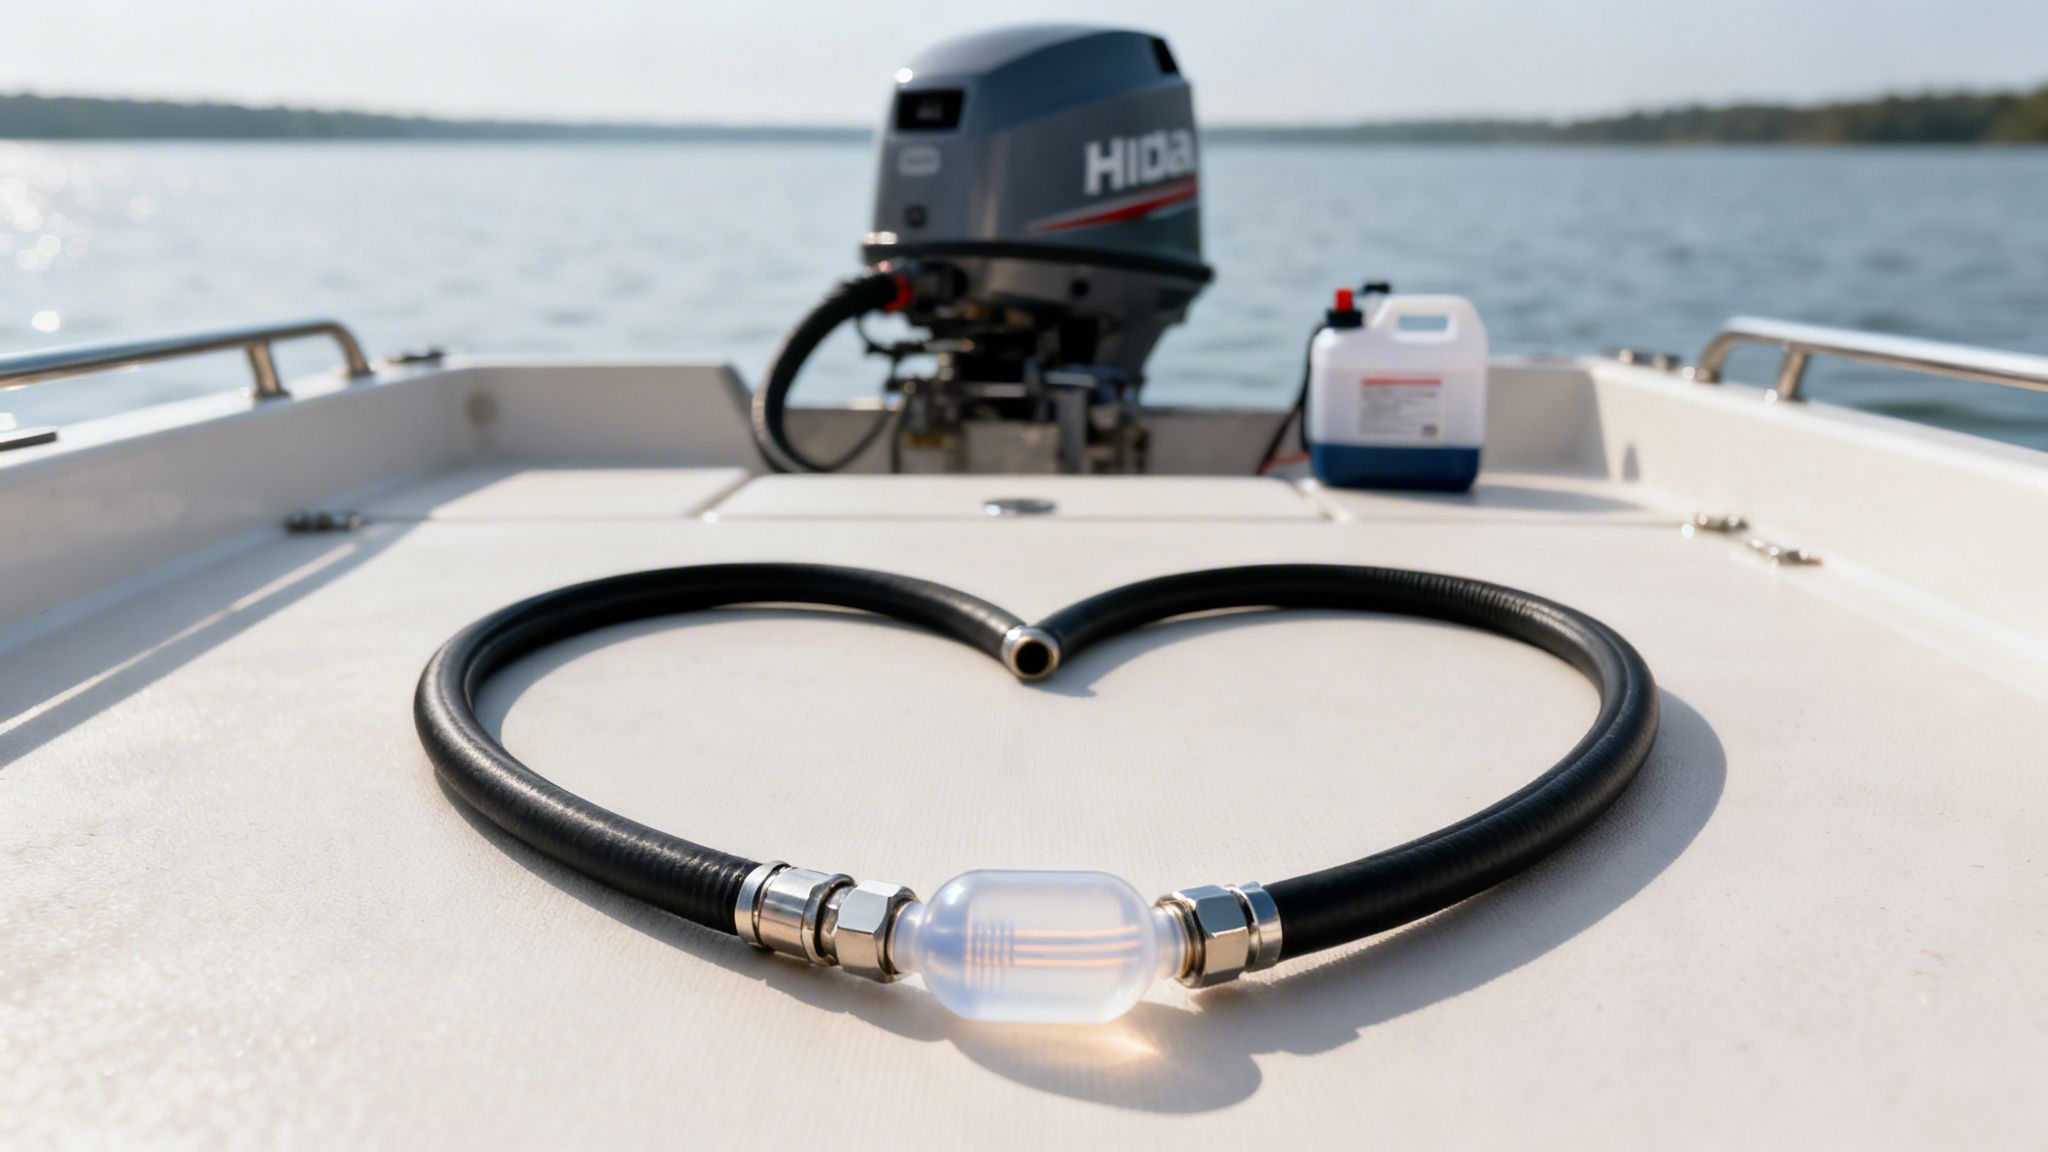
It’s easy to overlook something as simple as a fuel line, but this humble part is absolutely essential for a safe and fun day out. A dodgy or old line can lead to an engine that sputters, stalls, or just gives up completely—usually when you’re furthest from the shore.
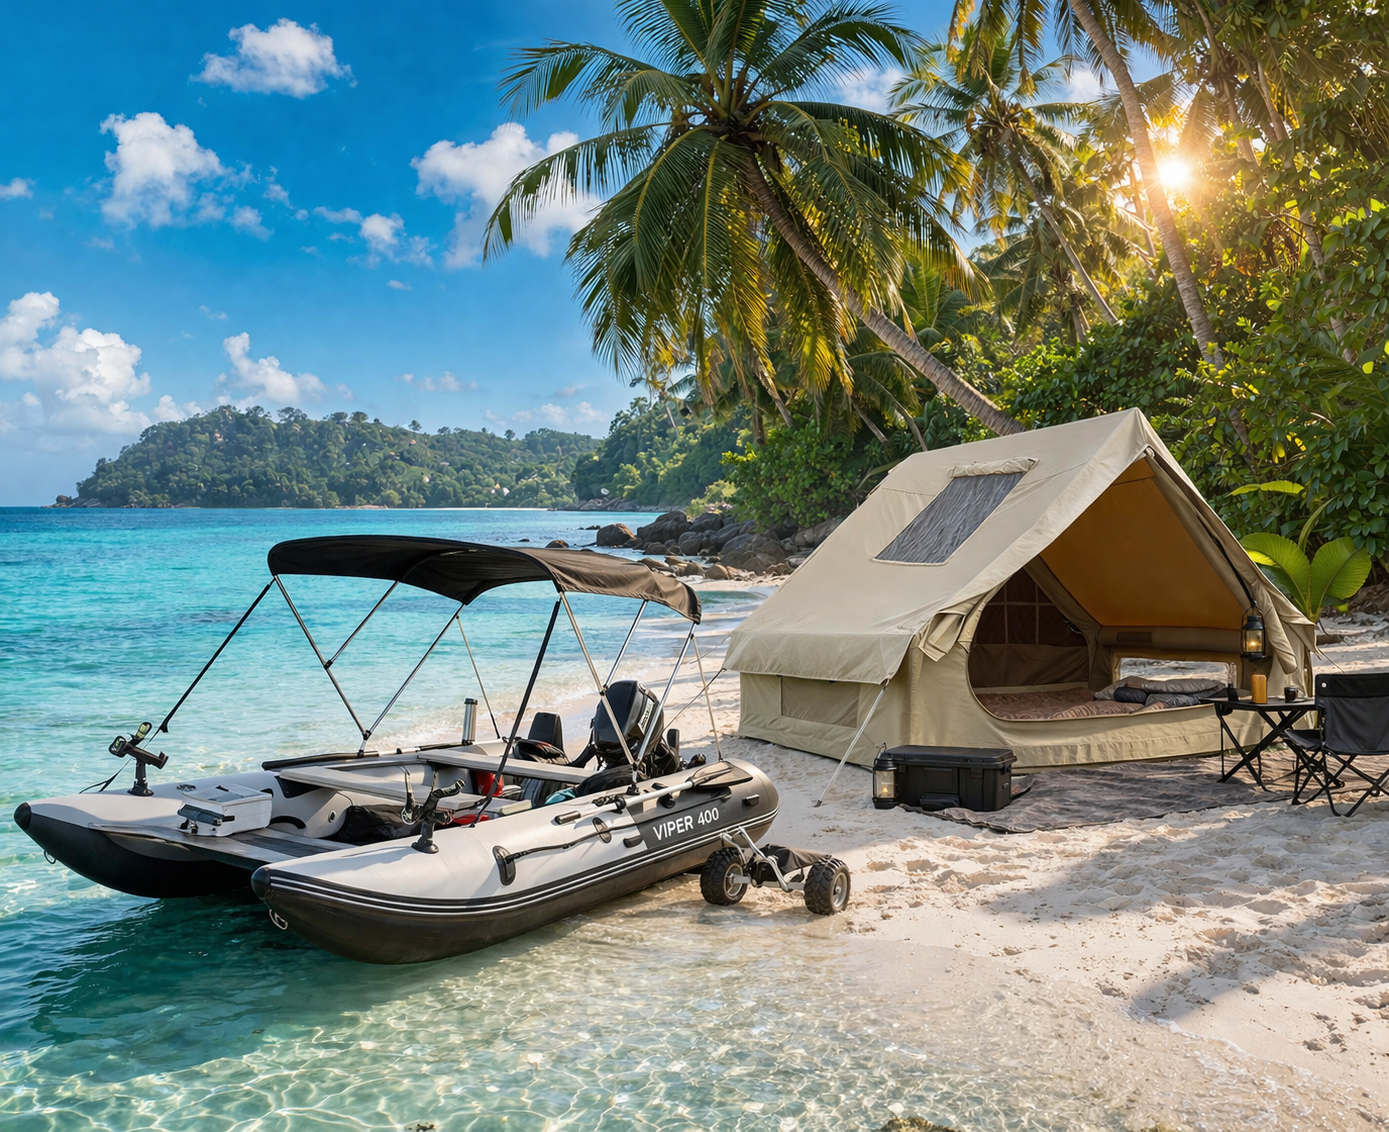
For inflatable boat owners, where every bit of gear needs to be dependable, a solid fuel system is non-negotiable. Whether you’re using a compact inflatable boat for recreational use or a larger inflatable catamaran, the fuel line is critical.
This vital piece of kit isn’t just a basic hose. It’s a purpose-built system designed to move fuel safely and efficiently. A complete fuel line assembly has three core parts working together:
A healthy fuel line makes sure your engine gets a consistent, air-free supply of petrol, which is the secret to smooth running. Petrol outboards, which all rely on these fuel lines, made up over 81% of the global outboard engine market in 2023.
That number really hits home here in Australia, where recreational boating is a way of life. It means your fuel line has to handle the E10 blends you find at most local servos, stopping the kind of degradation that can quickly wreck a good Hidea motor.
A great day of boating starts with reliable equipment. Your fuel line is the first link in that chain. Neglecting it is like planning a long road trip with a leaky petrol tank—you simply won’t get far.
Understanding these parts is the first step towards keeping everything in top shape. It all begins with the connection to your fuel source, and for that, you need a good tank. You might be interested in our guide to choosing the right petrol tank for your outboard engine.
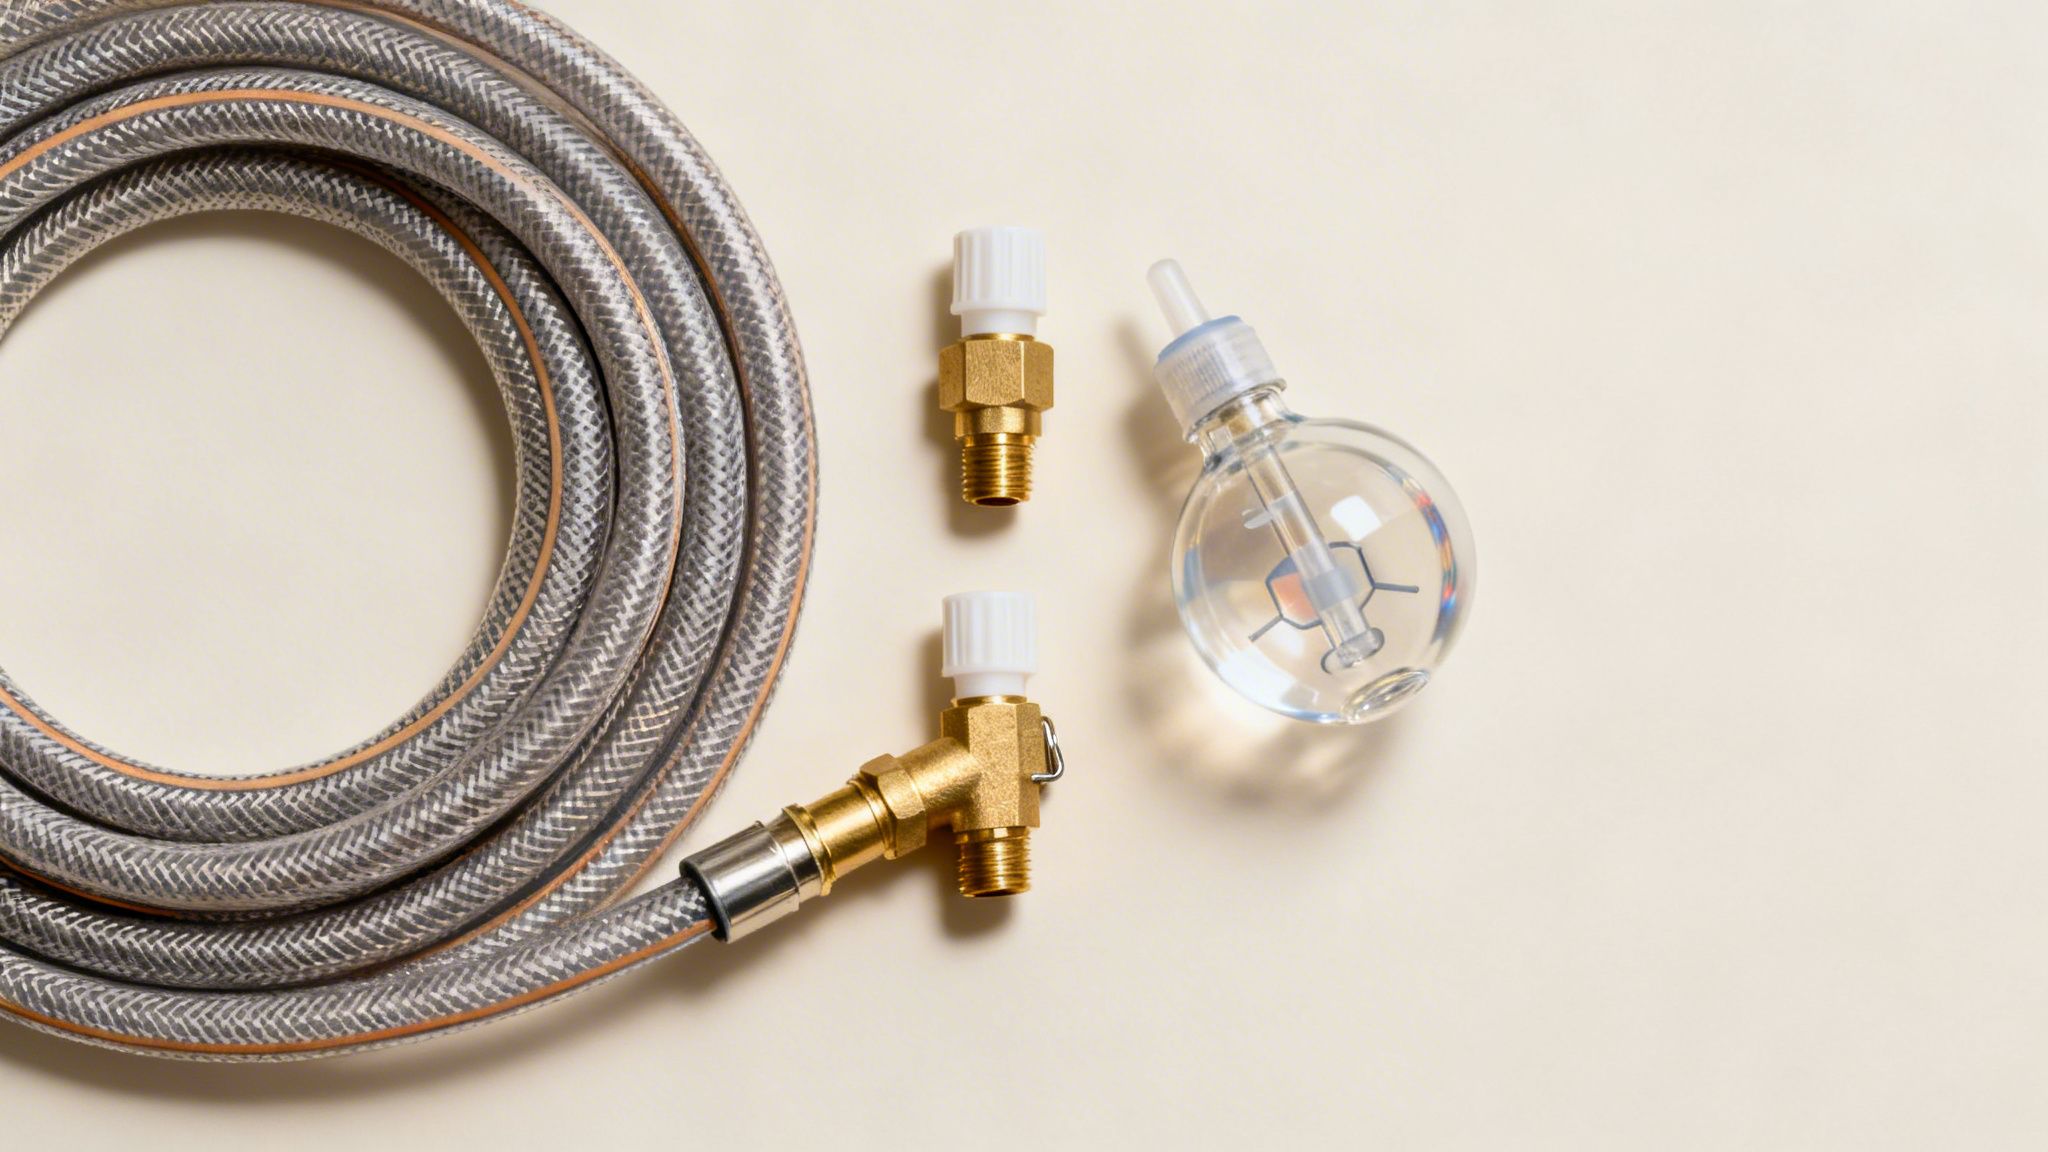
A modern outboard fuel line is a whole lot more than just a simple tube. Think of it as an engineered system where every single part has a critical job in getting fuel safely and reliably from your tank to your Hidea outboard. Once you understand what each component does, you’ll see why investing in a quality assembly for your inflatable boat is such a smart move.
The whole setup—the hose, the primer bulb, and the connectors—works as a team. If one part fails, the entire system is compromised, and that’s a recipe for getting stranded. Let’s break down what makes each piece so important.
The hose itself is your first and most important line of defence against fuel leaks and degradation. Older, single-layer rubber hoses just can’t handle the ethanol-blended petrol that’s common across Australia today. That ethanol can make old rubber brittle, leading to cracks and dangerous leaks.
That’s why high-performance hoses are now built with multiple layers to fight back. They typically feature:
This layered construction is what keeps the hose flexible and strong for years, ensuring a steady, uninterrupted flow of fuel to your motor.
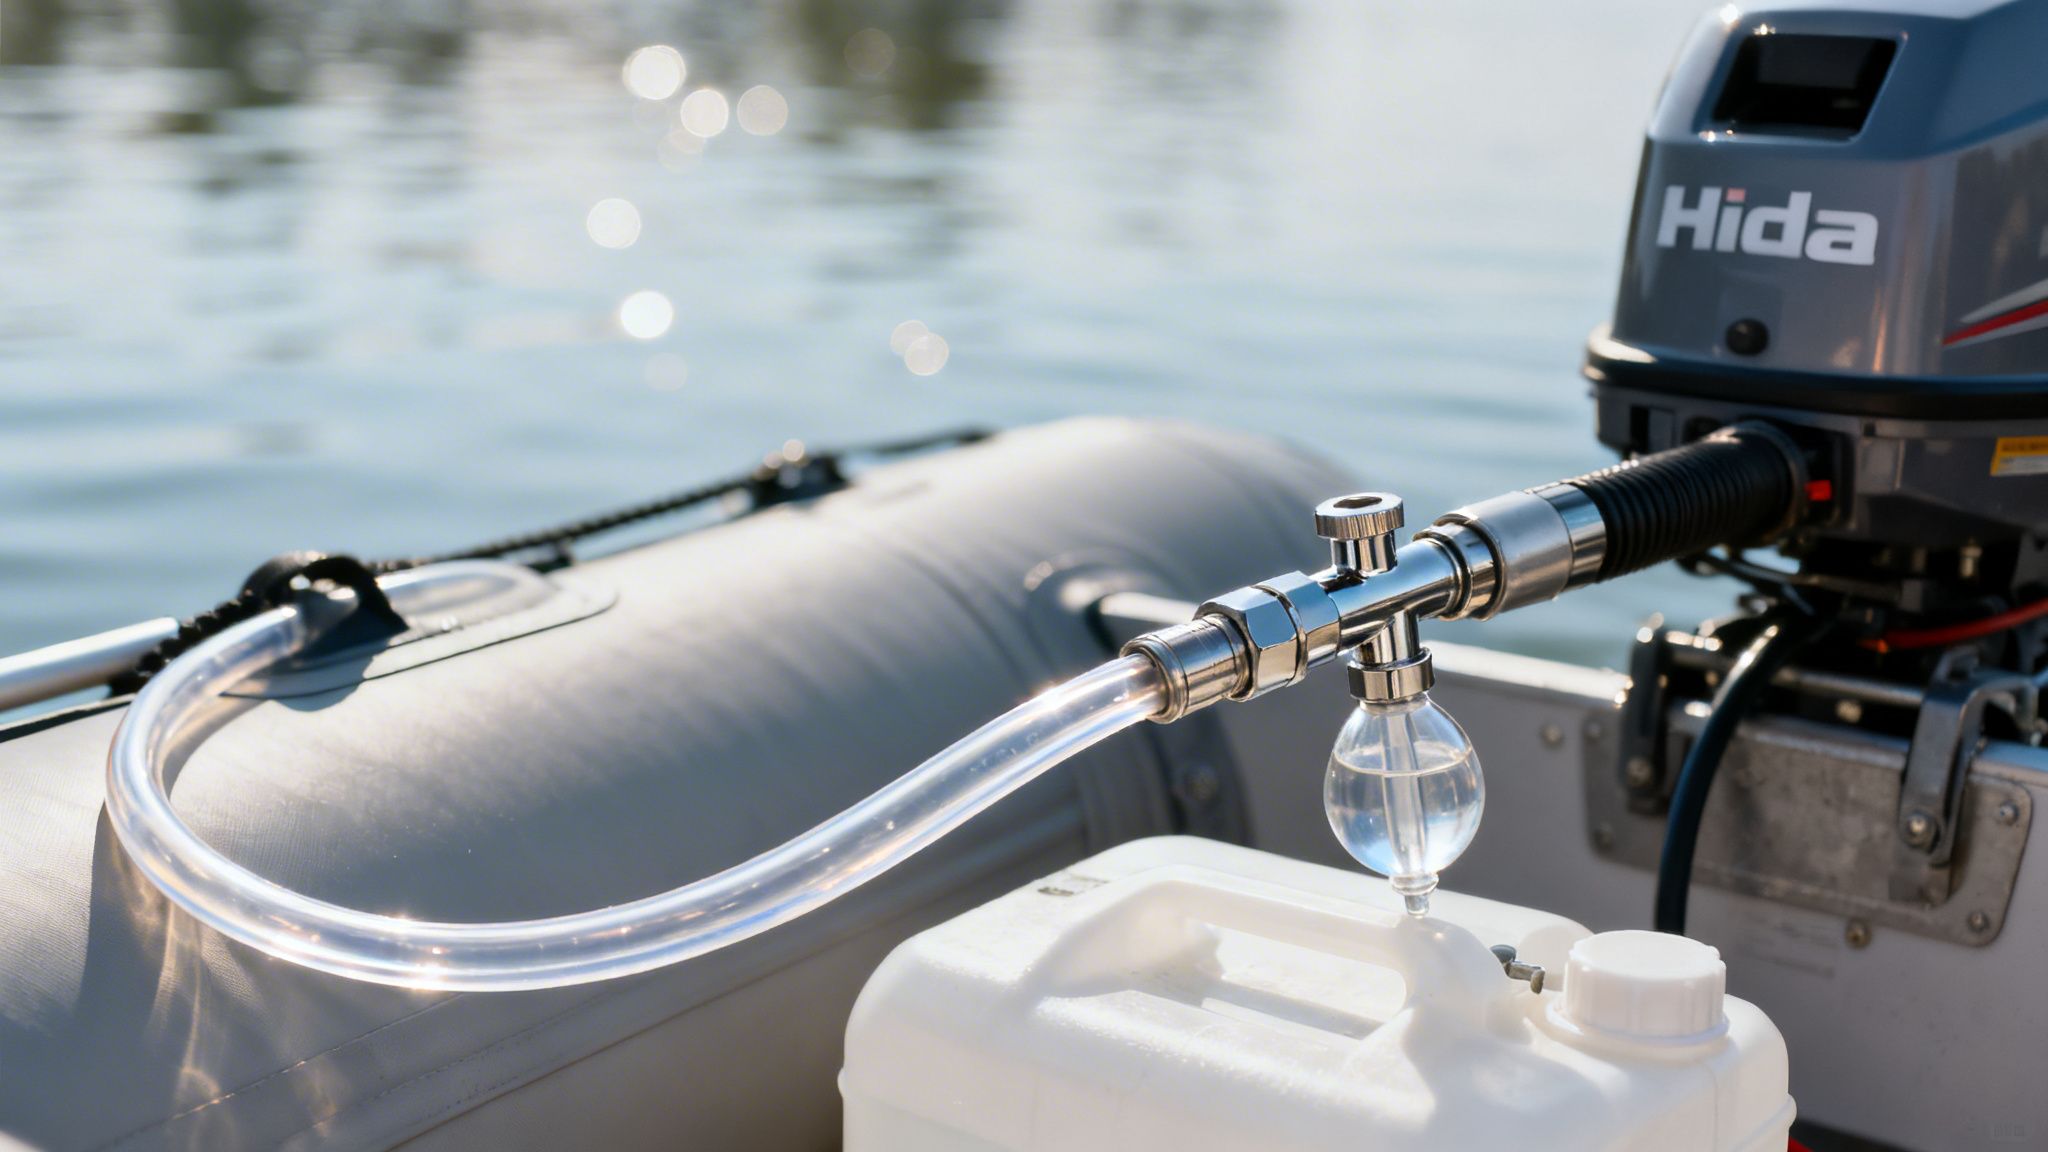
That small, squeezable bulb in the middle of your fuel line? That’s the primer bulb. Its job is simple but vital: it lets you manually pull petrol from the tank all the way up to the engine. This is essential for getting a cold motor started or for re-priming the system if you’ve accidentally run the tank dry.
Inside the bulb, there are two clever one-way check valves. When you squeeze the bulb, the valve on the tank side opens to suck fuel in, while the engine-side valve closes. When you let go, the tank-side valve shuts to stop fuel from flowing back, and the engine-side valve opens to push that fuel towards your motor.
A quality primer bulb will feel pliable and responsive, even after years of use. Cheaper bulbs often harden and crack quickly, leading to air leaks that will starve your engine of fuel and make priming impossible.
The connectors at each end of the fuel line are, without a doubt, the most critical parts for safety. These little fittings create a secure, leak-proof seal between your fuel tank and your specific outboard engine.
A loose or poorly matched connection is one of the biggest causes of dangerous fuel leaks and seriously frustrating performance problems. The engine-side connector is especially important because it has to be an exact match for your motor’s brand and model. A universal fitting might seem like a good idea, but a Hidea-specific connector guarantees a perfect, factory-tight seal every time. Quality connectors are almost always made from marine-grade materials to prevent corrosion from the saltwater environment.
If you’re looking for parts for different engine brands, you can learn more about finding the right components for a Mercury outboard and other parts.
Choosing the right outboard fuel line is about more than just grabbing the first one you see on the shelf. It’s a crucial decision that directly affects your engine’s performance and, more importantly, your safety on the water.
A fuel line that’s too long, too narrow, or fitted with the wrong connectors can starve your engine of fuel or create dangerous leaks. Nobody wants to deal with that, especially when you’re far from shore.
Getting this right from the start ensures your Hidea outboard gets the steady, reliable fuel supply it needs, whether it’s powering a zippy inflatable boat or a larger vessel. Let’s walk through the key things to look for so you can buy with total confidence and compare prices and features to find the best option in your area.
Think of your fuel line’s inside diameter (ID) like a water pipe – if it’s too small, it will choke the flow. This is a critical detail.
For most outboards under 115 HP, including the entire Hidea range that’s so popular with inflatable boat owners, an 8mm (5/16-inch) ID hose is the perfect match.
Trying to run a larger engine on a smaller hose is a recipe for trouble. It can starve the motor of fuel at high revs, leading to poor performance and even long-term engine damage. On the other hand, going bigger won’t give you any extra performance and just makes the hose harder to route. For almost every recreational setup, 8mm is the sweet spot.
Hose length is a balancing act. You need enough slack to connect your fuel tank to the engine without any sharp bends or kinks, even when you turn the motor hard over. But an overly long hose quickly becomes a messy trip hazard that’s likely to get tangled or pinched.
For a typical inflatable boat where the fuel tank sits near the transom, a line between 1.8m and 2.4m (6 to 8 feet) is usually ideal.
Before buying, take a quick measurement from your tank’s outlet to your engine’s fuel inlet. Add a little extra to allow for movement and turns, but don’t go overboard with excess length.
Always route your fuel line where it won’t be stepped on or crushed under gear. A crimped or kinked line is just as bad as a blocked one, as it will restrict fuel flow and cause your engine to run lean.
This is probably the most important step of all. Outboard fuel line connectors are brand-specific. A connector designed for a Yamaha won’t click into a Mercury, and neither will fit your Hidea outboard. You absolutely must choose a fuel line assembly with the correct engine-side fitting to guarantee a secure, leak-proof seal.
Using the wrong connector is a huge safety risk. It can easily vibrate loose, creating an air leak that stalls your engine. Even worse, it could cause a fuel leak, which is a serious fire hazard on any boat. Always double-check that the product description clearly states it’s compatible with your specific engine brand and model.
You’ll also want to make sure the tank-side connector matches your fuel tank. While many portable tanks use a standard fitting, it never hurts to verify. If you’re in the market for a new tank, check out our guide on finding the best portable petrol tanks that pair perfectly with our fuel lines.
To make things even easier, here’s a quick reference guide to help you match the right fuel line to your setup.
This table provides a simple overview to help you choose the right specs for your Hidea outboard and inflatable boat combo.
| Engine HP (Hidea) | Recommended Hose Diameter (ID) | Typical Length for Inflatables | Common Connector Type |
|---|---|---|---|
| 2.5HP – 9.9HP | 8mm (5/16″) | 1.8m – 2.4m | Hidea-specific |
| 15HP – 40HP | 8mm (5/16″) | 1.8m – 2.4m | Hidea-specific |
| 50HP – 60HP | 8mm (5/16″) | 2.4m – 3.0m | Hidea-specific |
Remember, this is a general guide. Always measure your specific boat layout to confirm the perfect length, and double-check your engine manual if you’re ever in doubt about connector types. Getting these details right ensures a safe, reliable day on the water.
A top-quality fuel line is only as good as its installation. The good news is, getting it right is straightforward, and it’s the key to a safe, leak-free system that keeps your outboard happily fed with fuel.
We’ll walk you through the process step-by-step, so you can connect your new assembly with complete confidence. Following the correct procedure prevents common headaches like kinks, which can choke off fuel flow and make your engine run rough. More importantly, a secure installation is your best defence against dangerous fuel leaks, giving you peace of mind every time you head out.
A little prep work makes the whole job smoother and safer. First things first: make sure your engine is switched off and cool. It’s also a good idea to work in a well-ventilated area, just in case you spill a little petrol from an old line.
Lay out your new fuel line assembly and grab any tools you might need, like pliers or a clamp driver. Keeping a few old rags handy is always a smart move for catching any drips.
Connecting your new outboard fuel line is a simple, logical process. Just follow these steps for a secure fit from tank to engine.
Attach to the Fuel Tank: Take the connector for the tank side and push it firmly onto the outlet fitting of your portable fuel tank. You should hear or feel a solid “click” as it locks on. Give it a gentle tug to be sure it’s seated properly.
Attach to the Outboard Engine: Now, do the same with the engine-side connector, connecting it to the fuel inlet on your Hidea outboard. Just like the tank fitting, it should click firmly into place. Since this connection is brand-specific, a perfect fit tells you you’ve got the right line for the job.
Route the Hose Safely: Carefully run the fuel hose from the tank to your engine, making sure there are no sharp bends, twists, or kinks along the way. The hose needs enough slack to let the engine turn fully from side to side without pulling or straining the line.
Getting the installation right really starts with choosing the right line in the first place—checking the diameter, length, and connector type is fundamental.
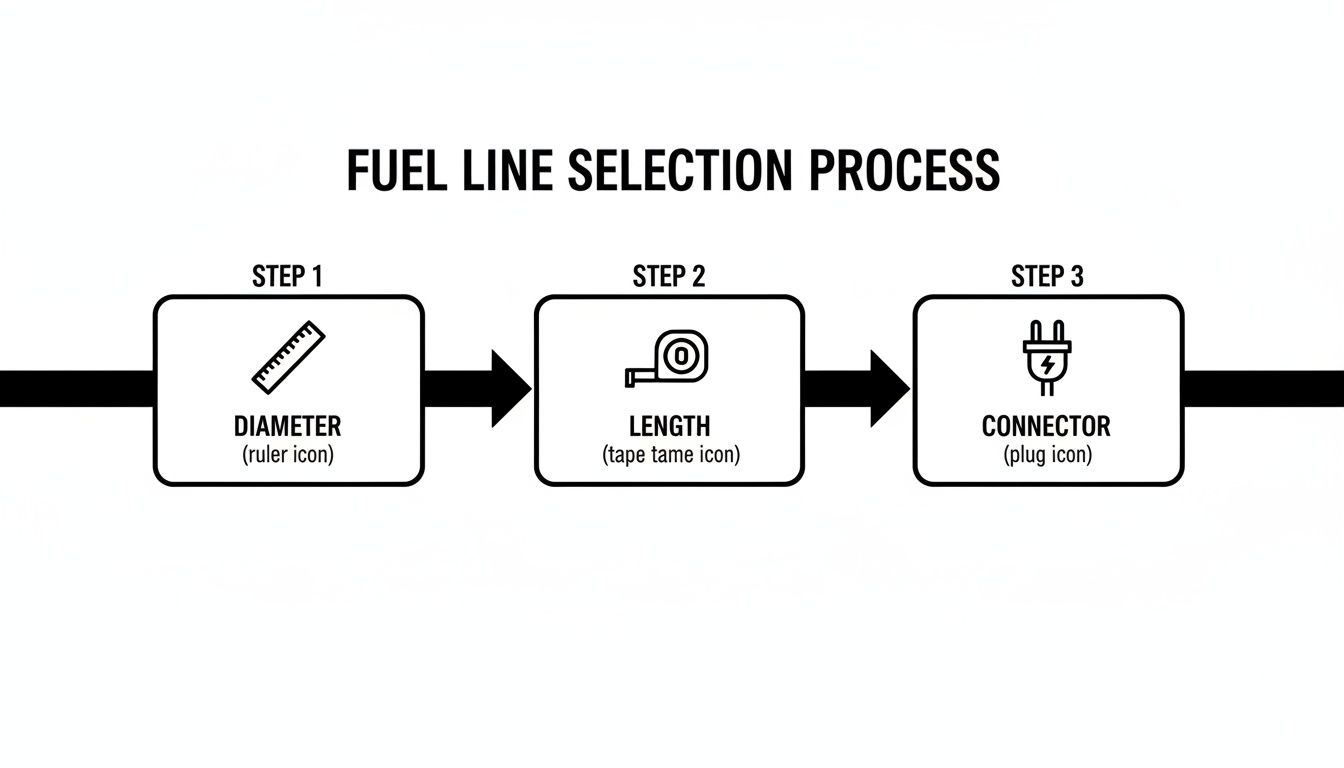
This simple visual shows how matching these three key specs to your setup is the foundation for a hassle-free installation.
Don’t skip this last step—it’s the most important one. Before you even think about starting your engine, you have to check for leaks.
With the line connected, squeeze the primer bulb until it feels firm. This pressurises the whole system. Now, carefully inspect every connection point—at the tank, at the engine, and on both ends of the primer bulb—for any sign of fuel weeping or dripping.
If you spot a leak, disconnect the fitting and reconnect it. If it still leaks, the connector itself might be faulty. Never, ever start an engine if you know there’s a fuel leak.
Once you’re 100% certain the system is sealed tight, you’re ready to hit the water. For a deeper dive into the components themselves, you can learn more about the outboard engine fuel line in our related article.
Nothing ruins a perfect day on the water faster than a fuel problem. The good news is, most of these issues are easy to avoid with a bit of proactive maintenance. Just a few moments spent checking your outboard fuel line before you launch can save you hours of frustration later.
Think of it this way: treating your fuel line with care is just good practice, especially under the harsh Australian sun. When you’re storing your boat, try to keep the fuel line out of direct sunlight. Over time, UV rays will degrade the hose material, making it brittle and prone to cracking. A little bit of shade goes a long way.
Before every single trip, get into the habit of running through this quick visual and physical check. It only takes a minute and is the best defence against problems out on the water.
Catching these issues early is the key. Finding a reliable replacement is more straightforward than ever, as the Australian marine equipment retailing industry has seen consistent growth. This market, now valued at an estimated $2.6 billion, ensures that quality parts are readily available for boaters across the country. This is particularly important for businesses like Easy Inflatables, which rely on dependable fuel lines to pair Hidea outboards with their popular Aerowave inflatable boats. You can discover more insights about this industry’s growth and its impact on marine safety on sapc.sa.gov.au.
Even with the best maintenance routine, you might still run into a snag. Here’s how to diagnose and fix the most common issues you’ll encounter.
Problem 1: The Primer Bulb Won’t Get Firm
This is almost always caused by an air leak somewhere in the system. The bulb simply can’t create a vacuum to pull fuel if it’s sucking in air instead.
Problem 2: The Engine Sputters or Stalls
This often points to a fuel flow restriction or a more significant air leak that’s starving your engine of fuel.
A common but often overlooked cause of fuel starvation is a faulty check valve inside the primer bulb. If one of the small valves gets stuck, it can prevent fuel from moving towards the engine, even if the rest of the system looks perfect.
If you find that your hose is cracked, brittle, or beyond repair, it’s time for a replacement. To learn more about this process, check out our resources on fuel hose replacement.
Even the most seasoned boatie runs into questions about their outboard fuel line. It happens. Getting the right answers is key, whether you’re doing a bit of pre-season maintenance or trying to sort out a problem on the water. This section tackles the most common queries we hear from boat owners just like you.
Whether you’re a keen angler or looking for a place in Australia to hire inflatable boats for a family outing, a little know-how goes a long way. Understanding your gear builds confidence and means more time making memories, less time wrestling with gear.
As a rough guide, it’s smart to inspect your fuel line assembly at the start of every season and think about replacing it every 3 to 5 years.
But honestly, the calendar isn’t nearly as important as what you can see and feel. You need to replace the line immediately if you spot any signs of trouble, no matter how old it is. Keep an eye out for visible cracks, stiffness, brittle patches, or even the slightest whiff of fuel where it shouldn’t be.
Definitely not. While the hose itself might seem standard, the connector on the engine end is specific to the brand. To get that solid, leak-free click, you have to use an assembly with the correct Hidea-compatible connector.
Trying to force on the wrong fitting is a classic mistake. It can lead to air leaks that starve your engine of fuel, or much worse, a dangerous fuel leak that puts everyone on board at risk.
This is easily one of the most common frustrations, and nine times out of ten, it’s an air leak somewhere in the system. The bulb simply can’t create the vacuum it needs to pull fuel from the tank if it’s sucking in air instead.
In a word, yes. Think of it as a small investment in your safety and peace of mind. Premium fuel lines are just built better, plain and simple.
They use multi-layer hoses that stand up to modern ethanol-blended fuels and harsh UV rays. Their primer bulbs are made from tougher, more flexible materials that won’t crack after a season in the sun, and the fittings are usually marine-grade stainless steel to fight off corrosion. That quality means better performance and a much longer life, which is exactly what you want when you’re miles from shore.
At Easy Inflatables, we provide top-quality, reliable fuel lines and accessories perfectly matched to your Aerowave inflatable boat and Hidea outboard. Whether you’re looking for the best inflatable boats for recreational use available near you or a sturdy inflatable catamaran, explore our full range of boating solutions at https://easyinflatables.com.au and get everything you need for your next adventure.