Inflatable Dinghy Repair: Pro DIY Leak Fix
Master inflatable dinghy repair with our pro DIY guide. Find & fix leaks on PVC & Hypalon boats for lasting results. Get back on the water!
🇺🇸 Boats shipping to United States
See landed prices in USD before you bounce.
Door-to-door delivery to United States in 7–14 days. Choose a boat, see local-currency pricing, or request a fixed landed quote from the sales team.
You’ve packed the car, loaded the rods, promised the kids a quiet beach landing, and your dinghy starts talking back with a faint hiss. That moment annoys every boatie because it usually happens right when you’re ready to launch, not when you’re standing in the shed with time to spare.
The good news is a leak in an inflatable isn’t automatically the end of the boat, or even the end of the weekend. A proper inflatable dinghy repair is usually very achievable if you slow down, identify the material first, and use the right adhesive system for that fabric.
Most failed repairs come from rushing, guessing, or mixing products that were never meant to work together. PVC and Hypalon don’t forgive shortcuts. Australian conditions make that even more obvious, because salt, UV and heat punish lazy prep fast. If you want a repair that holds through beach launches, marina bumps and another season of coastal use, the process matters as much as the patch.
That Sinking Feeling When Your Dinghy Isn’t
A lot of dinghy repairs start the same way. The boat looked fine last trip. It sat rolled up for a few weeks. Then you pump it up on a Saturday morning and one side feels soft before the other chambers are even firm.
That’s usually when people make the first mistake. They press a hand against the tube, decide the leak is “somewhere near the back”, slap on a bit of glue and hope for the best. Hope isn’t a repair method. A dinghy only becomes reliable again when you treat the job like proper fault-finding, then match the repair to the material.
In Australian use, the trouble spots are predictable. Boats dragged over shell grit at the ramp, left baking on the beach, or packed away salty after a run to the mooring all tend to develop the same kinds of issues. Small punctures in the tube skin. Valve leaks that only show under pressure. Edge lift on old DIY patches. Early seam trouble on lower-grade construction.
A clean, correctly bonded patch can outlast plenty of rough use. A rushed one often fails before the next trip.
There’s also a big difference between fixing a simple puncture and chasing a structural problem. A tiny hole in the middle of a PVC tube is straightforward. A leak at a valve base, seam junction or transom attachment needs a steadier hand and better judgement. Knowing which job you’re tackling is half the battle.
If you approach inflatable dinghy repair like a trade job instead of a panic job, the result changes completely. You stop asking, “Will this get me through today?” and start asking, “Will this still hold after curing, reheating, rolling and pressure testing?” That’s the mindset that gives you a bulletproof result.
Finding the Leak Your First Diagnostic Step
Don’t start with glue. Start with proof.
The most reliable way to locate leaks on an inflatable dinghy is still the old soapy water test. Inflate the boat, mix dish soap into water, and sponge or spray it over one area at a time. Work slowly and watch the surface film. A leak will show itself as bubbling foam, whether it’s a tiny pinhole or a more obvious escape of air.
Where leaks like to hide
Some spots deserve extra attention because they cop more load and more abrasion:
- Around valves where sand, salt and movement can compromise the seal
- Along seams where flex and age show up first
- Near the transom because that area takes repeated stress
- Under fittings and mounts where adhesive edges can start lifting
- On the underside of tubes where beaching damage is easy to miss
If you hear a hiss, don’t assume that’s the only problem. Keep checking the whole boat. It’s common to find one obvious leak and miss another slower one that only appears once the boat is back on the water.
Mark every fault before repairing
Use a waterproof marker or a small bit of tape and mark each leak as you find it. Don’t trust memory. By the time the surface dries and you’ve moved the boat, that tiny bubbling point can disappear from view.
A useful habit is to divide the boat mentally into sections and inspect it in order. Port tube, starboard tube, bow cone, floor, valve zones, fittings. Leak detection in plumbing follows the same logic. You isolate the problem instead of guessing at it, which is why Voyager Plumbing’s expert guide is a good reminder that small leaks usually reveal themselves through methodical testing, not luck.
Practical rule: If you haven’t mapped every leak first, you’re not ready to open the glue.
For a broader walk-through on emergency fixes and basic raft patching, this step-by-step inflatable raft repair guide is worth keeping handy in the shed or glovebox.
Gathering Your Professional Repair Toolkit
A repair usually succeeds or fails before the glue tin opens. On Australian water, that matters even more. UV cooks surfaces, salt creeps into every scratch, and a patch that looked fine in the shed can peel back after one hot day on the trailer if the materials don’t match.
Start with the hull fabric. PVC and Hypalon do not share the same repair chemistry, and treating them as interchangeable is one of the fastest ways to waste an afternoon. Easy Inflatables boats built with thermo-welded seams and quality Valmex PVC still need the right adhesive system when they’re punctured. Good construction gives you a stronger base to repair. It does not excuse the wrong glue.
What belongs on the bench
Set the whole job up before you clean the tube. Once adhesive reaches the right tack, there’s no time to rummage through drawers looking for a brush or cutting a patch with blunt scissors.
A proper bench kit includes:
- Matching patch material from the same fabric family as the boat
- The correct two-part adhesive for PVC or Hypalon
- Surface prep solvent that suits the fabric
- Masking tape to keep the glue area tidy
- Sharp scissors or a knife for clean, rounded patch edges
- A small stiff brush for even glue coats
- Lint-free rags so fibres don’t end up in the bond
- A roller or smooth hard tool to press out trapped air
- Gloves and eye protection for solvent work
- A controlled heat source if the adhesive system calls for heat activation
If you want a ready-made starting point, a proper inflatable boat repair kit for PVC dinghies and tenders saves guesswork and stops the common mistake of mixing hardware-store products with marine fabrics.
PVC vs Hypalon repair gear
| Item | PVC (e.g., Valmex PVC) | Hypalon |
|---|---|---|
| Patch fabric | Matching PVC patch | Matching Hypalon patch |
| Adhesive | Two-part PVC adhesive | Hypalon-specific two-part adhesive |
| Surface prep | MEK or manufacturer-approved PVC prep | Toluene or the prep specified for the adhesive |
| Heat use | Often used to wake up the glue and improve bond strength | Follow the adhesive instructions closely |
| Common failure | Glue softens or lifts in heat if the system is wrong | Poor prep and shortcut contact adhesives let go under flex |
PVC repairs reward precision. Hypalon gives you a bit more forgiveness during prep, but it still punishes shortcuts. In both cases, contamination is the quiet killer. Salt film, sunscreen, oxidation, fish slime, even dust from the shed floor can sit between the patch and the tube and weaken the bond.
One habit worth stealing from other repair trades is controlled prep and clean edges. The same logic shows up in this guide to fixing screen damage. Different material, same principle. A neat work area and the right tools produce cleaner, longer-lasting repairs.
Match the fabric, match the adhesive, prep the surface properly, and press the patch like you mean it. That is what turns a quick fix into a repair you can trust offshore.
The Ultimate Guide to Patching Your PVC Dinghy
You find the leak, mark the spot, and feel a bit relieved. Then the main work begins. On a PVC dinghy, especially one built from quality cloth like Valmex PVC, a repair lasts because the prep, glue timing and pressure are right. Strength comes from process.
Start with a dead-flat tube
For repairing punctures in Aerowave inflatable dinghies using Valmex PVC, success rates reach 95% for punctures under 5 cm when the chamber is fully deflated, because that prevents air pockets that cause 85% of repair failures. Repairs attempted on pressurised tubes sit closer to 40% success according to TrueKit workshop data and repair guidance.
Deflate the affected chamber to 0 PSI. Any remaining pressure pushes against the patch while the adhesive is trying to bond, and that leaves tiny voids you may not see until the boat sits in the sun or cops a bit of chop.
In Australian conditions, heat exposes lazy prep very quickly. A patch that looks fine in the shed can start lifting after a few hot days on a trailer or a week of salt spray and UV.
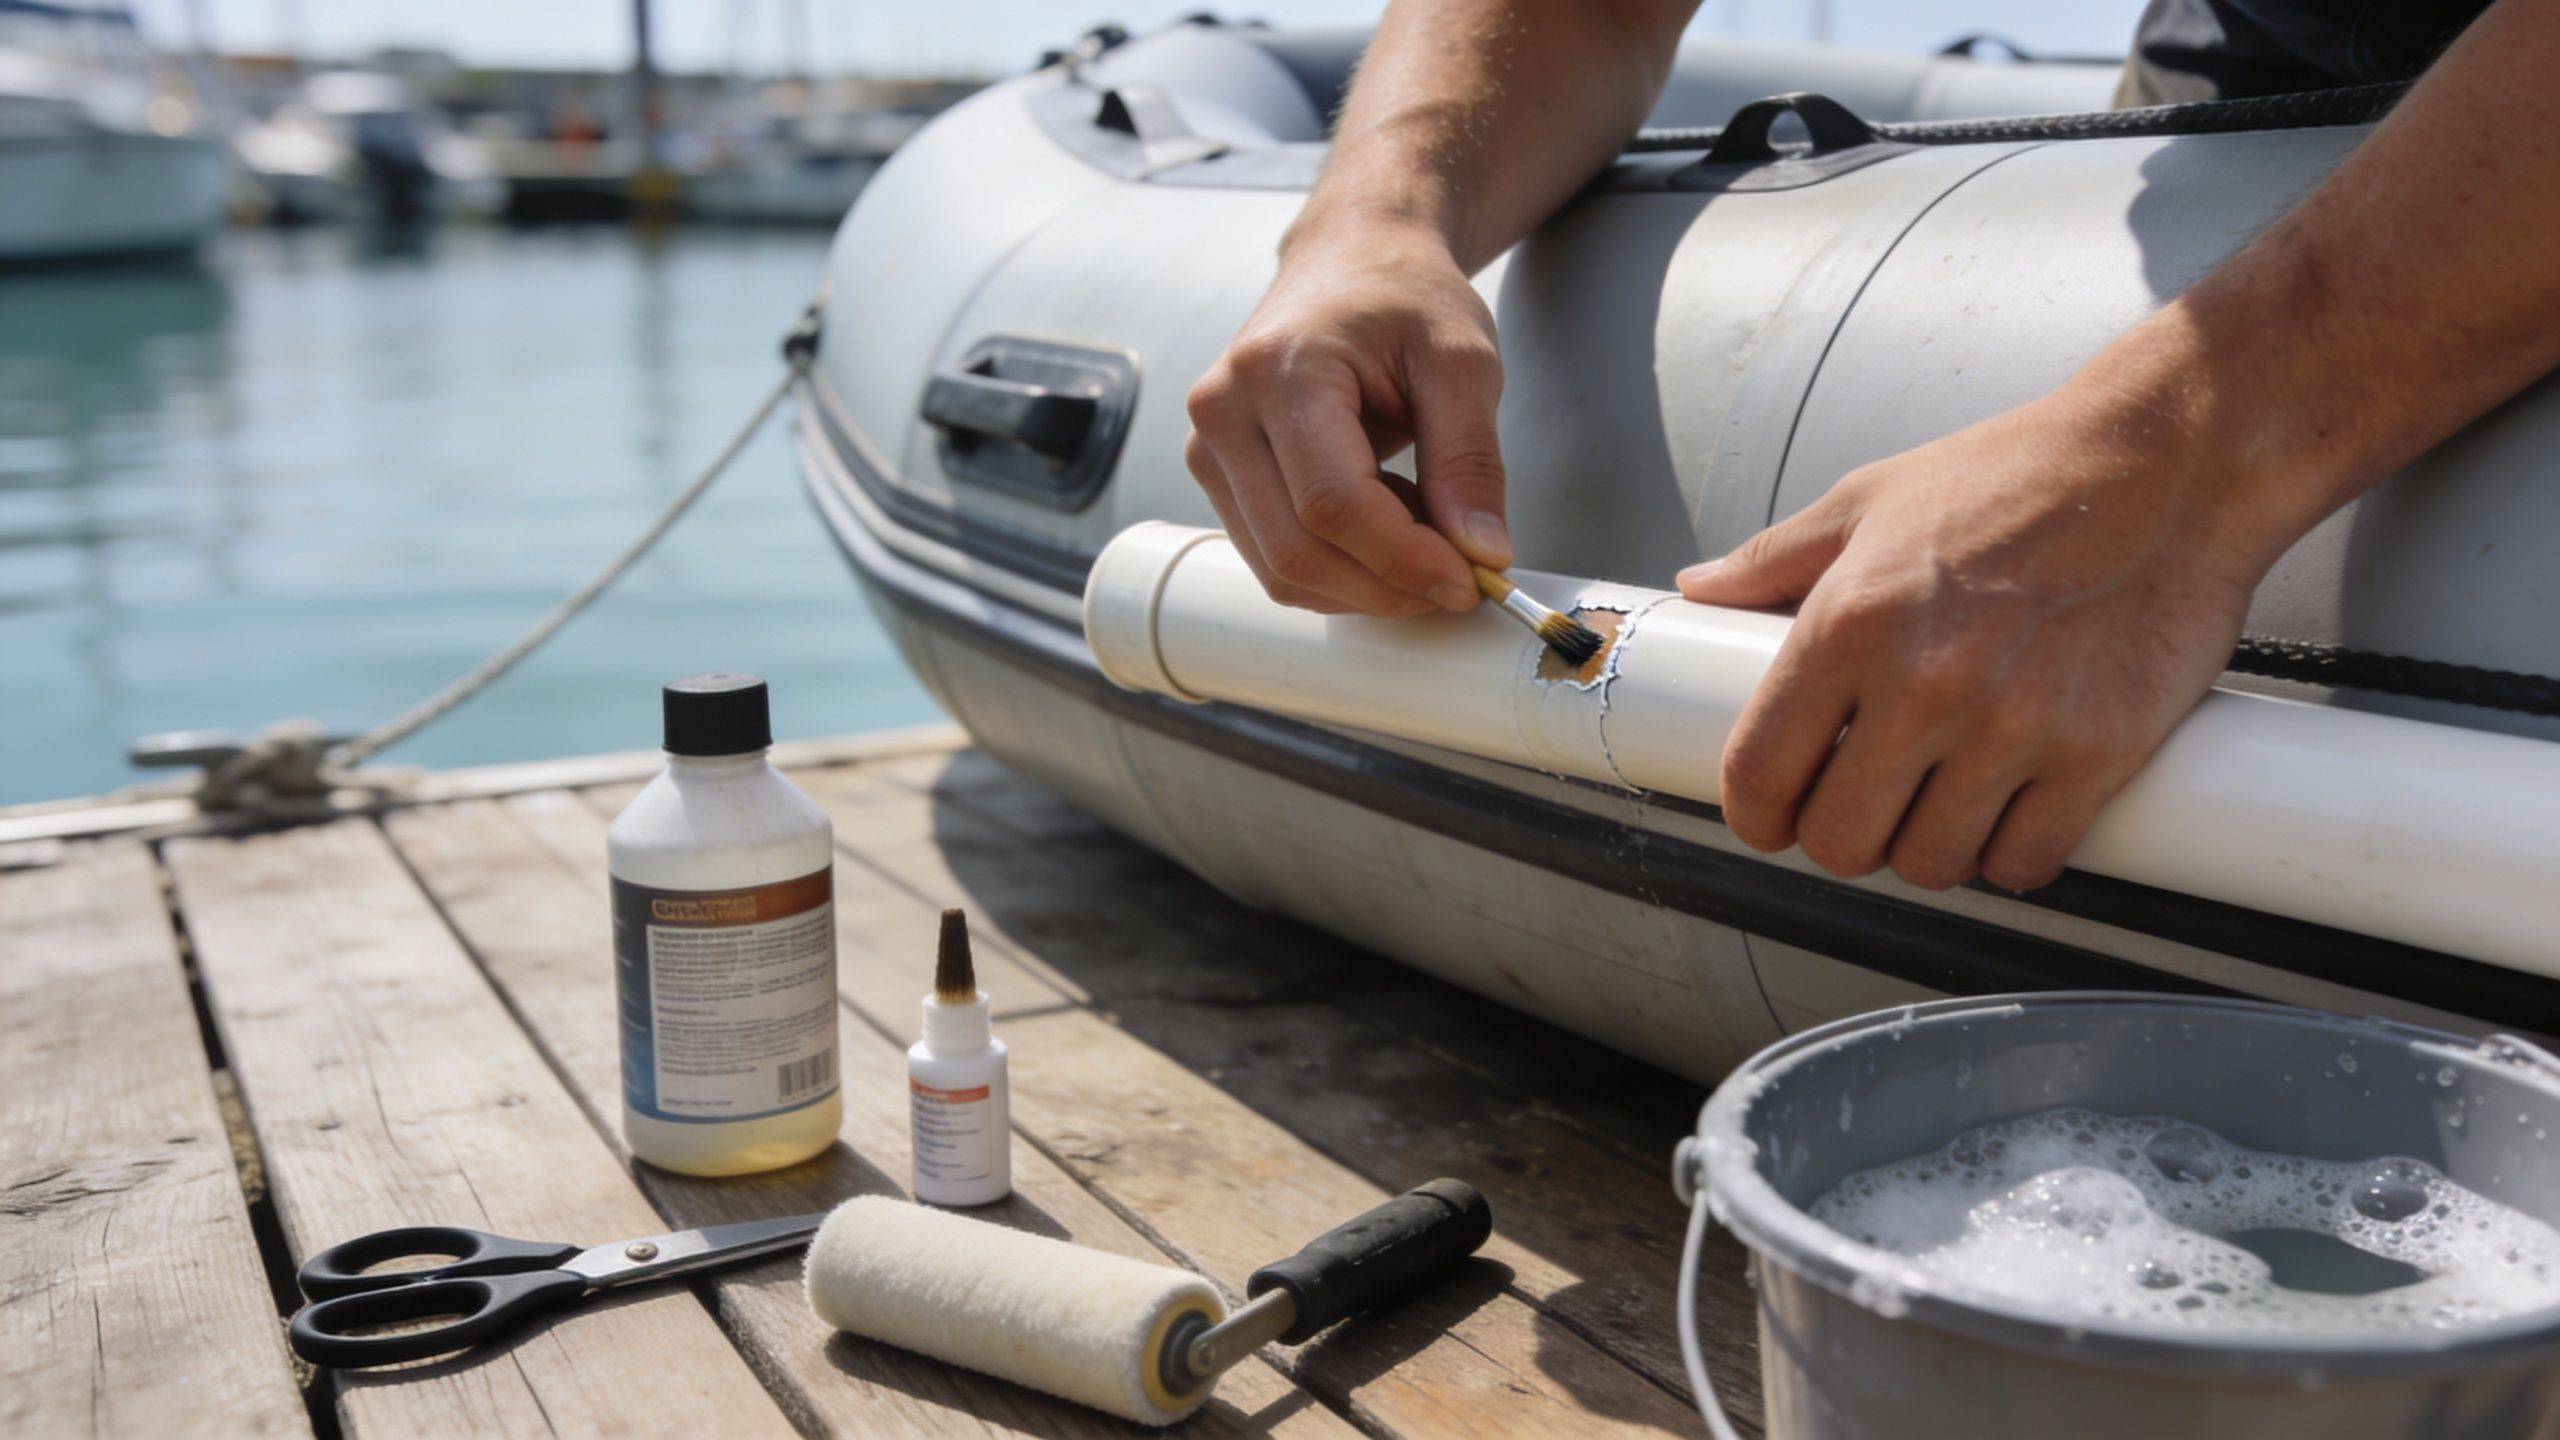
Prep the surface like a repairer, not a hobbyist
Wash the area first with soapy water and let it dry fully. Then wipe the repair zone and the back of the patch with MEK or the prep solvent approved for your adhesive system. On a coastal boat, salt film, sunscreen, fish slime and oxidation all get in the way of a clean bond.
Masking the repair footprint is worth the minute it takes. It keeps the glue line tidy, stops excess adhesive from spreading onto the tube, and makes the finished job look like it belongs on the boat.
PVC is less forgiving than Hypalon here. Hypalon often gives you a bit more working tolerance, but PVC rewards accuracy and punishes shortcuts, especially once UV and heat get involved.
Cut a patch that works with the fabric
Cut the patch so it extends 20 mm beyond the damage on all sides, and round every corner. Square corners are where edge lift usually starts.
Use matching PVC if you can. Similar colour does not mean similar fabric. If the patch is too stiff, too soft, or coated differently from the original tube, the repair area flexes unevenly and the edge can start to peel. That matters on tenders that spend half their life being dragged up beaches, bounced against pontoons, and baked in the sun.
If you’ve ever patched a torn flyscreen, the same basic discipline applies. Clean contact surfaces and rounded edges hold better, which is why this guide to fixing screen damage feels familiar even though the materials are completely different.
Glue in thin coats, not thick ones
For this style of PVC repair, use a two-pot, heat-activated PVC adhesive that suits the fabric and conditions. Apply two thin coats, allowing 5 to 10 minutes per coat until the adhesive reaches tack.
Heavy coats look generous but usually weaken the repair. Thin, even coverage on both surfaces gives a better bond and a cleaner edge. Brush right out to the perimeter so the patch edge is fully supported.
A simple sequence that works:
- Deflate fully and flatten the repair area.
- Wash and dry the tube.
- Wipe both surfaces with MEK or the specified prep solvent.
- Cut a rounded patch with the correct overlap.
- Mask the footprint for clean edges.
- Apply the first coat to patch and tube.
- Wait for tack, then apply the second coat.
- Heat-activate within the adhesive maker’s temperature range.
- Place the patch once, accurately.
- Press from the centre outward and leave it to cure.
Use heat carefully, then press hard
Heat activation helps PVC adhesive bite properly, but excess heat can damage the coating and fabric. Stay within the adhesive manufacturer’s recommended range. Once the glue is ready, position the patch carefully because you do not get many second chances once contact is made.
A roller, spoon back or other smooth hard tool earns its keep here. Work from the centre to the edges with firm pressure to drive out trapped air and make sure the whole patch is in contact. Take your time. Rushed pressure leaves bubbles, and bubbles become failures.
This is one reason quality construction matters so much. Boats built with good German fabric and properly made seams start from a stronger baseline, and repairs tend to behave more predictably. If you want the material background, this comparison of Hypalon and German Valmex PVC construction explains why.
Let it cure properly
After the patch is down, keep it under steady weight for 24 hours. Do not inflate early just to check your work. Fresh adhesive may feel set on the surface while the bond underneath is still developing.
That patience is what turns a decent-looking patch into one you can trust offshore. It is also why we put so much value on proper materials and build methods at Easy Inflatables, from thermo-welded seams to quality Valmex PVC. A good repair should bring the boat back close to that original standard, not just get you through the weekend.
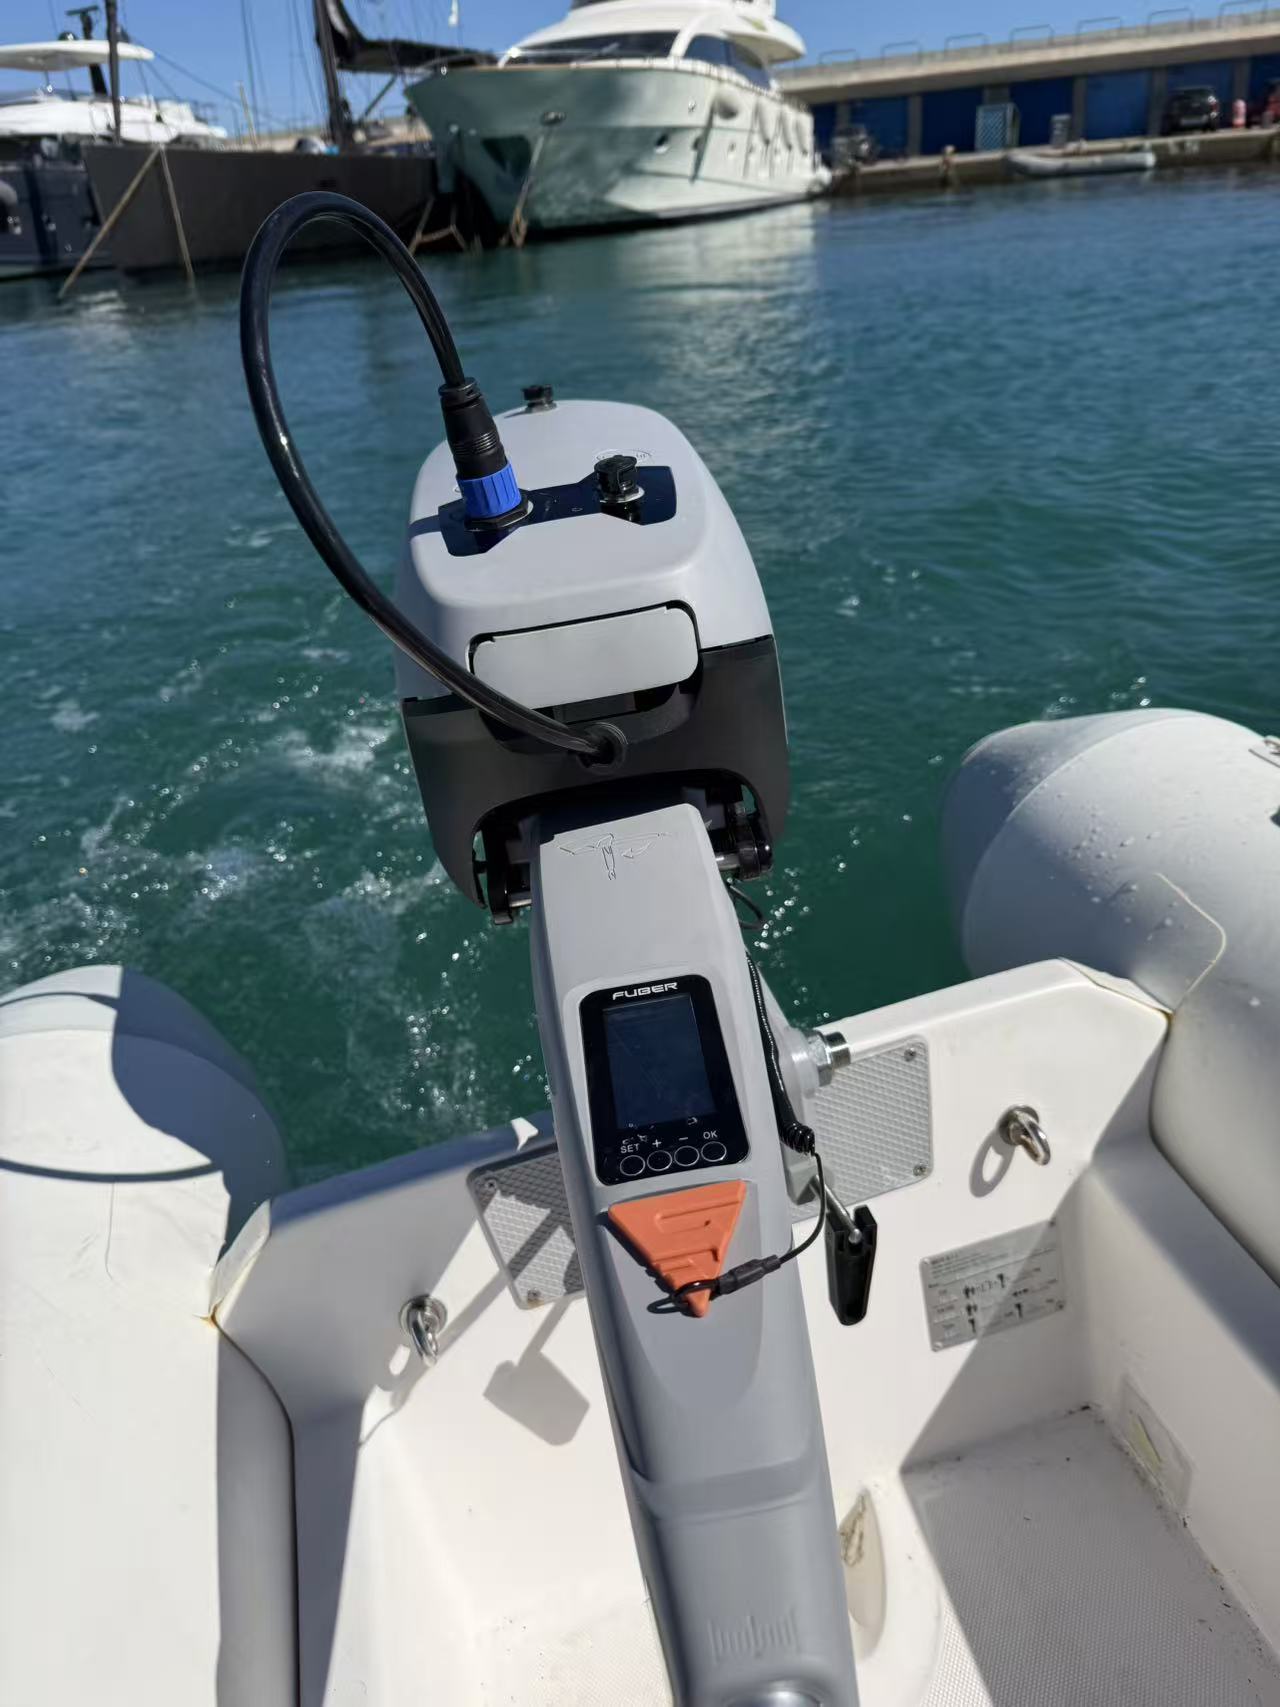
Tackling Tricky Valve and Seam Repairs
Valve leaks scare people more than punctures, but many of them are repairable if you stay organised. The usual culprits are contamination, worn gaskets, or issues in the fabric right around the valve seat rather than the valve body itself.
According to a Practical Sailor analysis of over 200 vessels, 20 to 30% of annual valve failures on yacht tenders are due to salt and algae buildup. A full refurbishment, including replacing crusty gaskets, reduces leaks by up to 60%, and incidents can drop from 12% to 3% after refurbishment, as outlined in Practical Sailor’s dinghy valve refurbishment advice.
Start with the valve before blaming the tube
Before removing anything, tighten the valve with the correct wrench if the design allows it. If it still leaks, disassemble it carefully and keep the parts in order.
The proven refurbishment approach is straightforward:
- Remove and inspect the valve assembly, including gasket and keeper string
- Clean the parts thoroughly with TSP, then dish soap
- Check the gasket closely for crusting, cracking or distortion
- Lubricate the O-ring with glycerin before reinstalling
- Replace degraded parts instead of trying to rescue them with random sealants
If the leak comes from the fabric around the valve rather than the valve internals, an internal patch is usually the better fix. That job needs patience because the patch has to sit properly inside the chamber and bond without wrinkling.
Internal valve-base patches and adhesive choice
Where an internal patch is required, the verified guidance calls for a 2.5 cm overlap and two layers of the correct two-component adhesive with a 5-minute flash-off between coats. Adhesive choice is critical, especially on Hypalon. Mismatched products don’t just underperform. They let go.
A lot of owners underestimate temperature as well. High heat affects working time, solvent flash-off and final bond quality. If you’re repairing in a hot shed or during a warm spell, this high temperature adhesive guide is worth reading before you mix anything.
Valve repairs reward clean parts and calm hands. Most of the job is inspection, not glue.
Here’s a visual walkthrough if you prefer seeing the process in action before pulling your own valve apart:
How To: Find and Fix Inflatable Boat Valve Leaks - YouTube
Tap to unmute
How To: Find and Fix Inflatable Boat Valve Leaks NRS
NRS26.9K subscribers
When a seam repair stops being a DIY job
A small, localised seam leak can sometimes be managed if the separation is minor and the surrounding material is still healthy. The problem is that seams often tell you more about the boat’s overall condition than a simple puncture does.
If the seam has widespread lifting, if the fabric coating is tired, or if the separation sits in a high-load area, treat it as a structural warning sign. A patch across a compromised seam can hold for a while, but it may not be the safest long-term answer. That’s the point where a professional inspection makes sense.
Pro Tips for a Lasting Repair and Future Prevention
A repair isn’t finished when the patch goes down. It’s finished when the adhesive has cured properly and the boat survives pressure, heat and use without the bond shifting.
That’s why aftercare matters so much. If you rush the cure, inflate too early, or leave the boat in harsh sun straight after the job, you undo a lot of the precision that went into the repair itself.
The habits that make repairs last
- Respect the cure time. Leave the patch undisturbed for the full curing period recommended by the adhesive system you’re using.
- Use steady pressure while curing. A flat weight over the patch helps maintain contact.
- Reinflate gradually. Don’t jump straight to full firmness the moment the wait is over.
- Rinse after saltwater use. Salt left on the boat works against future adhesion and general longevity.
- Store the boat clean and dry. Damp storage invites trouble, especially around fittings and folded surfaces.
- Protect against UV. In Australian conditions, sun is one of the hardest enemies of inflatable fabric.
The verified guidance also notes that using 303 Aerospace after repair can extend life 2x in harsh Tassie summers. That fits with what plenty of boat owners already know from experience. UV protection isn’t a cosmetic extra. It’s part of the maintenance routine.
Don’t guess at cure behaviour
Different sealants and adhesives behave differently once applied. If you’re also using marine sealant products around fittings, hatches or nearby hardware, understanding cure windows matters. This guide to Sikaflex 291 cure time is useful reference material because it reinforces a point many owners learn the hard way. Products may feel set on the surface before they’ve reached working strength.
Fresh water, shade and patience do more for an inflatable than most people realise.
A well-repaired dinghy usually stays that way because the owner changes the routine after the fix. Better rinsing. Better storage. Less dragging. More regular checks around valves, seams and fittings before trip day.
Getting Back on the Water and When to Upgrade
A proper inflatable dinghy repair gives you more than a sealed tube. It gives you confidence. Once you’ve found the leak properly, matched the adhesive to the fabric, and allowed the repair to cure, the boat stops feeling fragile again.
That said, there’s a point where repeated repairs are the message. If you’re chasing new leaks every time you inflate, if old patches are multiplying, or if seam and fitting issues keep stacking up, the boat may be telling you the fabric has had a fair run. Repair is smart when the structure is still sound. It’s false economy when the whole platform is tired.
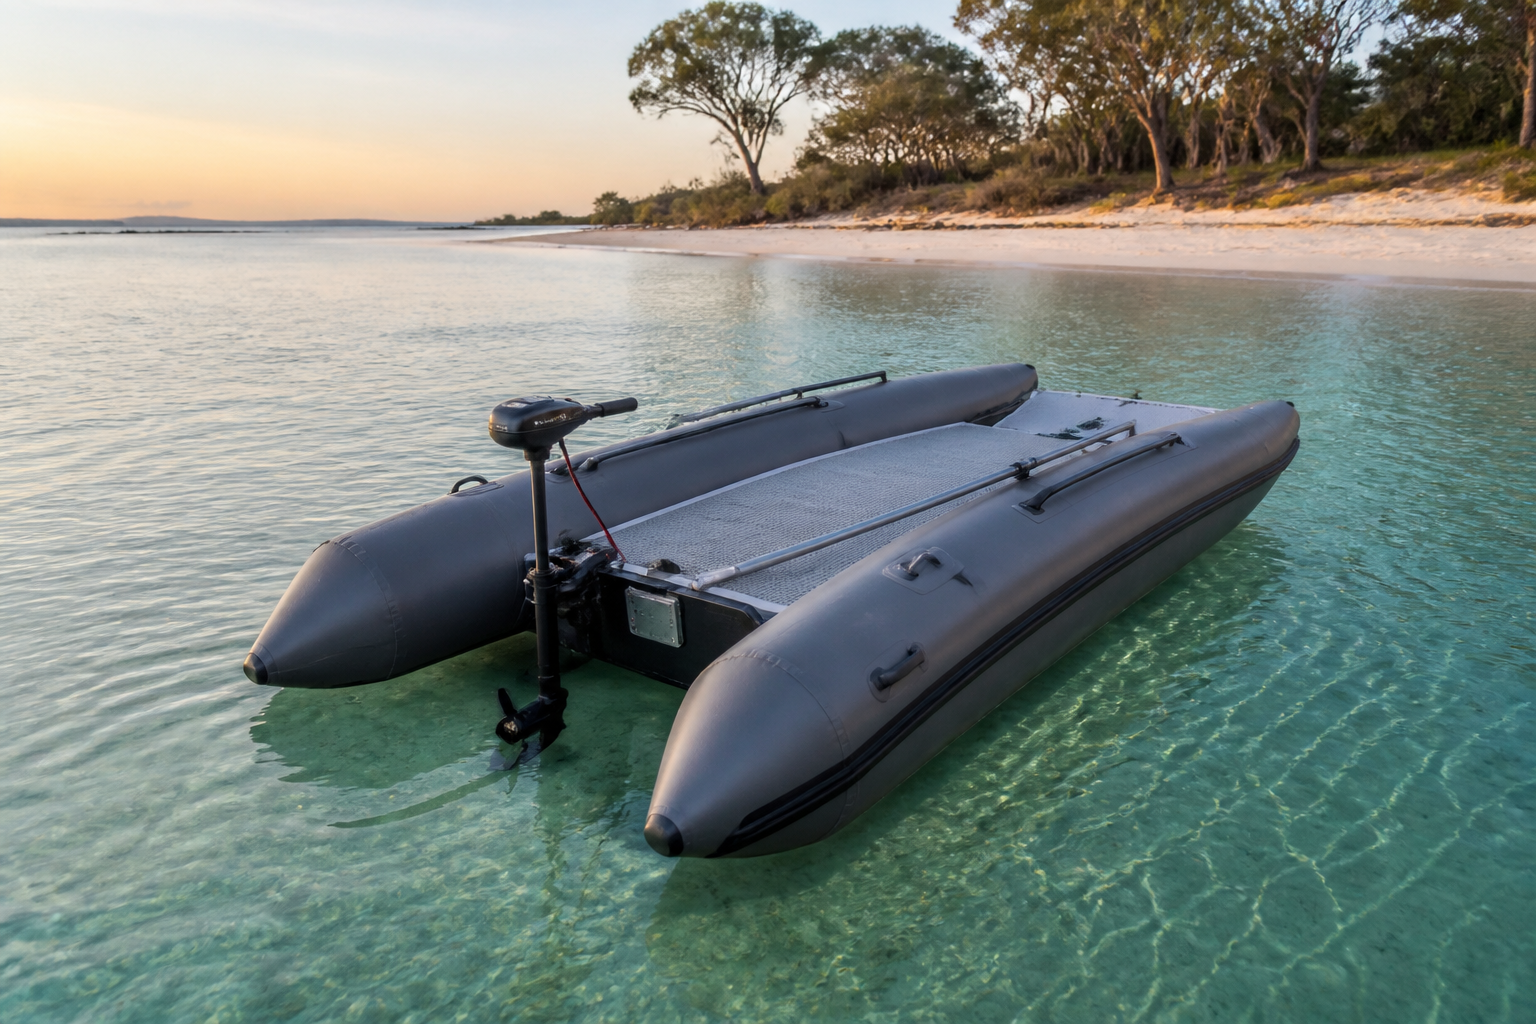
Build quality matters. Better fabric, better seam construction and better component choices reduce the amount of maintenance you need to do in the first place. For families, anglers, yacht owners and beach campers, that usually means more use and less workshop time. Whether you’re comparing tenders, compact boat-in-a-bag options, or inflatable catamarans for stable fishing and exploring, durability is part of the value, not a bonus extra.
If your current boat is worth saving, repair it properly. If it’s become a cycle of patch, pump and frustration, upgrade with your eyes open and buy for the way you boat.
If you’re ready for a tougher tender, a reliable family runabout, or a stable inflatable catamaran built for Australian conditions, have a look at Easy Inflatables. The range covers portable inflatables, yacht tenders, fishing-ready setups and custom options built with premium materials, backed by local support that makes ownership a lot easier.
Share the post now
Set Sail with Easy Inflatables
Experience the ultimate freedom on the water with our top-quality inflatable boats and accessories. Easy Inflatables is your trusted partner, providing everything you need for a safe and unforgettable adventure.
Categories
- Accessories & Gear (84)
- Adventure Destinations (63)
- Boat Accessories & Setup (25)
- Boat Comparisons (7)
- Boat Trailers (12)
- Boating Safety Gear (5)
- Catamaran Boats (12)
- Customer Stories & Experiences (4)
- Inflatable Boat Guides (47)
- Inflatable Boats & Kayaks (149)
- Inflatable Catamarans (12)
- Maintenance & Care (114)
- Outboard Motors (53)
- Outdoor Activities (26)
- Product Comparisons & Reviews (108)
- Setup & Safety Tips (52)
- Special Offers & Promotions (2)
- Sustainability Tips (13)
- Types of Boats (47)
Related Post
Your Guide to the Best Waterproof Battery Box of 2026
Sea Trail Boat Trailers A Complete Australian Guide
Choosing the Best Electric Trolling Engine: 2026 Guide
Inflatable Motorised Boat A Buyer’s Guide for Australia
Stay Connected
Join our community of water adventure enthusiasts! Sign up for Easy Inflatables' monthly newsletter for exclusive tips, product updates, and insights to make the most of your outdoor adventures.
Shop gear featured in this guide
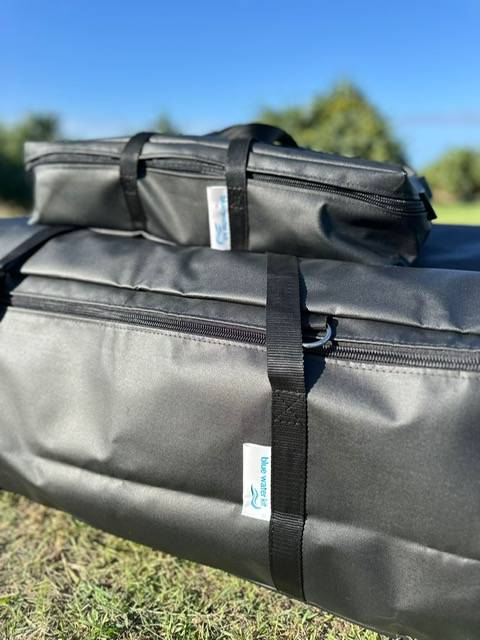
Blue Water Kit – Australian-Made Boat Bag Set
Premium Australian made inflatable boat bags built for durability and organization on the water.
Aerowave Viper 330
The compact premium Viper catamaran package built for buyers who want serious stability, easy transport, premium materials and real global support in a 3.3m boat. German VALMEX® 1.2mm fabric, 10 PSI high-pressure drop-stitch air deck floor with VALMEX non-slip surface, 5-year warranty and FREE express delivery Australia-wide delivery.
Aerowave Viper 400 Sovereign
Flagship 4m enclosed-bow inflatable catamaran. German VALMEX® 7321 Heavy Plus 1.2mm commercial-grade fabric, 10 PSI high-pressure drop-stitch air deck floor with VALMEX non-slip surface, LockPro wheels, full Bimini and FREE express delivery Australia-wide delivery included. Winter special — save $1,000 until 31 August 2026.
Not sure which suits you? Talk to a real boat owner.
Ready to set sail?
Premium German-fabric inflatable catamarans with FREE Sea Freight or Express Air Delivery — your choice at cart. Talk to our team or browse the fleet.
Like this guide? Get the next one in your inbox.
Owner-tested tips, gear deep-dives and Aussie boating know-how — no spam.