Your Guide to the Best Waterproof Battery Box of 2026
A waterproof battery box is the single most important piece of gear for protecting your marine battery. It’s not just a simple plastic tub; it's a purpose built shield designed to keep your power source safe from water,…
🇺🇸 Boats shipping to United States
See landed prices in USD before you bounce.
Door-to-door delivery to United States in 7–14 days. Choose a boat, see local-currency pricing, or request a fixed landed quote from the sales team.
A waterproof battery box is the single most important piece of gear for protecting your marine battery. It’s not just a simple plastic tub; it's a purpose-built shield designed to keep your power source safe from water, salt spray, and hard knocks, ensuring your boat's electronics never fail you.
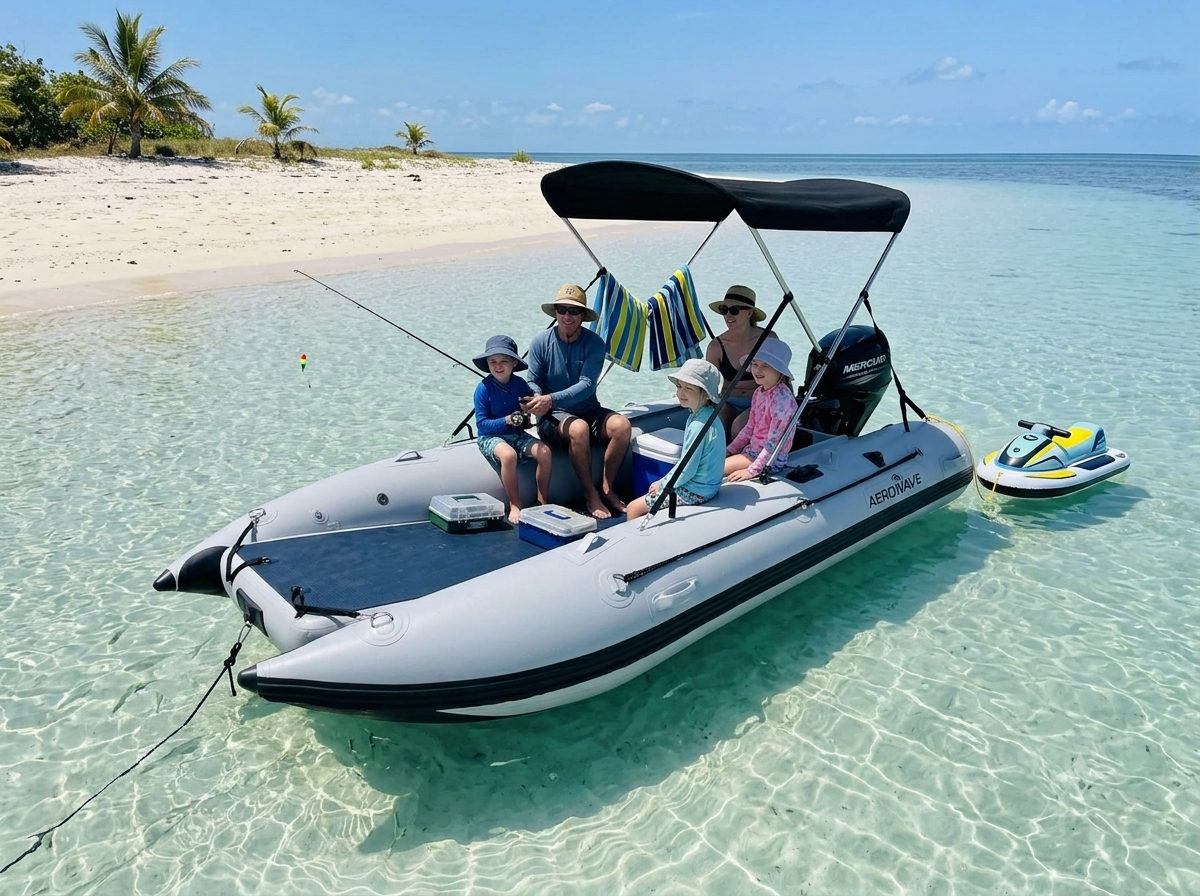
For anyone running gear on an inflatable boat, tender, or even an inflatable catamaran, this isn't an optional extra—it's a critical upgrade. If you're looking for the best inflatable boats for recreational use available near you, having a secure power system is the first step to a great day out.
Why a Waterproof Battery Box Is Your Most Critical Upgrade
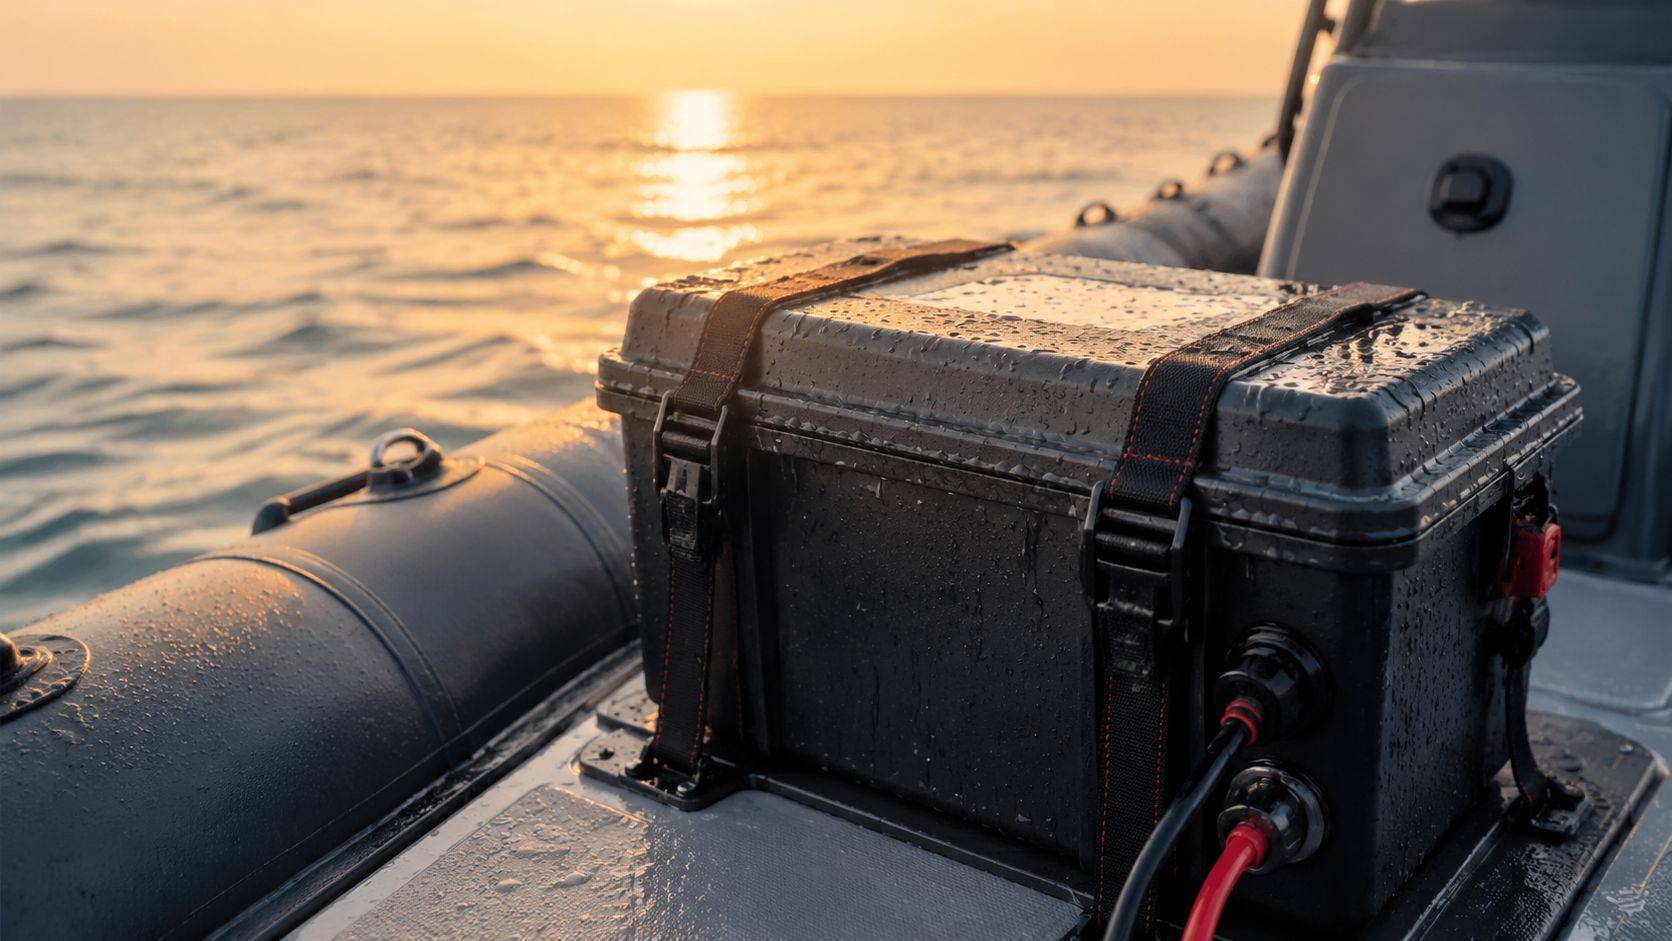
Picture this: you're miles from shore, the fish are biting, and then your sounder or GPS cuts out. A fantastic day on the water relies on dependable power, and in the harsh marine world, that power is always under threat. This is where a waterproof battery box shifts from a "nice-to-have" to an absolutely non-negotiable piece of kit.
Think of it as an insurance policy for your entire electrical system. It's the unsung hero that guards your expensive battery against its worst enemies: corrosive saltwater, driving rain, and the unexpected wave that washes over the deck.
Protection Beyond the Plastic
A generic plastic tub from the hardware shop simply won’t do the job. A proper marine battery box is engineered for the tough conditions we face out on the water, especially on inflatables, tenders, and our nimble inflatable catamarans.
The benefits are clear and immediate:
- Corrosion Prevention: Saltwater is brutal. Just one splash can start corroding battery terminals and wiring, causing voltage drops and, eventually, total system failure. A sealed box keeps everything bone dry.
- Enhanced Safety: It stops accidental short circuits. Imagine a stray metal fishing lure or a pair of pliers falling across the battery terminals—a good box prevents that disaster. This is a vital part of your overall boating safety equipment.
- Impact Resistance: On smaller boats, getting knocked around in choppy water is part of the experience. A quality box absorbs those impacts, protecting the battery's delicate internal structure.
- Battery Longevity: By shielding your battery from physical damage and extreme temperature swings, the box helps it last longer. That saves you real money down the track.
The Australian Standard for Protection
Here in Australia, with more and more of us running electronics on everything from small tinnies to kayaks, having reliable protection is paramount. If you're looking to hire inflatable boats for a family outing in Australia, you'll notice that professionally maintained boats always have secure, protected power systems. A key benchmark to look for is an IP67 rating. This means the enclosure is completely dust-tight and can handle being submerged in 1 metre of water for up to 30 minutes.
This isn't just about deflecting a bit of spray; it's a guarantee of true waterproof performance, which is exactly what you need when a wave catches you by surprise.
For owners of inflatable boats and tenders, a waterproof battery box isn’t just an accessory; it’s the heart of a reliable and safe onboard power system. It ensures that when you need your electronics the most, they will be ready to perform.
How to Select the Right Size and Type for Your Battery
Choosing the right waterproof battery box isn’t about the box itself—it’s about the battery you’re putting inside it. This is where a lot of people get it wrong. Pick a box that’s a perfect match for your battery, and you’ve got a safe, reliable power system. Get it wrong, and you’re looking at wasted money, a box that won’t close, or worse, a dangerous setup on your inflatable.
The two main contenders in the marine battery world are the old-school lead-acid batteries and the newer lithium options. For a lightweight inflatable or tender, the difference between them is night and day, especially when it comes to weight. When you compare prices and features of inflatable boats in your area, you'll see that lightweight models benefit hugely from lighter power sources.
Lead-Acid Versus Lithium: What You Need to Know
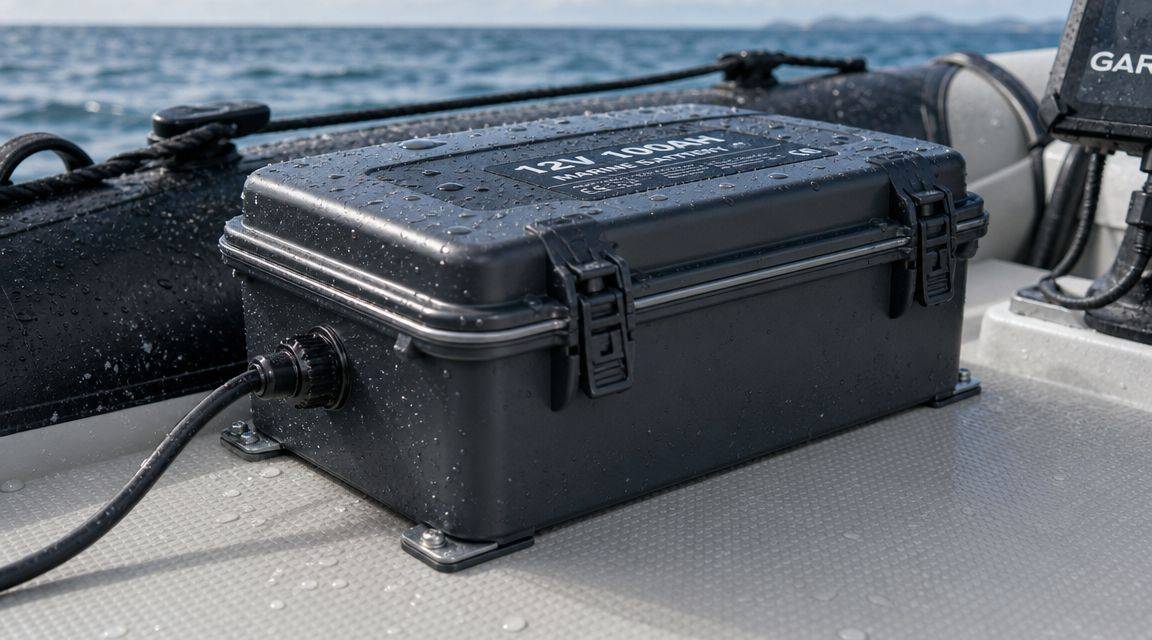
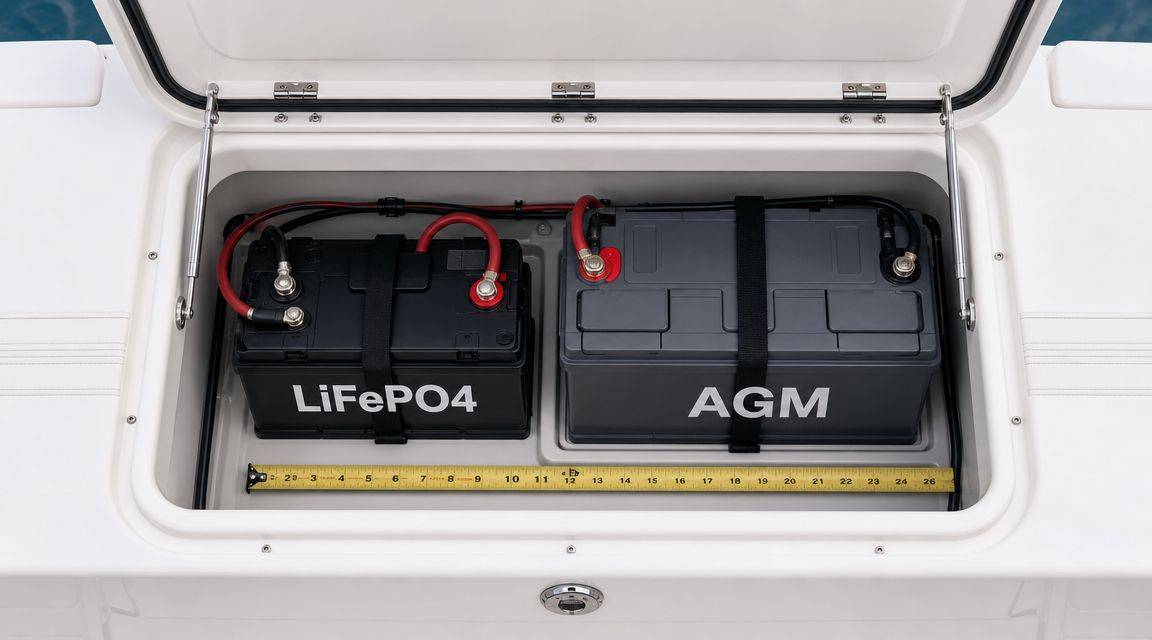
For decades, lead-acid batteries—especially the AGM (Absorbent Glass Mat) types—were the go-to choice. They’re dependable and cheaper upfront, which is always tempting. But their big weakness is weight. A standard 100Ah AGM battery can tip the scales at over 30 kg, which is a serious load to put on a small inflatable.
This is why Lithium Iron Phosphate (LiFePO4) batteries have taken over. A 100Ah LiFePO4 battery weighs in at just 11–13 kg, less than half of its lead-acid cousin. Yes, they cost more to begin with, but they provide more usable power, last significantly longer, and their chemistry is far more stable and safe. While we're talking about reliable power, it's amazing to see how battery technology has evolved; if you're curious about large-scale systems, you can see how some homeowners maximize savings with Florida battery backup.
The single biggest mistake we see boaters make is buying a box that’s too small. They shop based on the battery's amp-hour (Ah) rating, not its physical dimensions, and end up with a box that simply won't close.
Match the Box to the Battery Group Size
Batteries are sorted by a "Group Size," like Group 24, 27, or 31. This isn't about power—it's a standard that defines the battery's physical footprint (length, width, and height). Your waterproof battery box needs to be selected to fit your battery's specific Group Size.
Always, always measure your battery before you even think about buying a box. Then, double-check the internal dimensions of the box. Don't just trust a description that says it "fits most Group 27 batteries." A few millimetres is all it takes to go from a perfect fit to a useless purchase.
Why Extra Room Is Non-Negotiable
A snug fit sounds good in theory, but in practice, it’s a terrible idea. You absolutely need to leave some wiggle room inside the box for two critical reasons: wiring and ventilation.
- Wiring Clearance: Those thick battery cables don't bend easily. You need enough space to route them from the terminals to the box’s exit points without creating sharp kinks or putting stress on the connections.
- Ventilation (for Lead-Acid): This one is a major safety point. If you’re running a traditional lead-acid or AGM battery, it can release hydrogen gas when charging. Hydrogen is highly flammable and has to be able to escape. A box that’s packed too tight traps this gas, creating a serious risk.
To make the choice clearer, we’ve broken down the key differences to consider when matching a box to your battery. For a deeper dive into our recommended setups, you can learn more about finding the right battery box for your boat in our dedicated guide.
Here's a quick comparison to help you decide.
Choosing Your Box Based on Battery Type
| Battery Type | Average Weight (for 100Ah) | Ventilation Needs | Best For | Box Size Consideration |
|---|---|---|---|---|
| Lead-Acid (AGM) | 28–32 kg | Essential. Vented box required to release gas during charging. | Budget-conscious boaters who can handle the extra weight. | Must have extra space for ventilation all around the battery. |
| Lithium (LiFePO4) | 11–13 kg | Minimal. No gas is released, but airflow prevents heat buildup. | Boaters prioritising lightweight performance and long-term value. | Needs clearance for wiring, but ventilation is less critical. |
Ultimately, getting the right waterproof battery box starts with your battery. Know its exact dimensions and type, then choose a box that gives you enough room for safe wiring and proper ventilation. Taking the time to get this right ensures your power system is not just protected from the elements, but is also reliable and safe for every trip out on the water.
Decoding IP Ratings and Construction Materials
Technical jargon can be a real headache, but when it comes to safety on the water, it pays to know what you're looking at. When you’re shopping for a waterproof battery box, you’ll see codes like "IP67," and understanding them is crucial.
Think of it like the water-resistance rating on your phone or a good watch—it’s a simple, universal code that tells you exactly how much protection you’re getting from dust, spray, and even a full dunking. This is called the Ingress Protection (IP) rating.
Breaking Down the IP Rating Numbers
The IP code is made up of two numbers. Together, they paint a clear picture of how well a box will hold up in a tough marine environment.
The first digit is all about protection from solids, like dust and sand. The scale runs from 0 (zero protection) up to 6 (completely dust-tight). For any boat, you want a box with a first digit of at least 5, but a 6 is the real deal. It guarantees that no fine sand or grit can work its way inside and mess with your battery terminals.
The second digit is the one that really matters for us boaties: water protection. This scale goes from 0 (no protection) to 8 (good for continuous immersion in deep water).
Here’s what the most common ratings mean for you:
- IP65: The box is dust-tight and can handle low-pressure water jets, like light rain or a bit of spray. It's okay, but it won’t cut it if a decent wave washes over your boat.
- IP66: This steps it up to protection against powerful water jets. It’s better for heavy spray and rougher conditions, but it’s still not designed to go for a swim.
- IP67: This is the gold standard for small boats. A battery box with an IP67 rating is totally dust-tight and can be fully submerged in up to 1 metre of water for 30 minutes.
For an inflatable boat, tender, or inflatable catamaran where a rogue wave or even a capsize is a genuine possibility, an IP67 rating is your best friend. It’s the difference between crossing your fingers and having total peace of mind that your power system will survive.
Beyond the Box: The Materials That Matter
While a high IP rating is your first checkpoint, the materials used to build the box are just as important for long-term reliability. Not all plastics are the same, and the material directly affects how well the box handles impacts, UV damage from the Aussie sun, and years of hard use.
You’ll generally come across three main types:
- Standard Polypropylene (PP): This is a basic, cheap plastic often found in budget-friendly boxes. It offers some protection but can get brittle over time with sun exposure and is more likely to crack if it takes a hard knock.
- ABS (Acrylonitrile Butadiene Styrene): This is a massive step up in quality. ABS is much tougher and more impact-resistant than standard plastic—it’s the same sort of durable stuff used in car bumpers and power tool casings. It’s built to last.
- Fibreglass: Often seen on premium boxes, fibreglass is exceptionally strong and rigid. It offers excellent resistance to impacts and chemicals, but it’s also heavier and comes with a higher price tag.
The materials in your battery box are just as critical as the ones in your boat. To see how premium materials can make or break performance, check out our article on the benefits of Hypalon vs. German Mehler PVC for inflatables.
The Anatomy of a Truly Waterproof Seal
A box is only as waterproof as its weakest point. The best material in the world won’t do you any good if the lid seal is rubbish. Three things are vital for a seal you can actually rely on.
- The Gasket: This is the rubber or silicone seal that sits in the lid's channel. A cheap foam gasket will compress and fail over time, but a quality, continuous silicone O-ring will give you a tight, consistent seal for years.
- The Latches: Look for sturdy, over-centre latches that clamp the lid down with serious force. Flimsy plastic clips can snap or lose tension, compromising the seal. Robust, cam-style latches are what you want to see, as they ensure the gasket is evenly compressed.
- Lid Design: A well-designed lid will have a deep channel for the gasket and an overlapping lip. This simple feature helps shed water away from the seal and adds a second line of defence against any water getting in.
Essential Wiring and Safety Best Practices
A top-quality waterproof battery box is a brilliant start, but getting the box is only half the job. The real secret to a safe and reliable power setup is what you do inside the box—the wiring. Getting this right isn’t just about making sure your gear works; it's about preventing electrical faults that can damage your equipment or, worse, create a serious hazard on the water.
Think of your boat's electrical system like the fuse box in your house. You’d never plug a high-powered appliance straight into the wall without a safety switch, and the same thinking absolutely applies to your boat.
Every single accessory you power, from the trolling motor to the fish finder, needs its own protection. Installing an inline fuse or a circuit breaker is non-negotiable. This little device is your first line of defence, instantly cutting the power during a short circuit or surge that could otherwise fry your electronics or even start a fire.
Choosing Fuses and Wires
Picking the right fuse is straightforward. Just check the manufacturer’s specs for your trolling motor or sounder. The gear will have a maximum amp draw listed, and you’ll want a fuse or breaker rated just a little bit higher than that. This stops it from tripping during normal use but guarantees it will blow if a dangerous fault happens.
Once you have your fuse sorted, it's time to choose your wire. The marine environment is brutal on electronics, and standard automotive wire just won't cut it.
- Use Marine-Grade Tinned Copper Wire: This wire is coated with a thin layer of tin, which makes it incredibly resistant to the corrosion that saltwater and moisture love to cause. It’s the key to a solid electrical connection that lasts for years.
- Make Solid Connections: Loose or poorly crimped connections are the number one cause of power failures out on the water. Always use marine-grade terminals and crimp them on tight.
- Seal Everything with Heat-Shrink Tubing: After crimping, slide a piece of adhesive-lined heat-shrink tubing over the connection and warm it gently. It’ll shrink down and create a tough, waterproof seal that locks out moisture for good.
Following these steps will keep your connections clean, strong, and corrosion-free, giving you consistent power right when you need it.
Maintaining the Waterproof Seal
Of course, running wires out of a sealed box creates a hole where water can get in. This is where a simple but crucial part called a cable gland (or cord grip) comes into play. You simply drill a hole, screw in the gland, and pass the cable through. It tightens down to create a perfect watertight seal.
Here in Australia, there’s a big push among boaties to move away from just "water-resistant" setups and towards genuinely sealed installations, especially for smaller boats that cop a lot of spray. For example, a popular guide for building a DIY battery box recommends sealing the cable glands with marine goop and adding rubber caps for total protection, while also noting the box isn't meant for full submersion. You can find similar real-world tips from experienced boat owners across UK boating forums.
Safety Critical: The Importance of Ventilation
If you're running a traditional lead-acid or AGM battery, proper ventilation isn't just a good idea—it's an absolute must. During charging, these batteries can release hydrogen gas. In a sealed box, this gas can build up and create a seriously explosive environment.
Many battery boxes designed for these batteries have built-in vents to let the gas escape safely. If yours doesn't, you must drill a few small holes for airflow or leave the lid slightly open while charging in a dry, well-ventilated space. This rule doesn't apply to modern lithium (LiFePO4) batteries, which don't produce any gas and are perfectly safe to keep in a fully sealed box. For a deeper dive into battery types, our guide on choosing a marine battery and charger breaks it all down.
Securely Installing the Box on Your Inflatable Boat
Mounting gear on an inflatable boat is a different ball game compared to a traditional hard-hulled vessel. You can’t just grab a drill and start making holes wherever you fancy. This section is all about damage-free, practical ways to lock down your waterproof battery box, ensuring it stays put without putting your boat’s tubes at risk.
Let’s be honest, a heavy battery box sliding around is more than just an annoyance. It can throw off your boat's balance, yank on your electrical wiring, or even turn into a dangerous projectile in a bit of chop. The goal is to anchor it down firmly while making sure you can still easily remove it when you need to.
Mounting Strategies for Inflatables
The best approach is to work with what your boat already gives you, like D-rings and bench seats. Your new best friend here is a set of heavy-duty cam-buckle straps. Steer clear of those cheap ratchet straps with sharp metal hooks—they're a surefire way to puncture your PVC or Hypalon fabric.
Here are the two most effective ways to get it done:
- Strapping to D-Rings: Most quality inflatables come with strong, welded D-rings on the floor or tubes. Simply run two straps through your battery box handles and cinch them down tight to these points. This is hands-down the most secure method for keeping the box locked in place.
- Securing to a Bench Seat: If you’ve got an aluminium or timber bench seat, you can strap the box directly to it. This gets the battery off the floor and keeps it fixed, though it does raise your centre of gravity a little.
Got an air-deck or flat aluminium floor? You’ll know that a loose box can slide around like it's on ice. A simple non-slip rubber mat, like the kind you find in a ute tray, placed underneath the battery box gives it fantastic grip and stops it from shifting.
Where you place the box matters. A lot. For the best stability and handling, always position the battery box as low and as close to the boat's centreline as you can. This keeps your boat balanced and predictable. For more tips on getting your vessel set up right, have a look at these essential inflatable boat setup tips for safety.
The infographic below recaps the key safety and wiring steps we’ve covered, which are the foundation of any secure installation.

This guide is a great reminder that a secure mount is only half the job. Safe wiring practices—from fusing your circuits to sealing every entry point against moisture—are just as critical. When you start adding power-hungry accessories, a properly installed battery box becomes non-negotiable. This is especially true when it comes to high-draw items, making the process of picking a reliable boat winch much simpler when you have a solid power source you can trust.
By combining good strapping techniques with smart placement and a non-slip mat, you’ll have a mounting system that is both rock-solid and perfectly suited to your inflatable. That’s the kind of confidence you want every time you head out on the water.
Your investment in a quality waterproof battery box is a great first step, but it doesn't end there. Like any piece of marine gear that cops a beating from sun and salt, a little ongoing care is what keeps it reliable trip after trip.
Think of it this way: you wouldn't head out on the water without checking your fuel, right? A quick annual check-up on your power system is just as crucial. It’s the best way to catch small issues before they leave you stranded.
Taking a few minutes before your boating season kicks off can save you a world of headaches later. This simple routine will extend the life of your battery and your box, ensuring you have power when you need it most.
Your Annual Maintenance Checklist
Set aside some time once a year to give your whole setup a proper once-over. It’s the difference between a reliable system and a ticking time bomb.
- Inspect Gaskets and Seals: Pop the lid and run your finger over the rubber or silicone gasket. Is it cracking, brittle, or squashed flat? A dodgy gasket is the number one reason a "waterproof" box fails. If it looks tired, replace it. It's a cheap fix that saves you from a very expensive problem.
- Check for Moisture: After a particularly wet trip, it's always smart to open the box and check for any signs of water inside. Even a little bit of condensation is a red flag. If you find moisture, you’ve got a leak to track down – usually from a worn gasket or a loose cable gland.
- Examine the Latches: Make sure every latch snaps shut firmly and puts even pressure on the lid. A loose or broken latch means the seal isn't doing its job, rendering the box pretty useless against spray or a downpour.
Keeping Corrosion at Bay
Corrosion is the silent killer of marine electricals. Salt, moisture, and electricity are a nasty combination. Even with a sealed box, you can’t afford to get complacent. Your battery terminals and wiring are the weakest links.
Keep an eye on your terminals for any white or greenish crusty buildup. If you see it, disconnect the battery immediately. Clean it all off with a wire brush and a simple paste of baking soda and water. Once it's spotless and dry, slather a thin layer of dielectric grease over the terminals. This creates a barrier that stops moisture from getting in and starting the whole process over again.
Think of this routine as changing the oil in your car—a simple, preventative task that prevents catastrophic failure down the road. A few minutes of cleaning can save you from a dead battery miles from shore.
Off-Season Storage and Winterising
How you store your gear during the off-season makes a huge difference, especially if you live somewhere that gets cold. A frozen battery is usually a dead battery, so never leave it outside in an uninsulated shed over winter.
The best move is to bring the whole battery box setup inside. A cool, dry spot in the garage or a basement is perfect. If you're running a traditional lead-acid battery, hooking it up to a smart trickle charger will keep it healthy and ready for next season. Lithium batteries are a bit more forgiving and hold their charge much better, but it's always best to check the manufacturer's storage recommendations.
Common Questions About Waterproof Battery Boxes
Even with the best plan, a few questions are bound to pop up when you're sorting out your power setup. Let's tackle the most common queries we hear from fellow boaties, so you can choose the right waterproof battery box with complete confidence.
Do I Need a Waterproof Box for a Sealed Lithium Battery?
Yes, you absolutely do. This is a question we get a lot, and the answer is always the same.
While a modern lithium battery is sealed and won’t leak acid like the old lead-acid ones, the waterproof battery box is about more than just containing leaks. Its real job is to shield your vulnerable electrical connections and terminals from the harsh marine world.
Think about it—salt spray is everywhere, and it’s incredibly corrosive. It will chew through high-quality wiring and connectors in no time if they're left exposed. This leads to frustrating voltage drops, flickering electronics, and eventually, total power failure right when you need it most.
A good battery box is like a clean, dry garage for your entire power system. It’s a simple step that guarantees reliability for years to come.
Can I Charge the Battery While It Is Inside the Box?
Yes, but you need to be smart about it. If you're still using a traditional lead-acid or AGM battery, proper ventilation is non-negotiable. These batteries release flammable hydrogen gas during charging, which needs a clear path to escape.
For any battery type, the safest and most convenient setup is a quality box with built-in external charging ports. This lets you connect your charger without ever opening the lid and exposing the terminals.
If your box doesn’t have these, you must open it up in a dry, well-ventilated area before charging. You never want heat building up inside a sealed box during a charge cycle—it’s a surefire way to shorten your battery's life.
The ultimate goal is to create a self-contained, protected power hub. Your choice of a waterproof battery box and how you use it directly impacts the safety and performance of every electronic device on your inflatable boat.
What Is the Best Way to Secure the Box in My Inflatable?
This is a key question, especially for anyone with a recreational inflatable or an inflatable catamaran. The last thing you want is a heavy battery box sliding around.
The best method is to use two good-quality cam-buckle straps—and we mean the fabric cam-buckle type, not the sharp metal ratchet straps that can damage your boat and the box.
Run the straps through the box handles and anchor them securely to your boat's floor or tube D-rings. If you've got an aluminium or air deck floor, stick a non-slip rubber mat underneath the box for extra grip. For the best stability and performance, always aim to position the box low and as close to the boat's centreline as possible.
Ready to create a reliable and safe power system for your adventures? Easy Inflatables offers a range of durable inflatable boats and expert advice to help you get the most out of your time on the water. Explore our range today at .
Shop gear featured in this guide
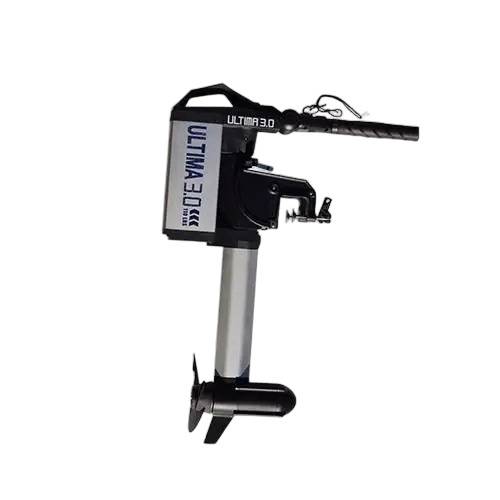
Haswing Ultima 3.0HP Electric Outboard
Petrol-equivalent performance without the noise, fumes, or fuel maintenance — 110lbs of thrust and up to 1030W output.
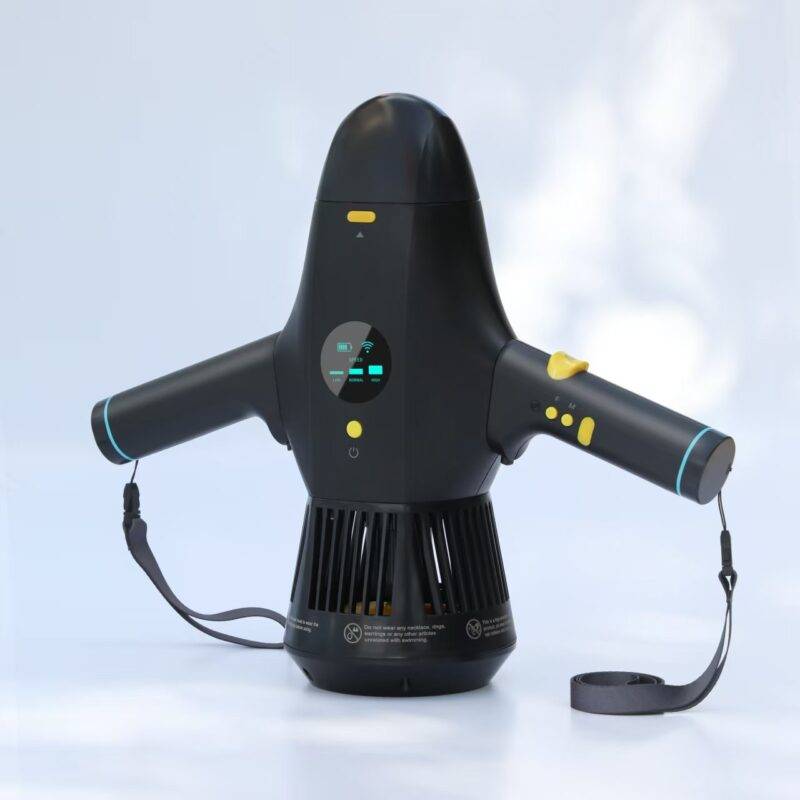
Stermay M1 Snorkelling Sea Scooter
A lightweight, electric underwater scooter designed for snorkelling and shallow-water exploration, with intuitive controls and a maximum speed of 5 km/h.
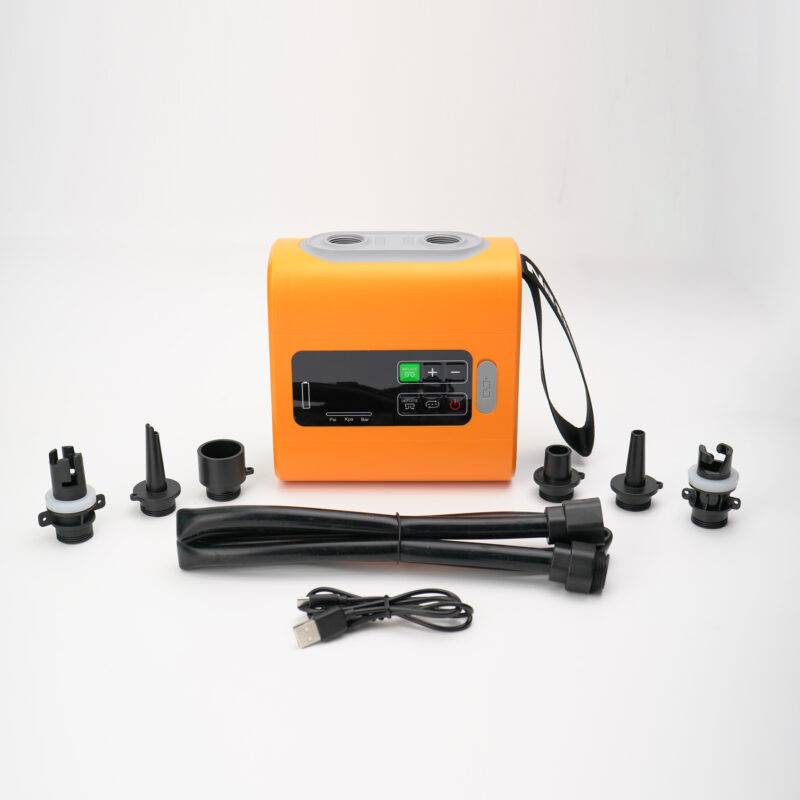
22 PSI Lithium Electric Air Pump
A portable lithium electric pump built for inflatable boats and SUPs, ensuring faster setup and accurate pressure.
Not sure which suits you? Talk to a real boat owner.
Ready to set sail?
Premium German-fabric inflatable catamarans with FREE Sea Freight or Express Air Delivery — your choice at cart. Talk to our team or browse the fleet.
Like this guide? Get the next one in your inbox.
Owner-tested tips, gear deep-dives and Aussie boating know-how — no spam.