Commissioning Your New Inflatable Boat: The Ultimate Aussie Guide
Our definitive step-by-step guide on how to commission a new inflatable boat. From the initial unboxing and inflation to the outboard's first start and that triumphant maiden voyage in Australian waters.
🇺🇸 Shipping to United States · duty & taxes prepaid
Yes — we ship the Aerowave Viper 400 Sovereign to United States. Here's the landed price.
Our best-selling boat: 4.0 m, 1.2 mm VALMEX hull, 7-year hull warranty.
Written for Australian readers — but the boat ships to you. We are an Australian builder and this article is written from Australian waters. That changes nothing about what you can order: the same hull, the same 7-year warranty and the same certification go out to United States every week.
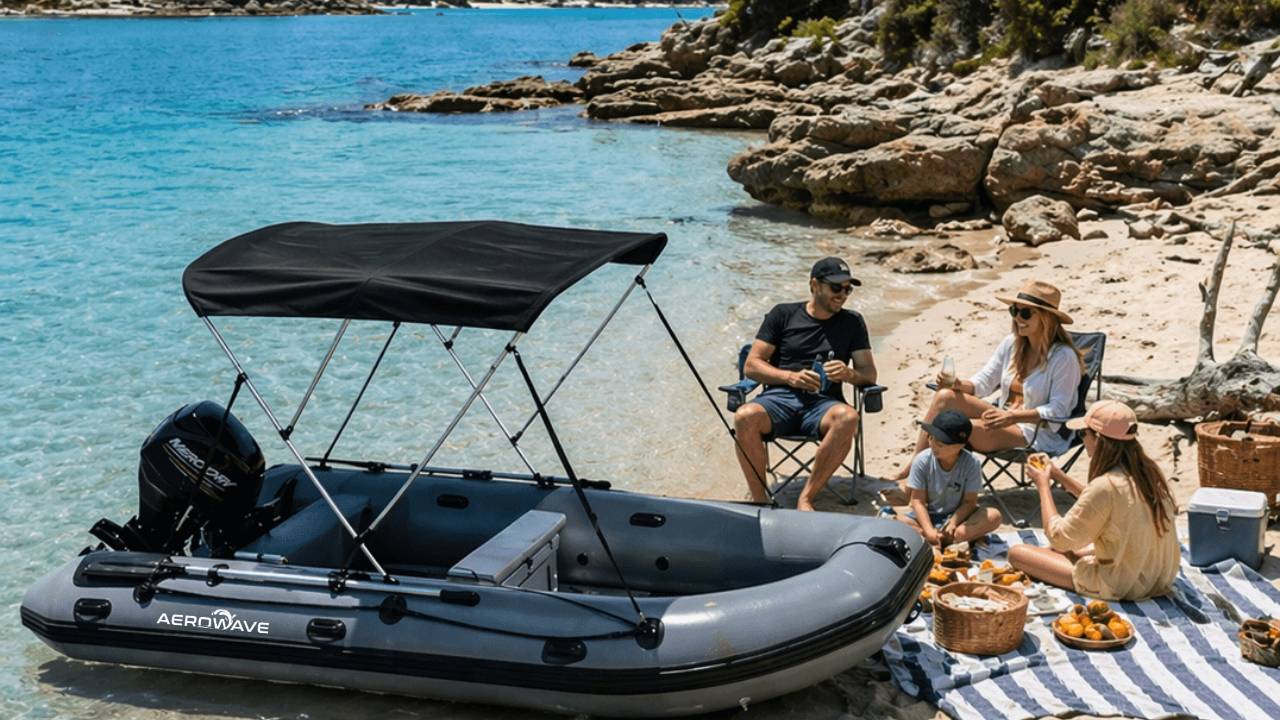
Aerowave Viper 400 Sovereign
- Boat package (export price)
- US$4,182
- 15% tariff relief credit
- − US$627
- Express air freight to United States
- US$1,221
- Import duty, taxes & customs clearance
- US$1,328 — prepaid by us
- Estimated landed, USD
- US$6,104
Indicative, converted at today's rate. Ask below and we'll put a fixed figure in writing, valid 30 days.
- 7-year hull warranty
- 1500 GSM / 1.2 mm VALMEX® Heavy Plus hull
- CE certified to ISO 6185-3 and EU Directive 2013/53/EU
- Delivered duty paid — nothing to pay on arrival
Your price, delivered to your door — freight included.
We email the full PDF quote (spec, freight, finance, WavePay) to your inbox in under 60 seconds. No spam — one quote, one follow-up.
That moment of unboxing your new boat is pure magic; commissioning it correctly turns that magic into a lifetime of adventure.
There are few feelings that compare to taking delivery of a brand new vessel. The promise of open water, secluded beaches, and fishing spots inaccessible by land is bundled up in that box. But before you can taste the salt spray, there's a crucial process to undertake: commissioning. This isn't just about blowing it up and hoping for the best. To correctly commission a new inflatable boat is to lay the foundation for its safety, performance, and longevity. It’s the methodical, satisfying process of transforming a boat-in-a-box into a seaworthy craft ready for Australian waters.
For many, especially first-time boat owners, this can seem daunting. What's the right inflation pressure? How do you run in a new four-stroke outboard? What checks are absolutely non-negotiable before that first launch? This guide is your definitive answer. We’ll walk you through every step, from the initial inspection to your post-voyage checklist, using the professional-grade standards we apply to our own Aerowave and AeroCat models. This isn't just about getting on the water; it's about doing it right, with the confidence that comes from a job well done.
Unboxing and the Critical First Inspection
The commissioning process begins the moment you cut the tape. Whether your new boat has arrived via Express Air Delivery in 7–14 days or you've patiently waited for the FREE Economy Sea Freight (30–40 days), the temptation is to get it inflated immediately. Resist. A careful, methodical inspection now can save you major headaches later.
Find a clean, clear, and soft surface to work on—a grassy lawn is perfect, but a clean garage floor will do. Avoid sharp gravel, concrete, or asphalt that could scuff or puncture the new fabric. Lay out all the components and cross-reference them with the manufacturer's packing list.
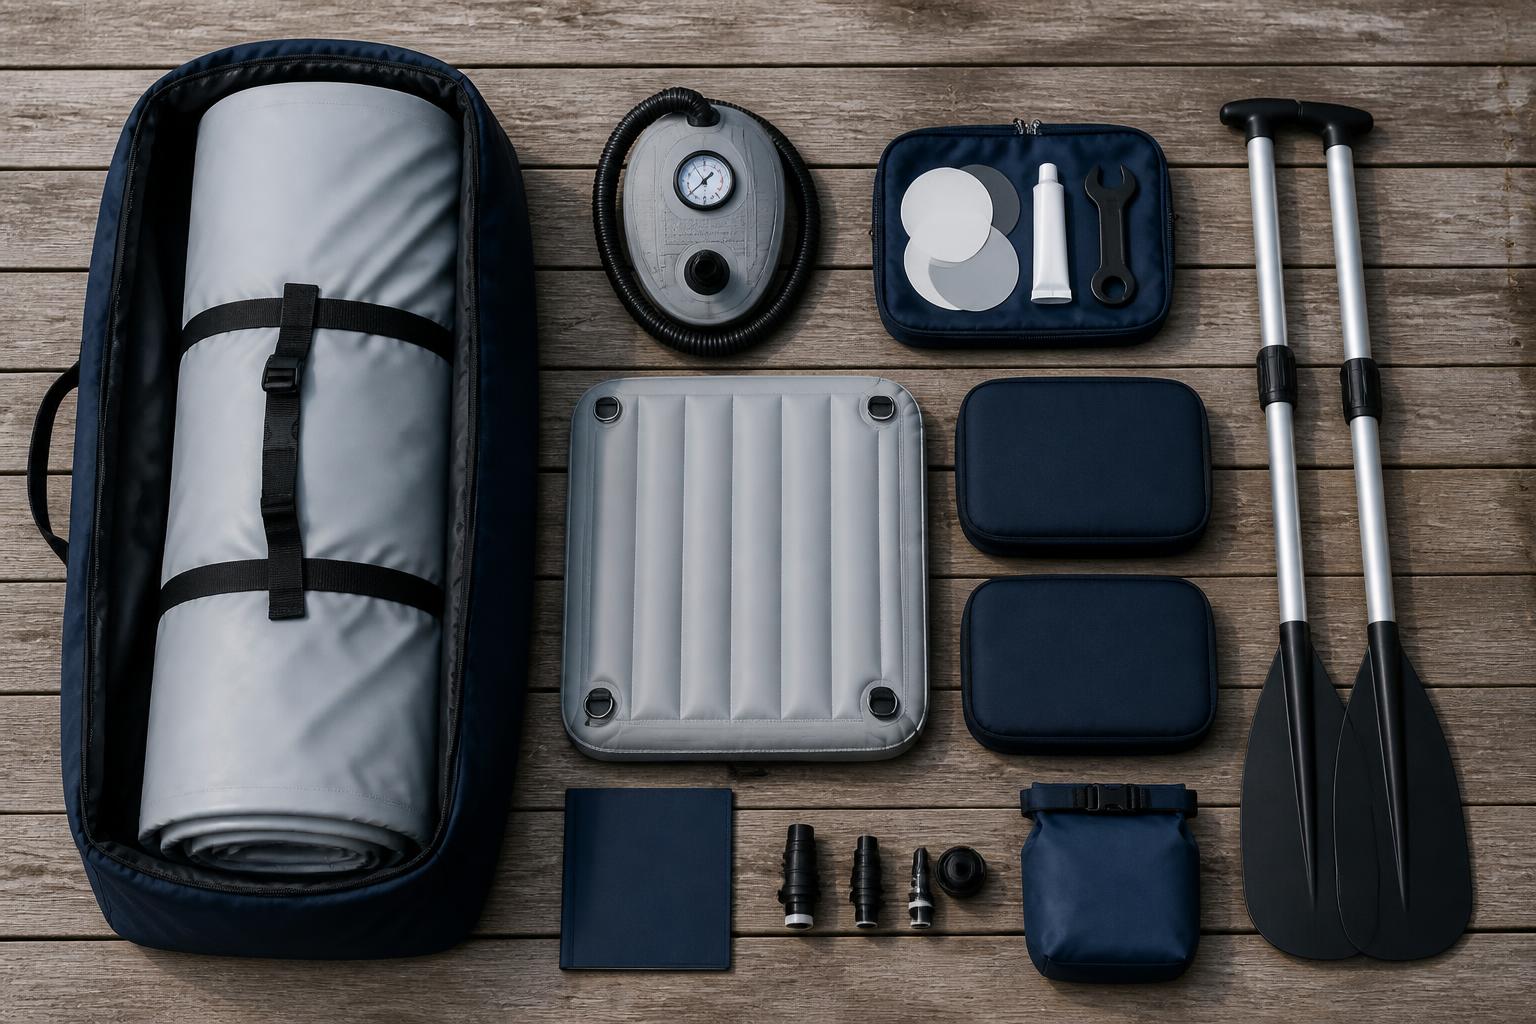
You should have:
- The main inflatable hull (rolled or folded).
- The high-pressure air deck floor (if separate).
- Oars or paddles.
- One or more bench seats.
- A high-volume hand or foot pump.
- A repair kit (patches, glue, valve wrench).
- A carry bag.
- Any optional extras you ordered, like launching wheels or a bow bag.
Now, unroll the hull and give it a thorough visual once-over. You're looking for any signs of transit damage—deep scuffs, abrasions, or anything that looks out of place. Pay special attention to the seams, transom attachments, and D-rings. On a premium boat, like an Aerowave Viper with its heavy-duty 1.2mm, 1500 GSM VALMEX® Heavy Plus fabric, the material should feel substantial and flawless. The seams should be perfectly bonded with no signs of peeling or air bubbles. This German-made fabric is the gold standard for a reason, promising a 10–12 year lifespan when cared for, and your initial inspection is the baseline for that journey.
Why This Matters More Than You Think
This initial check isn't just about spotting factory defects; it's your first opportunity to get intimately familiar with your boat. Understand where the valves are, how the transom is constructed, and where the attachment points for seats and accessories are located. This knowledge is invaluable, especially if you ever need to perform a repair or troubleshoot an issue on the water.
Compare the build quality to budget PVC imports you might have seen. Notice the precision of the welds, the robustness of the transom mount, and the quality of the fittings. This is the difference between a boat designed for a few seasons of light use and a serious vessel engineered for Australian conditions. If you spot anything that concerns you, now is the time to take a photo and contact your supplier. At Easy Inflatables, we're here to help, so don't hesitate to call us on +61 2 4335 1603 if you have any questions during this stage.
Inflation Technique: How to Safely Commission a New Inflatable Boat
Proper inflation is the single most important factor in your boat’s performance and structural integrity. An under-inflated boat will feel sluggish, flex unpleasantly in chop, and put undue stress on the seams and transom. An over-inflated boat risks damage, especially on a hot day when the air inside expands.
The Right Tools and Pressures
Your boat will come with a manual pump, which is great for getting started and for topping up on the go. However, for initial setup and regular inflation, a quality 12V electric pump with an auto-shutoff pressure gauge is a game-changer. It ensures you hit the exact recommended pressure every time, without guesswork or back-breaking effort.
Pressure is measured in PSI (Pounds per Square Inch) or Bar. Your boat's manual will specify the correct pressures, but here are the industry standards for high-quality boats:
| Boat Component | Recommended Pressure (PSI) | Recommended Pressure (Bar) | Notes |
|---|---|---|---|
| Main Hull Tubes | 3.0 - 3.6 PSI | 0.20 - 0.25 Bar | Firm to a solid thumb press. Consistent pressure in all chambers is key. |
| High-Pressure Air Deck | 8.0 - 10.0 PSI | 0.55 - 0.70 Bar | This is what creates the 'rigid' feel. It should be board-hard. |
| Inflatable Keel | 3.6 - 4.5 PSI | 0.25 - 0.31 Bar | Found on V-hull models like the WaveRunner 380, it's vital for tracking. |
The Inflation Sequence
Always follow a specific sequence to ensure even pressure distribution across the boat's structure.
- Work the Valves: Before connecting the pump, ensure all valves are in the closed (up) position. Press the central pin and turn it a quarter-turn. If it stays down, it's open for deflation. If it springs up, it's closed for inflation. A common rookie mistake is leaving a valve open and wondering why the boat won't hold air.
- Partially Inflate All Chambers: Inflate each of the main hull chambers to about 50% capacity. This gives the boat its basic shape but leaves it soft enough for you to install the floor and seats easily.
- Install the Air Deck and Seats: With the hull tubes soft, slide the high-pressure air deck into place. Ensure it's sitting flat and centred. Now is also the easiest time to slide the aluminium bench seats into their mounting tracks.
- Fully Inflate the Hull Tubes: Bring the main hull tubes up to their final working pressure (e.g., 3.6 PSI). Use a pressure gauge! Don't rely on 'feel' the first few times. Move from one chamber to another to keep the pressure balanced as they expand against each other.
- Inflate the Air Deck Last: Now, connect the pump to the air deck and inflate it to its much higher pressure (e.g., 8-10 PSI). As it inflates, it will expand and lock the hull tubes into their final, rigid position. You'll hear the boat creak and groan as everything settles—this is normal. The floor should now be incredibly firm, almost like a solid deck.
Once fully inflated, leave the boat for a few hours, or even overnight if possible. A brand new boat's material will stretch slightly on its first inflation, and you may notice a small pressure drop. This is normal. Simply top it up to the correct pressure before your first launch. This initial 'settling' period is a vital part of your new boat commissioning process.
Assembling Your Vessel: Transom, Oars, and Accessories
With the hull rigid and ready, it's time to fit the final hardware. The transom is the structural heart of the boat's stern, designed to transfer the thrust of your outboard motor to the hull.
Checking the Transom
Inspect the transom plate, both inside and out. It should be firmly bonded to the hull tubes with no gaps. On our Aerowave and AeroCat models, the transom is a robust, marine-grade plywood assembly, fully sealed and supported by heavy-duty attachments integrated into the VALMEX® fabric. Confirm the motor mount plates are secure and the drain plug (bung) is accessible and seals correctly. A small smear of silicone grease on the bung's O-ring is good practice to ensure a perfect seal and prevent it from seizing.
Make sure the transom height (the distance from the top of the mount to the bottom of the hull) is a correct match for your outboard. Most quality inflatables like ours feature a standard 380mm (15-inch) short-shaft transom, which is the industry standard for portable outboards up to around 20hp.
Fitting Oars and Accessories
Assemble and attach the oars. Even with a reliable motor, oars are essential safety equipment. Ensure they are secured correctly in their rowlocks and can be clipped securely to the side of the tubes when not in use, so they don't get in your way.
Now is also the time to attach any other accessories you might have, such as rod holders, launching wheels, or a bow-mounted canopy like our popular Air Tent ($890). Fit everything now, in the comfort of your backyard, rather than fumbling with it at a crowded boat ramp.
Preparing the Heart: Outboard Motor Commissioning
This is the most technical part of the checklist, and arguably the most important. A modern 4-stroke outboard, like the Hidea motors we recommend, is a sophisticated piece of machinery. Commissioning it correctly will ensure it starts easily, runs smoothly, and provides years of reliable service.
Warning: Always read the outboard motor's specific owner's manual before you begin. The following are general guidelines for a typical portable 4-stroke.
Uncrating and Mounting
Carefully uncrate the motor. It will be shipped without engine oil. DO NOT ATTEMPT TO START THE MOTOR UNTIL YOU HAVE ADDED OIL. This is the number one cause of new engine failure and is not covered by warranty.
Lift the motor onto the transom, ensuring it's perfectly centred. Tighten the transom clamps evenly and firmly by hand. They should be as tight as you can get them. For added security, we strongly recommend drilling through one of the clamp holes and bolting the engine to the transom, or at the very least, using a high-tensile safety wire to secure the engine to a D-ring or other strong point on the boat. Engines can and do vibrate loose from clamp-only mounts.
Adding Oil and Fuel
- Add Engine Oil: Place the motor in a vertical position. Locate the oil filler cap (usually yellow) and the dipstick. Using a funnel, slowly add the manufacturer-recommended 4-stroke marine engine oil (e.g., 10W-30 or 10W-40). Add a small amount at a time, checking the dipstick frequently. Fill to the upper mark on the dipstick. Do not overfill! Most portable outboards (4-9.9hp) take between 400ml and 800ml of oil.
- Fill the Fuel Tank: For motors with an internal tank, fill it with fresh, standard unleaded petrol (91 RON). Avoid E10 or premium fuels unless specified by the manufacturer. For motors with an external tank, connect the fuel line, ensuring the fittings 'click' securely into place on both the engine and the tank. Open the vent on the fuel cap and prime the engine by squeezing the primer bulb on the fuel line until it feels firm. Check thoroughly for any fuel leaks.
The First Start and Run-In Procedure
The 'run-in' or 'break-in' period is critical for seating the piston rings and polishing the bearing surfaces. Running a new engine too hard, too soon will drastically shorten its life. The first start should be done in a test tank (a large barrel or tub of water) or at the boat ramp with the boat in the water. Never run the engine out of water, not even for a few seconds, as this will destroy the water pump impeller.
- Cooling Water: Ensure the lower unit (gearbox and propeller) is fully submerged in water.
- Gear and Choke: Put the engine in 'NEUTRAL'. Pull out the choke knob (for a cold start).
- Start: Attach the safety lanyard (kill switch) to your wrist. Give the starter cord a short, sharp pull. It should start within a few pulls. As it warms up, slowly push the choke in.
- Check the 'Tell-Tale': Immediately look for a steady stream of water squirting from the 'tell-tale' outlet. This confirms the water pump is working and the engine is being cooled. If you don't see water within 10-15 seconds, shut the engine off immediately and troubleshoot.
- Initial Run-In (First 15 Minutes): Let the engine idle in neutral for 10-15 minutes. This allows it to come up to operating temperature slowly and circulates oil throughout.
- Run-In On The Water (First 2 Hours): This is part of your sea trial. Your manual will have a specific schedule, but it generally looks like this:
- First Hour: Vary the throttle, but do not exceed 50% power. Avoid holding a constant speed for long periods.
- Second Hour: You can now use bursts of up to 75% throttle, but for no more than a few minutes at a time. Return to lower speeds and continue to vary the RPM. Avoid full throttle.
- Subsequent 8 Hours: You can now use full throttle for short periods (1-2 minutes), but continue to focus on varying the engine speed. After 10 full hours of operation, the run-in period is complete. You can now operate the engine normally. We recommend changing the engine oil and gearcase oil at this 10-hour mark.
The Pre-Launch Checklist: Your Final Safety Scan
You're at the ramp. The boat is gleaming, the motor is purring in its test tank, and the water is calling. Before you slide it off the trailer or carry it to the water's edge, run through this final checklist. This isn't bureaucracy; it's the professional habit that ensures you come home safely every single time.
- Registration & Licensing: Are your boat registration stickers correctly displayed? Are you carrying your boat driver's licence? (Requirements vary by state and engine size—check with your local maritime authority).
- Weather & Tides: Have you checked the latest marine weather forecast and the tides for your planned area of operation?
- Bung/Drain Plug: Is it securely in? (The oldest mistake in the book!)
- Fuel: Is the tank full? Is the tank vent open?
- Safety Gear: Is all mandatory safety equipment aboard, accessible, and in good condition? This is non-negotiable.
- Correctly-sized PFDs/lifejackets for every person aboard.
- Anchor with chain and rope.
- Oars or paddles.
- Bailer or bucket.
- Waterproof torch.
- Fire extinguisher (if required for your vessel size).
- Signalling device (flares, V-sheet, mirror).
- Communications: Is your mobile phone fully charged and in a waterproof case? Do you have a VHF radio for offshore work?
- Personal Items: Sunscreen, hat, sunglasses, water, snacks.
- Task Acknowledgement: Confirm understanding of the mission to commission new inflatable boat and proceed with sea trial.
- Float Plan: Have you told someone reliable where you are going and when you expect to be back?
Your First Sea Trial: Putting it All Together
Choose a calm day and a sheltered waterway for your maiden voyage. A river, estuary, or protected harbour is ideal. The goal here isn't to break speed records; it's to get a feel for your new boat and complete the engine run-in procedure correctly.
Launch the boat. With the engine off, paddle away from the ramp. Start the engine only once you're in clear, deep water. Follow the run-in schedule meticulously. As you cruise, pay attention to how the boat feels.
- Trim: Does it ride flat on the water? The outboard has several trim-pin positions. Experiment with them to find the 'sweet spot' where the boat planes easily and feels balanced. A premium inflatable catamaran like the AeroCat 380 or Viper 400 Sovereign will feel incredibly stable and track straight, with minimal bow-rise.
- Handling: Practice gentle turns at various speeds. Get a feel for how it banks and how much space it needs. Inflatable catamarans are known for their sports-car-like handling and ability to turn flatly without the unnerving lean of a traditional V-hull.
- Listen: Tune your ears to the sound of the boat. The hum of the engine, the sound of water on the hulls—learn what sounds normal. This will help you identify any potential issues early on.
This first trip should be short and close to home. An hour or two is plenty. This is your chance to build confidence in your vessel and your own abilities.
Post-Voyage Care: Securing Your Investment
Your responsibility doesn't end when you hit the boat ramp. What you do after each trip is just as important as the pre-launch prep.
- Flush the Engine: As soon as you get the boat out of the water, flush the engine's cooling system with fresh water using a set of 'flushing ears' or a built-in flushing port. This is absolutely essential if you've been in salt water, as it prevents internal corrosion.
- Wash Down the Boat: Give the entire boat—tubes, deck, and transom—a thorough rinse with fresh water. This removes salt crystals, which can be abrasive and degrade the fabric over time. For a proper clean, use a dedicated inflatable boat cleaner, not harsh household detergents.
- Dry Thoroughly: Before folding and storing, the boat must be completely dry. Trapped moisture can lead to mould and mildew, which can stain the fabric and smell awful. If you're storing the boat inflated, a simple wipe-down is sufficient.
- Storage: Store the boat out of direct, harsh sunlight. UV radiation is the number one enemy of any inflatable boat fabric, though the German VALMEX® used in our boats has the highest UV resistance in the industry. A garage, boat cover, or even our Air Tent canopy gives it the protection it needs to deliver that 10-12 year lifespan. Avoid storing it where rodents could chew on the fabric.
You have now successfully completed the full commissioning process. It's a thorough procedure, but one that rewards you with a safe, reliable, and high-performing vessel. Your boat is no longer new; it's yours.
The Bottom Line
Commissioning a new inflatable boat is a rite of passage for any new owner. By taking a methodical, detail-oriented approach from the moment of unboxing to the first post-trip wash-down, you are not just preparing for a single voyage; you are setting the standard for the entire life of your vessel. It builds confidence, imparts crucial knowledge, and ultimately ensures maximum safety and enjoyment on the water. Now, go and make some memories.
If you're considering a new inflatable catamaran or tender and value premium build quality and expert advice, browse our range of Aerowave Viper, AeroCat, and WaveRunner boats. Or give our team a call on +61 2 4335 1603. We're passionate boaties, and we're here to help you get it right from day one.
Related
Shop gear featured in this guide
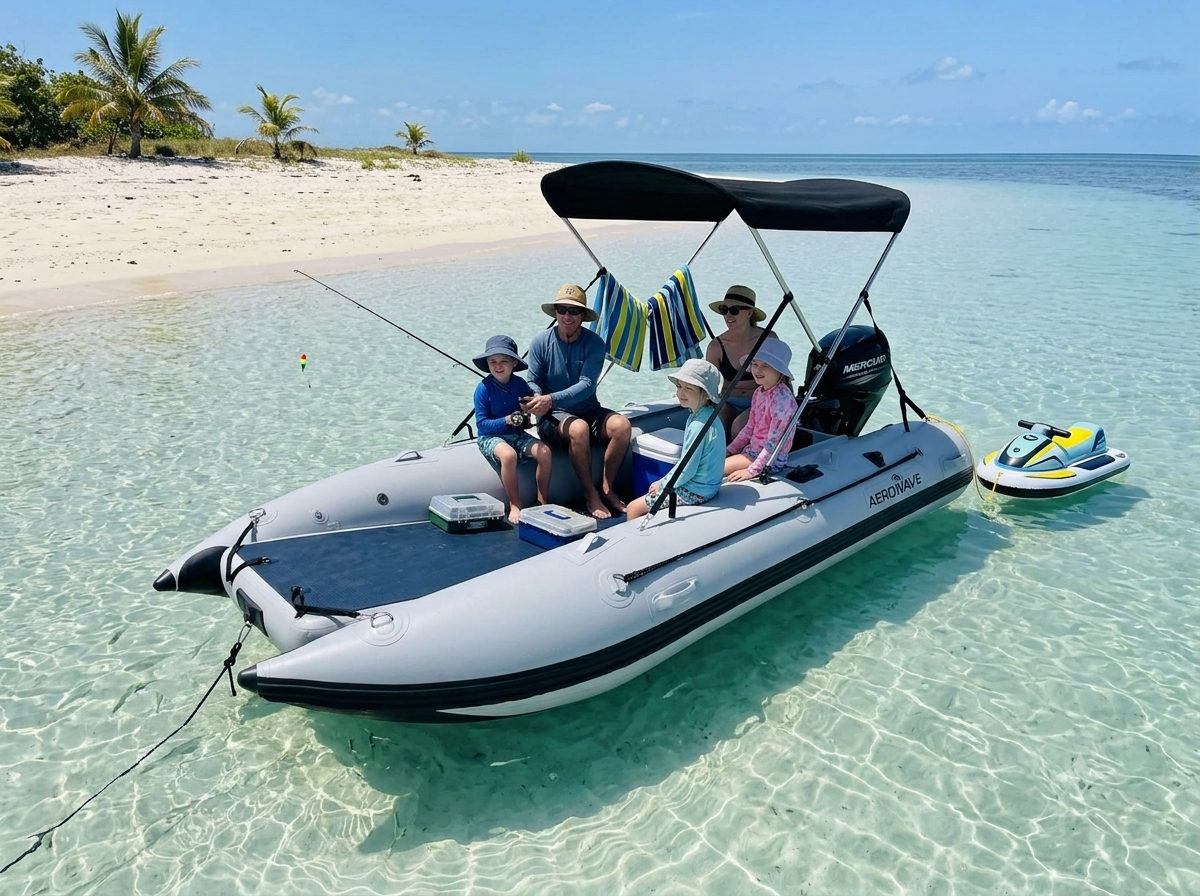
Aerowave WaveRunner 380 Series 3 Catamaran Package
The WaveRunner 380 Series 3 is a premium 3.8m inflatable catamaran package built for Australian and worldwide families, fishing, and coastal day boating — ideal for snorkeling and spearfishing — offering serious stability and premium German Valmex® construction.
Aerowave Viper 400 Sovereign
Flagship 4m enclosed-bow inflatable catamaran. German VALMEX® 7321 Heavy Plus 1.2mm commercial-grade fabric, 10 PSI high-pressure drop-stitch air deck floor with VALMEX non-slip surface, LockPro wheels, full Bimini and FREE express delivery Australia-wide included. Winter special — save $1,000 until 31 August 2026.
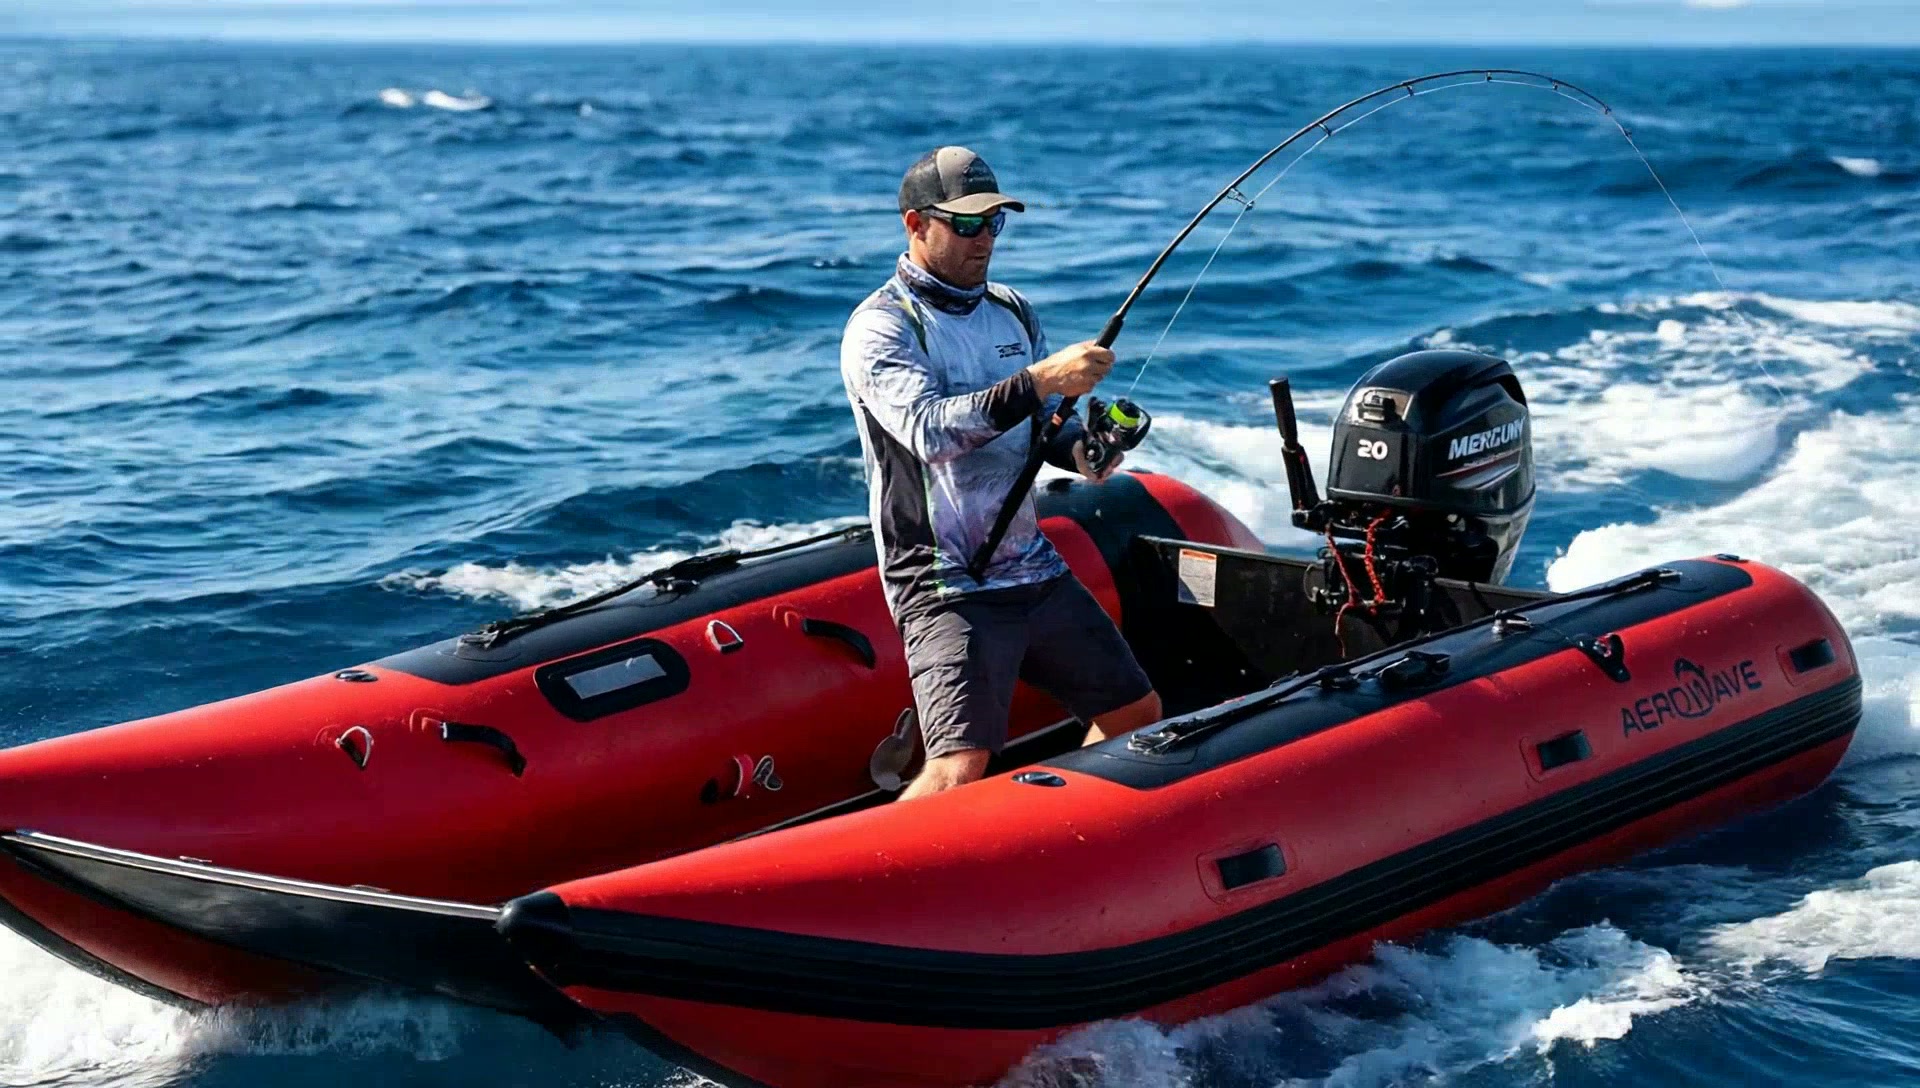
AeroWave AeroCat 360 Inflatable Catamaran
Same proven hull design, shape and look as our flagship Aerowave Viper catamarans — built lighter using 0.9mm Valmex® fabric instead of the Viper's 1.2mm. The AeroWave AeroCat 360 is our 3.6m inflatable catamaran built from 0.9mm Valmex® fabric — intentionally lighter than our 1.2mm Viper hulls so it folds smaller, packs lighter and is easy to handle solo. Twin-hull stability, 5-Year Warranty with global support and priced ~$500 below comparable 0.9mm imports.
Not sure which suits you? Talk to a real boat owner.
Before you spend a cent
Buying from Australia, delivered to United States
You have never heard of us, we are on the other side of the world, and the internet is full of fakes. Fair enough. Here is everything you would need to check us out, in one place — no forms, no chat bot.
Australian designed business
Easy Inflatables, Avoca Beach NSW 2251. ABN 96 856 548 613. International orders ship from our Hong Kong hub.
222 owner reviews, 4.8 average
Read them in full, good and bad, on our reviews page.
CE certified, 7-year hull warranty
ISO 6185-3 and EU Directive 2013/53/EU. Warranty honoured worldwide.
Tracked, insured, door to door
Freight included on our supported lanes. Duty payable on arrival, stated up front.
- Who am I actually buying from?
- Easy Inflatables, Avoca Beach NSW 2251, Australia. ABN 96 856 548 613. Sean is the owner and skipper, Gary Stewart handles sales on +61 2 4335 1603, Karen Matthews handles email. The boats are Australian designed; international orders ship from our Hong Kong dispatch hub so your landed price stays competitive. Phone us before you pay a cent — a real person answers.
- Is this really an Australian product?
- Yes — Australian designed and engineered on the NSW Central Coast. Manufacturing is done offshore to our spec, and international orders ship direct from our Hong Kong dispatch hub. If we routed every boat through Australia first, the freight alone would roughly double or triple your cost for the same hull.
- What do I pay, and what is not included?
- The price you see is the boat with freight already included on our supported lanes. Import duty and local taxes are payable by you on arrival — we do not hide them inside the price, and we do not pretend they do not exist.
- How do I pay safely?
- Card through Stripe (Visa, Mastercard, Amex, Apple Pay, Google Pay) or bank transfer. Card payments carry your bank's own dispute protection. We never ask for crypto, gift cards or payment to a personal account.
- What if it arrives damaged?
- Every boat ships fully tracked and insured door to door. Photograph the carton and the boat on arrival and email us — transit damage is claimed and replaced through us, not left with you and the courier.
- Is the warranty real outside Australia?
- Yes. The 7-year hull warranty on 1.2 mm VALMEX Heavy Plus and Orca Hypalon hulls applies wherever you are. Replacement parts are held in Australia and at our overseas hub and go out by express courier to your door.
- Is the boat actually certified?
- All Aerowave catamarans are CE certified to ISO 6185-3 and EU Directive 2013/53/EU. Certification paperwork is supplied with the boat — ask and we will send it before you order.
Frequently asked questions
- Do I need to register my new inflatable boat in Australia?
- It depends on your state and the size of your motor. Generally, if your boat is powered by a motor of 4hp (3kW) or more, it will require registration with your local state maritime authority. Always check the specific regulations in your state (e.g., Transport for NSW, Maritime Safety Queensland) as rules do vary.
- What is the most important safety item I need for my inflatable boat?
- Without a doubt, a correctly fitting personal flotation device (PFD) or lifejacket for every single person on board. All other safety gear is vital, but a PFD is the one item most likely to save a life in an emergency. Ensure they are approved for Australian standards and are the right size for the wearer.
- How long does high-quality VALMEX® fabric actually last?
- Premium German-made VALMEX® fabric, like the 1.2mm version on our Aerowave Viper or the 0.9mm on the AeroCat series, has a typical lifespan of 10 to 12 years with proper care. This includes regular cleaning, avoiding prolonged exposure to harsh UV, and correct storage. This is significantly longer than the 3-5 year lifespan of many budget PVC boats.
- What is an outboard's 'run-in' period and why is it so important?
- The run-in period, typically the first 10 hours of operation, is crucial for the long-term health of your new 4-stroke outboard. It involves running the engine at varied, limited throttle settings to allow the piston rings and bearings to seat correctly. Following the manufacturer's run-in procedure is the best way to ensure maximum performance and engine life.
- Can I leave my inflatable boat inflated permanently?
- Yes, you can. High-quality inflatables are designed to be left inflated for extended periods, which is often more convenient. If you do, it is vital to keep it under a good quality cover to protect it from UV radiation and to check the tube pressures occasionally, topping up as needed, especially with temperature changes.
- What's the difference between Express Air and Sea Freight delivery?
- We offer two options to suit your budget and timeline. Express Air Delivery gets your boat to you in 7–14 days for a flat A$600 contribution from the customer. For those not in a rush, we offer FREE Economy Sea Freight, which takes approximately 30–40 days to arrive at your door.
- What is the warranty on an Easy Inflatables boat?
- We stand by our build quality with robust warranties. The premium Aerowave Viper 400 Sovereign comes with a 7-year warranty on the VALMEX® fabric and seams. Our WaveRunner 380 tender comes with a 5-year warranty. These warranties reflect the top-tier materials and construction we use.
Ready to set sail?
Premium German-fabric inflatable catamarans with express courier delivery included in the price — 7–14 days door-to-door. Talk to our team or browse the fleet.
Like this guide? Get the next one in your inbox.
Owner-tested tips, gear deep-dives and Aussie boating know-how — no spam.