The Ultimate Guide to Inflatable Boat Repair in Australia
A complete guide to inflatable boat repair in Australia. Learn what your warranty covers, when to DIY a patch, and when to call a professional for your SIB.
🇺🇸 Boats shipping to United States
See landed prices in USD before you bounce.
Door-to-door delivery to United States in 7–14 days. Choose a boat, see local-currency pricing, or request a fixed landed quote from the sales team.
A puncture or tear isn't a death sentence for a quality inflatable boat—it's a maintenance event. Knowing how to respond is what separates a minor inconvenience from a major headache.
For many boaties, the fear of a puncture is the single biggest barrier to embracing the versatility and performance of a modern soft inflatable boat (SIB). It’s a vision of being stranded, of a costly and complicated fix, or of the vessel simply being ruined. The reality, particularly for premium boats built from advanced materials, is far less dramatic. An inflatable boat is not a balloon waiting to pop; it's a multi-chambered, incredibly tough marine craft designed for the real world, and that world includes the occasional knock, scrape, or hook.
The key to confident ownership lies in understanding the difference between a repairable, high-quality vessel and a disposable one. The market is flooded with budget PVC imports that, frankly, aren't built to last or be effectively repaired. Their glued seams fail in the harsh Australian sun, and the low-grade fabric becomes brittle. In contrast, a premium German VALMEX® boat like an Aerowave Viper or AeroCat is an investment designed with a 10–12 year fabric lifespan, built specifically to be serviceable. This guide is your definitive resource for inflatable boat repair in Australia, covering everything from emergency on-water patches to understanding what your warranty actually covers and when it's time to call in the professionals.
Understanding Your Boat's DNA: Why Fabric Matters
Before you can repair a boat, you must understand what it's made of. The vast majority of inflatable boats on the market fall into two categories: those made from PVC (polyvinyl chloride) and those made from advanced thermoplastic polyurethane composites, like the VALMEX® fabric used in our Easy Inflatables range. They are not the same, and they cannot be repaired in the same way.
Budget boats almost exclusively use lower-grade, lighter-weight PVC, often with seams that are simply glued. This glue is the boat's primary weak point. Under the intense UV radiation and heat of an Australian summer, the plasticisers in the PVC leach out, making the fabric brittle, and the glue can soften and fail. You've likely seen these boats—faded, sticky to the touch, with peeling seams. They are, for all intents and purposes, disposable.
Premium boats use a fundamentally different material and construction method. Our AeroCat series uses a high-grade 0.9mm, 1100 GSM VALMEX® fabric, while the flagship Aerowave Viper 400 Sovereign boasts an incredibly robust 1.2mm, 1500 GSM VALMEX® Heavy Plus material. This isn't just thicker PVC; it's a multi-layer composite with a woven polyester core that provides immense tear resistance. Crucially, the seams on these boats are not glued but thermo-welded. This process uses heat and pressure to fuse the material panels together, creating a permanent, monolithic bond that is stronger than the fabric itself. A welded seam will not fail from heat or sun exposure.
This distinction is critical for repairs. A welded VALMEX® boat can be reliably patched time and time again over its 10–12 year lifespan. A cheap, glued-PVC boat can be patched, but you are always fighting a losing battle against the eventual, inevitable failure of its seams.
The Anatomy of a Good Repair Kit
A proper repair kit is non-negotiable. The one that comes with your boat is a starting point, but a serious boatie should build a more comprehensive kit for peace of mind. Here's what should be in your waterproof dry bag at all times.
- Fabric Patches: You need patches of the original boat material. Colour matching is nice, but having a substantial piece of the correct fabric is what matters. A quality supplier will provide this.
- Two-Part Adhesive: This is the heart of the kit. For VALMEX® and other polyurethane-based fabrics, you need a specific two-part polyurethane adhesive. It consists of the glue itself and a hardener or curing agent. Do not use single-part PVC cement or a generic vinyl adhesive. It will not create a permanent, structural bond.
- MEK Solvent or Acetone: Methyl ethyl ketone (MEK) is the professional's choice for cleaning and priming the fabric surfaces before applying glue. It gently melts the top layer of the material, allowing the adhesive to create a chemical weld. Acetone is a more readily available alternative.
- Valve Wrench: The specialised tool for tightening or replacing the boat's inflation valves.
- Sandpaper: A small piece of fine-grit (around 120-grit) sandpaper for scuffing the patch and the boat tube to provide a better surface for the glue to grip.
Checklist: Your Ultimate On-Water Repair Pouch
Beyond the basics, here’s what a truly prepared skipper carries:
- A high-quality two-part polyurethane adhesive (check expiry date!).
- A generous piece of original VALMEX® patch material (at least 30cm x 30cm).
- A small, sealed glass or metal container of MEK or acetone.
- Several pairs of nitrile gloves.
- A small, stiff-bristled brush for applying adhesive.
- A seam roller or the back of a large spoon for pressing the patch down.
- A permanent marker for outlining the patch area.
- Good quality scissors or a sharp knife for cutting a round patch.
- Masking tape to create a clean glue area.
- A microfibre cloth for cleaning.
- The boat's valve wrench.
- A small tube of 3M 5200 for emergency sealing of a leaky valve thread (a get-you-home fix, not a permanent repair).
DIY Inflatable Boat Repair in Australia: A Step-by-Step Guide
For small punctures (think fish hooks, oyster shells, or dropped knives) up to about the size of a 5-cent coin, a DIY repair is not only possible but also extremely effective if done correctly. The key is patience and process.
Step 1: Find the Leak
This can be the most frustrating part. If the hole isn't obvious, inflate the boat to its working pressure (around 3.5 PSI for tubes, 8-10 PSI for a high-pressure air deck). Mix some dish soap and water in a spray bottle and systematically spray the entire tube. Watch for bubbles. A pinhole will produce a tiny stream of fine bubbles; a larger hole will create a visible froth. Once you find it, circle the spot with your permanent marker.
Step 2: Prepare for Surgery
This is the most critical stage. A perfect patch on a dirty surface will fail. A mediocre patch on a perfectly prepped surface will likely hold.
- Work in the shade: Direct sunlight can make the adhesive cure too quickly and unevenly. Ensure the boat is dry.
- Cut your patch: Cut a circular or oval patch from your material. It should be at least 4-5cm larger in diameter than the hole itself. Never use square patches. The corners are weak points that can lift and peel.
- Deflate the tube: The repair area needs to be flat and without pressure behind it.
- Mark the area: Place the patch over the hole and trace around it with your permanent marker. This gives you a clear guide for cleaning and gluing.
- Clean and Prime: Put on your nitrile gloves. Dampen a clean cloth with MEK or acetone and wipe both the marked area on the boat and the back of the patch. Scrub firmly. You should see the colour of the fabric transfer slightly to the cloth—this is a good sign you are cleaning effectively. Let the solvent flash off completely (about 5-10 minutes).
Step 3: The Gluing Process
Read the instructions on your two-part adhesive carefully. Typically, you'll mix a specific ratio of glue to hardener.
- First Coat: Using your brush, apply a thin, even layer of adhesive to both the patch and the marked area on the boat. Don't slop it on; thin is better. Let this coat dry until it's just tacky to the touch (usually 10-15 minutes, but this varies with temperature and humidity).
- Second Coat: Apply a second thin, even coat to both surfaces. Again, let it dry until it is tacky. The 'tack' test: touch a gloved knuckle to the glue. It should feel sticky but not transfer to your glove.
Step 4: Applying the Patch
This is a one-shot deal, so be precise. Starting from one edge, carefully lay the patch down onto the boat, aligning it with your marks. Once it makes contact, it will bond instantly, and you won't be able to reposition it.
Firmly press the patch down, working from the centre outwards to expel any air bubbles. Use your seam roller or the back of a spoon to apply significant pressure over the entire surface of the patch, paying special attention to the edges. This pressure is what ensures a complete bond.
Step 5: Cure Time
This is where most DIY repairs fail. The patch is not ready to be pressurised immediately. While it might feel secure after an hour, the adhesive needs a full 24 hours to achieve a strong chemical bond, and up to 72 hours for a full cure. If you're in a humid environment, it can take even longer. Do not be tempted to inflate the tube early. If you must move the boat, do so with the tube deflated.
When to Call a Professional: DIY vs. Expert Repair
Knowing your limits is crucial. A failed DIY attempt on a major tear can make a professional repair more difficult and expensive. Here’s a breakdown of what to tackle yourself versus what requires a specialist.
| Damage Type | Recommended Action | Estimated Cost (Professional) | Notes |
|---|---|---|---|
| Pinhole leak or cut under 2cm | DIY Repair | N/A | A standard procedure for any boat owner. Use a proper two-part adhesive. |
| Cut or tear (2cm to 10cm) | Professional | $150 - $350 | Often requires an internal patch for structural integrity, which is a job for an expert. |
| Major tear (>10cm) or complex shape | Professional | $350 - $700+ | Definitely not a DIY job. This requires skill and specialised tools to ensure a safe, lasting repair. |
| Seam separation | Professional | $200 - $600+ per metre | A sign of glue failure on cheap PVC boats. On a welded VALMEX® boat, this is extremely rare. |
| Baffle leak (internal chamber wall) | Professional Only | $500 - $1,500+ | A complex and labour-intensive job involving opening the main tube. Only trust a specialist. |
| Transom re-glue or replacement | Professional Only | $800 - $2,000+ | The transom holds the engine; its integrity is a critical safety issue. This is a major structural job. |
| Valve replacement | DIY (if confident) | $100 - $200 | Can be DIY if it's just a simple screw-in replacement. If the fabric around it is damaged, see a pro. |
| Abrasion / 'Road Rash' | Professional | Varies | A second layer of fabric (a 'wear patch') can be applied for long-term abrasion resistance. |
Note: Costs are indicative estimates and can vary widely based on labour rates and the specifics of the damage. For any major inflatable boat repair in Australia, always get a firm quote first.
Warranty Realities: What's Covered and What Isn't
A long warranty is a great indicator of a manufacturer's confidence in their product. For example, our Aerowave Viper Sovereign models come with a 7-year warranty, and the WaveRunner has a 5-year warranty. However, it's vital to understand that a warranty covers manufacturing defects, not accidental damage or wear and tear.
What a Good Warranty Covers:
- Seam Integrity: On a thermo-welded boat, this covers any separation or failure of the main tube welds. This is the hallmark of a quality build, and failures are exceptionally rare.
- Fabric Delamination: This is when the layers of the composite fabric separate. Again, this is a defect in the material itself and is extremely uncommon with premium VALMEX®.
- Component Defects: This can include a faulty valve that won't seal or a transom fitting that fails due to a manufacturing flaw.
To make a warranty claim, you'll need proof of purchase and photos of the issue. The manufacturer will assess whether the problem stems from a defect or from external factors. At Easy Inflatables, we handle this process directly with our customers to ensure it's as smooth as possible.
What is Never Covered by Warranty:
This is a simple one: anything that isn't a defect in materials or workmanship. This includes:
- Accidents: Punctures from hooks, knives, rocks, collisions with pontoons, etc.
- Wear and Tear: Scuffs and abrasions from dragging the boat on boat ramps, beaches, or concrete. Fading from UV exposure is also considered normal wear over a long period.
- Improper Use: Damage from significant over or under-inflation, using a motor that exceeds the boat's maximum horsepower rating, or damage from towing inappropriately.
- Environmental & Chemical Damage: Storing the boat in a way that allows rodents to chew it, or cleaning it with harsh, unapproved chemicals that attack the fabric.
- Failed DIY Repairs: If you attempt a repair and it fails or causes more damage, that is not covered.
Finding a Professional for Major Inflatable Boat Repair in Australia
When you have a problem that's beyond a simple patch—like a baffle leak or a long tear near a critical seam—you need a professional. But not all repairers are created equal. Many marine trimmers who are brilliant with canvas covers don't have the specific knowledge to properly repair a high-pressure inflatable boat.
When searching for an expert for inflatable boat repair in Australia, ask them these questions:
- What is your experience with thermo-welded VALMEX® or polyurethane boats? Their answer will tell you if they're just a generalist or a specialist.
- What type of adhesive do you use? The only correct answer is a two-part polyurethane adhesive.
- Do you use internal (inside the tube) and external patches for large tears? For any significant structural repair, a double patch is the professional standard.
- Do you offer a warranty on your repair work? A reputable repairer will stand by their work for a reasonable period.
Your first port of call should always be the company you bought the boat from. At Easy Inflatables, while we don't operate our own repair facility, we have a network of trusted, independent specialists across Australia that we can refer our customers to. They are experts we know and trust to work on our boats to the highest standard. Just give us a call on +61 2 4335 1603 or email sales@easyinflatables.com.au, and we can point you in the right direction.
The Bottom Line
A quality inflatable catamaran or tender is one of the most durable, versatile, and enjoyable ways to get on the water. Scrapes and punctures are a part of boating, but they don't have to be a disaster. By investing in a vessel made from superior materials like welded VALMEX®, you're already 90% of the way there. The final 10% is knowledge: knowing how to perform a simple patch correctly, recognising when a job is too big to tackle yourself, and understanding the clear line between a warranty issue and a maintenance task. Master these, and you'll enjoy many years of confident, stress-free boating.
Related
Shop gear featured in this guide
Aerowave Viper 330
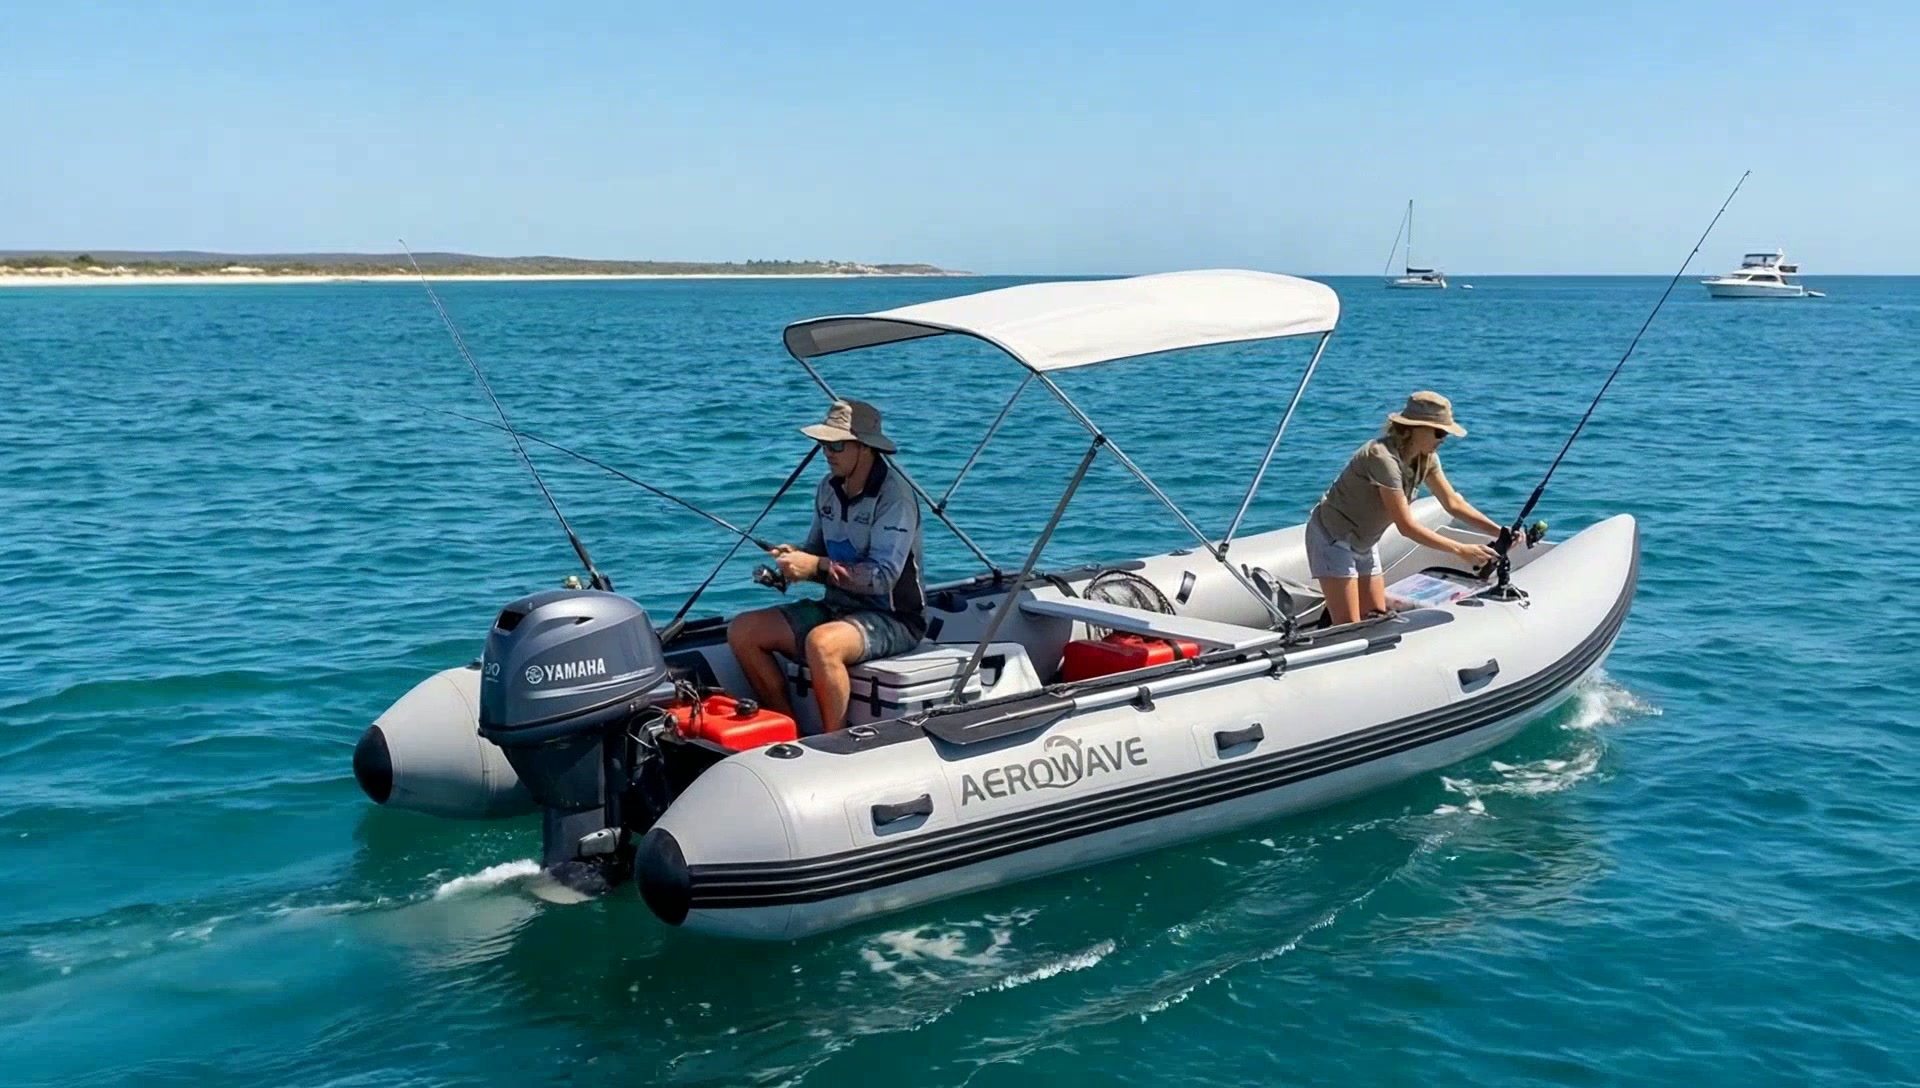
The compact premium Viper catamaran package built for buyers who want serious stability, easy transport, premium materials and real global support in a 3.3m boat. German VALMEX® 1.2mm fabric, 10 PSI high-pressure drop-stitch air deck floor with VALMEX non-slip surface, 5-year warranty and FREE express delivery Australia-wide delivery.

Aerowave Viper 400 Sovereign
Flagship 4m enclosed-bow inflatable catamaran. German VALMEX® 7321 Heavy Plus 1.2mm commercial-grade fabric, 10 PSI high-pressure drop-stitch air deck floor with VALMEX non-slip surface, LockPro wheels, full Bimini and FREE express delivery Australia-wide delivery included. Winter special — save $1,000 until 31 August 2026.
Not sure which suits you? Talk to a real boat owner.
Frequently asked questions
- Can I use a bicycle tyre puncture kit on my inflatable boat?
- Absolutely not. Bicycle tube patches are made for thin rubber and use a vulcanising solution that will not bond with PVC or VALMEX fabric. You must use a proper marine repair kit with the correct fabric and a two-part polyurethane adhesive for a safe, permanent repair.
- How long does a boat patch really take to cure?
- While the patch might feel stuck after an hour, the adhesive requires at least 24 hours to achieve about 80% of its bond strength, and up to 72 hours in cool or humid conditions for a full 100% cure. Do not fully inflate the boat for at least 24 hours.
- Can I repair a leak that is right on a seam?
- This is a job for a professional. A leak on a seam is a high-stress area, and a simple external patch is unlikely to hold. A professional will use specific techniques, and possibly an internal patch, to ensure the structural integrity of the seam is restored.
- How do I protect my inflatable boat from damage in the first place?
- Prevention is key. Avoid dragging your boat on rough surfaces, be mindful of sharp objects like fishing knives and hooks inside the boat, and use fenders when moored against a pontoon or another vessel. Storing it clean, dry, and covered will also dramatically extend its life.
- What is a baffle leak and why is it so expensive to fix?
- A baffle is the internal wall of fabric that separates the main tube into different air chambers. A leak in the baffle means air can move between chambers, compromising safety. Repairing it is a major operation that requires a professional to open up the main tube to access the internal wall, making it very labour-intensive.
- Is it worth repairing my old, cheap PVC inflatable boat?
- Often, no. If the seams are starting to peel or the fabric has become sticky and brittle from sun damage, you are fighting a losing battle. Any patch you apply is temporary, as another part of the boat is likely to fail soon after. It's often safer and more cost-effective to invest in a new, high-quality boat with welded seams.
- What's the difference between PVC glue and VALMEX glue?
- They are chemically different and not interchangeable. PVC glue (a one-part cement) works by melting the PVC surfaces together. VALMEX/Polyurethane glue is a two-part adhesive with a hardener that creates a powerful chemical cross-linked bond, which is far stronger and more resistant to heat and UV.
Ready to set sail?
Premium German-fabric inflatable catamarans with express courier delivery included in the price — 7–14 days door-to-door. Talk to our team or browse the fleet.
Like this guide? Get the next one in your inbox.
Owner-tested tips, gear deep-dives and Aussie boating know-how — no spam.